In today’s fast-paced digital world, learning how to repurpose event footage is one of the most effective ways to create engaging content at scale. Content is the heartbeat of online marketing, but producing fresh material consistently is no small feat. That’s where the magic of learning how to repurpose event footage comes into play. Think of it as turning a one-time gathering into an ongoing goldmine of content that keeps on giving. Let’s dive into how you can repurpose event footage into a wellspring of marketing possibilities that resonate with your audience long after the lights have dimmed on the main stage.
Harness the Power to Repurpose Event Footage
Extend Audience Engagement
Imagine being able to continue the conversation with your audience long after the event has ended. That’s the true power when you repurpose event footage. By taking footage from your events and reshaping it into new content, you are not just creating something fresh, you are extending engagement and keeping your message alive. It is like having a cup of coffee with a friend, sharing the highlights of a past event, but with the ability to reach a much wider audience. By breaking your content into different formats such as short clips, highlight reels, podcasts, or educational videos, you can connect with various audience segments across multiple platforms, keeping them engaged, informed, and coming back for more.
Maximize ROI
Think about the effort and resources poured into producing an event. It is substantial, right? You have already invested in professional video and live streaming services to capture it all. So why let that footage live in just one place? When you repurpose your event content, you stretch that original investment further and turn a single moment into a long-lasting asset. The more ways you use your source material, the more value you unlock. This is not just about getting your money’s worth. It is about making every moment count and keeping your content working for you long after the event wraps.
Strategies to Repurpose Event Footage
1. Social Media Snippets
Short, punchy videos and soundbites are like the espresso shots of social media content. They’re quick, energizing, and just what today’s fast-scrolling users crave. Platforms like Instagram and TikTok thrive on these snippets, capturing your audience’s attention with brief yet impactful messages. Not only do they keep your brand in the spotlight, but they also satisfy the rapid consumption habits of modern users.
2. Highlight Reels
Picture this: a highlight reel that acts as a movie trailer for your event. It’s a dynamic way to give your audience a taste of what happened and entice them to explore more. Social media platforms are perfect for showcasing event highlight reels. They serve as captivating previews that draw viewers back to your full-length content, sparking curiosity and interest.
3. Webinar Series or Podcasts
Some people prefer listening over watching. By turning standout sessions or panel discussions from your conference into webinars or podcasts, you’re catering to this auditory learning preference. Tools like Anchor make it easy to transform video into audio, offering your audience new ways to engage with your content while they multitask.
4. Educational Video Series
Have you ever watched a video series that made you feel smarter? Through editing, you can repurpose event footage into an educational series that provides your audience with valuable insights on specific topics. Whether you’re generating leads or simply adding value to your existing user base, these series can deepen your audience’s understanding and engagement.
5. Blog Posts and Articles
Turning transcripts from webinars or presentations into blog posts is like turning lemons into lemonade. For those who prefer reading over watching, these posts offer an alternative way to digest your content. Plus, they’re an SEO powerhouse, attracting organic traffic and establishing your brand as a thought leader. To understand the SEO benefits better, check out Moz’s beginner’s guide on SEO.
6. Infographics and Visual Summaries
Complex insights can sometimes feel overwhelming, but not when they’re transformed into infographics. These visual summaries make information digestible and shareable, especially on platforms like Pinterest that are driven by visuals.
7. Behind-the-Scenes Content
Who doesn’t love a sneak peek? Behind-the-scenes content humanizes your brand and provides a personal touch. Whether it’s a mini-series or social media posts, sharing these glimpses on platforms like Instagram can resonate with your audience on a deeper level.
8. Newsletters and Email Campaigns
Newsletters are a classic way to stay in touch with your audience. By incorporating event highlights into your newsletters, you’re nurturing leads and keeping subscribers informed and engaged with value-driven content.
9. User-Generated Content
Encouraging attendees to share their experiences can amplify your event’s reach organically. Dedicated hashtags or social media contests can foster a sense of community and engagement, turning your attendees into brand advocates. User-generated content is more than just customer reviews, but they are increasingly valuable assets for your brand.
10. Leveraging AI Tools
In deciding how to repurpose event footage, AI tools can be your best friend. They can help you process footage efficiently, extracting relevant snippets, transcribing audio, and even suggesting content ideas. For cutting-edge strategies on using AI in content repurposing, check out Univid’s insights.
Integrating Event Footage into Marketing Campaigns
When you repurpose event footage, it’s not just about reusing content. It’s about making the most of what you already invested in and working it into a broader marketing narrative. By aligning key moments from your event with ongoing messaging, you create consistency across platforms while saving time and resources. Many leading brands emphasize this efficient approach to strengthening brand presence and extending the life of each event.
Measuring Success and Refining Strategies
Once you’ve put your repurposed content out there, it’s time to measure its success. Consistent monitoring and evaluation are key to understanding what works and what doesn’t. Use analytics tools to gain insights and refine your strategy accordingly. Following Google Analytics’ insights helps businesses hone their content strategies and better understand audience preferences.
Conclusion
There are versatile assets available when you repurpose event footage that can dramatically extend the life and impact of a single event. Repurposing content isn’t just about maximizing past investments; it’s about crafting a sustained engagement strategy that keeps your brand relevant and your audience engaged. Whether you’re a seasoned marketer or just starting, these strategies can invigorate your content pipeline, keeping you ahead in the dynamic world of digital marketing. So why not give it a try? You might just find yourself with a treasure trove of content ready to captivate your audience.
At Luma Creative, we make it easy to turn your event into a versatile content asset. Our team can capture every moment in high-quality video and provide professional editing, giving you footage ready to use across your marketing channels. Let us help you extend the life of your events and keep your audience engaged. Contact us to schedule a discovery call today!
Hey there, fellow marketers! Let’s talk about a content strategy that doesn’t always get the spotlight but can make a big impact: behind-the-scenes content. Showing your audience how your team works, how projects come together, and the stories behind your brand helps create a more personal, authentic connection. BTS content isn’t just fun; it can boost engagement, build trust, and make your marketing feel more human. In this article, we’ll break down why behind-the-scenes content works and share practical tips for weaving it into your strategy so your brand stands out.
The Magic of Behind-the-Scenes Content
Cultivating Authenticity and Personalization
In our world, where consumers are always on the lookout for the real deal, behind-the-scenes content is like a breath of fresh air. Imagine lifting the curtain and letting people see the real personalities, stories, and processes that make your brand tick. It could be stories about your team, snippets of your company culture, or the journey of a product from idea to shelf. This kind of content doesn’t just engage, but it connects. It’s like when you meet someone and they share a personal story; suddenly, they become relatable and real.
Behind-the-scenes content is all about authenticity, which is what modern consumers crave. According to Taggbox, authentic content is crucial for building trust and loyalty. After all, who doesn’t love a brand that feels like a friend?
Showcasing Values in Action
Today, buying isn’t just about the product. People want to know the heart behind the brand. This content allows you to show, not just tell, your values and ethics in action. Whether it’s your commitment to sustainability or your passion for community projects, these stories can humanize your brand, making it more relatable and trustworthy.
Think about it: would you rather support a company that just talks about its values, or one that shows you how they live them every day? Recent trends emphasize that storytelling with depth can help brands stand out in a saturated market.
Engaging in Real-Time and Encouraging Interaction
What sets behind-the-scenes content apart is its interactive nature. It’s like inviting your audience to join you on your journey. By encouraging comments, likes, and shares, you’re not just broadcasting; you’re having a conversation. This real-time engagement invites feedback and builds a sense of community.
Crafting the Perfect Behind-the-Scenes Content
Understand Your Audience
Understanding your audience is key to tailoring content that hits the mark. It’s about knowing their journey and crafting your narrative to resonate with them at different stages. Think about their interests, how they interact with your brand, and what unique stories would intrigue them. Here are some questions to ponder:
Who is my audience, and what are their interests?
How do they interact with my brand on different platforms?
What unique aspects of the brand journey will intrigue them?
Cross-Functional Collaboration
Creating compelling behind-the-scenes content in a video production company is a collaborative effort that goes beyond the creative team. At Luma Creative, producers, directors, camera operators, editors, and motion designers all bring unique perspectives that make each story richer. By working together, the team can capture not only the technical craft behind a shoot but also the human moments that resonate with audiences.
How Collaboration Strengthens BTS Content
Highlighting Every Role: From lighting setups to post-production edits, showing the full spectrum of talent builds authenticity
Capturing the Complete Process: Coordinated efforts ensure BTS footage tells the story from concept to final delivery
Creating Cohesive Stories: Team collaboration keeps the narrative consistent across videos, social media, and client-facing content
Maximizing Efficiency: When everyone shares insights and coordinates shoots, BTS content is easier to plan, film, and repurpose
By integrating input from every department, Luma Creative turns behind-the-scenes moments into engaging content that demonstrates expertise, creativity, and the human side of production. This collaborative approach not only strengthens brand storytelling but also builds trust with clients and audiences alike.
Check out this example from a recent shoot we did!
To understand how your behind-the-scenes content is performing, you need to measure it. Tools like Google Analytics are your best friends here. They provide insights into engagement and conversion, helping you adapt your strategy to audience preferences and boost ROI.
Diversifying Content Distribution
The reach of your behind-the-scenes content is crucial. A successful strategy should include multiple distribution channels. Start with owned media like blogs and newsletters, then expand to earned and paid media. Collaborations with influencers or media mentions can also amplify organic growth.
Optimizing Existing Content
Don’t underestimate the power of repurposing content. If something resonates with your audience, adapt it for different formats or platforms. Transform a popular behind-the-scenes blog post into an infographic or video, multiplying its impact while minimizing resource expenditure.
Here’s that same Instagram post from above repurposed for LinkedIn!
BTS on Social Platforms: Where It Works Best
While behind-the-scenes content is valuable for any brand, its impact is magnified when shared strategically across social platforms. Each platform offers unique ways to showcase your team, processes, and culture in ways that resonate with audiences. Instagram and TikTok excel at short-form, visually engaging clips that can highlight day-to-day moments or quick project updates. LinkedIn provides a professional space to share BTS insights from a business or corporate perspective, helping establish thought leadership and credibility. YouTube allows for longer, more in-depth content, giving viewers a complete look at your creative process from concept to completion.
Maximizing Engagement on Each Platform
The key to successful BTS content is tailoring it to the platform and audience behavior. Here are some examples of what works best on each:
YouTube: Longer videos like production walkthroughs, tutorials, and project deep dives
Instagram and TikTok: Short clips, team introductions, quick project highlights, or fun office moments
LinkedIn: Professional insights, behind-the-scenes of company initiatives, lessons learned, and case studies
Consistency and Authenticity Across Channels
Regardless of platform, consistency and authenticity are critical. Audiences respond to content that feels real and relatable. Showcasing your team’s personality, challenges, and successes builds trust. Cross-posting BTS content across multiple channels, while adapting format and messaging, ensures your stories reach different audience segments without losing impact. When done well, behind-the-scenes content becomes a powerful tool for engagement, connection, and community building.
Actionable Steps for Implementing a Behind-the-Scenes Content Strategy
Here’s a 10-step guide to jumpstart your behind-the-scenes content journey:
Define Objectives: Set clear goals for your content.
Know Your Audience: Identify and understand your target segments.
Harness Team Collaboration: Engage multiple departments for a diversified narrative.
Select the Right Platforms: Choose the platforms that suit your audience, be it social media, newsletters, or blogs.
Authenticity is Key: Keep content real and relatable.
Measure with Analytics: Use tools to track engagement and tweak strategy as needed.
Repurpose Wisely: Adapt popular content into multiple formats.
Explore Partnerships: Leverage collaborations for expanded reach.
Embrace Continuous Learning: Stay updated with emerging trends and strategies.
Feedback Loop: Encourage and act on audience feedback to refine storytelling.
Conclusion: Elevate Your Brand with Behind-the-Scenes Content
Behind-the-scenes content isn’t just a trendy add-on. It’s a powerful way to showcase your team, process, and personality while building genuine connections with your audience. When executed well, it strengthens trust, deepens engagement, and helps your brand stand out in today’s competitive landscape.
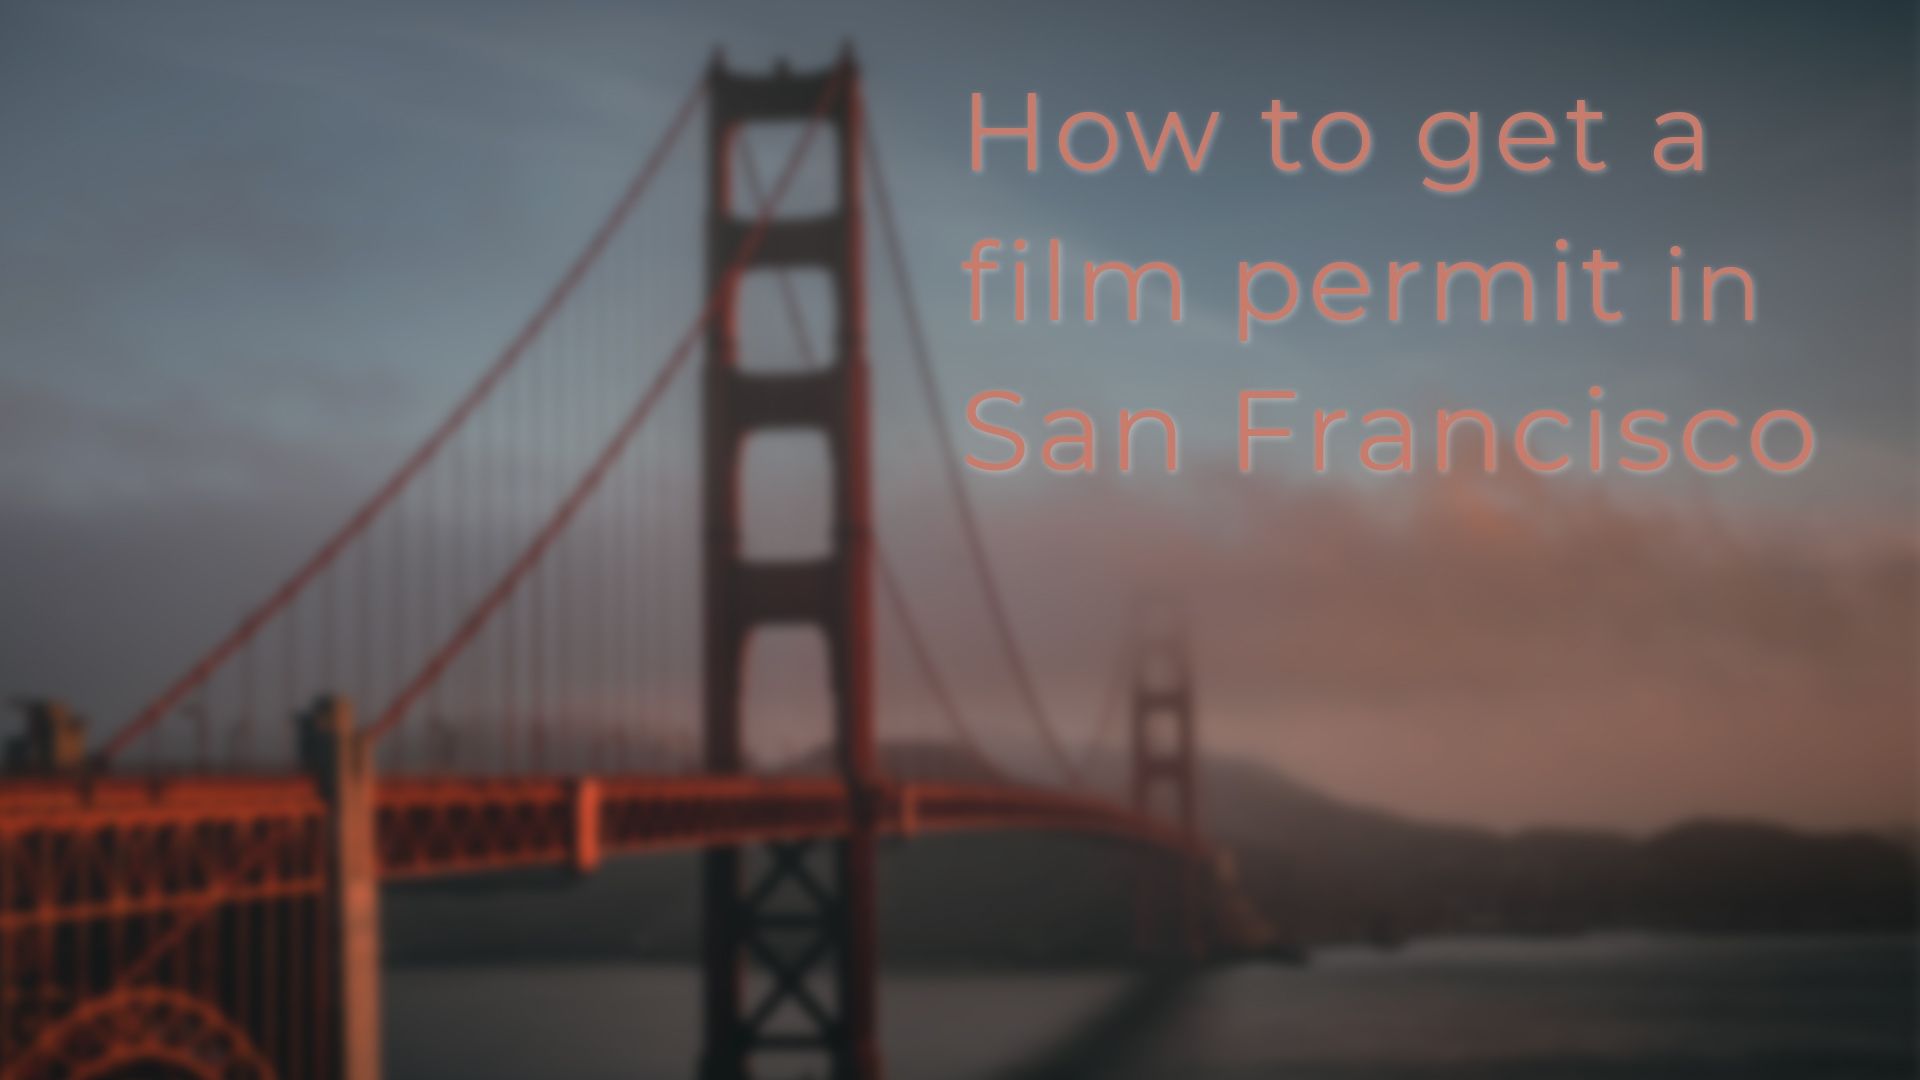
Locations for video production can make or break a project. When looking for shooting locations, we typically evaluate which locations best tell the story. Whether that’s shots of nature, an indoor seamless background, or city shots, every location poses potential challenges. When we determine we need to film in a town, we often turn to our own backyard in San Francisco to get the shots we need. SF has its challenges, for sure, including parking, security, and traffic, but every time we apply for a permit, we know we are about to get some gold shots! In this article, we’ll break down how to get a film permit in San Francisco.
Before we dive in, you might be thinking, do I really have to get a film permit to shoot in SF? While we can’t answer that question for you, there are several factors to keep in mind regardless of your production’s size.
#1. Is your client with you?
If so, the obvious answer is yes. You should absolutely get a permit. It’s a professional thing to do, and it doesn’t cost that much. When we first started shooting, we’d often wing it, but as we’ve grown, we’ve learned that the risk vs. reward of getting stopped isn’t worth it.
#2. How big is your crew?
If you aren’t with a client and are just solo shooting a quick scenic pickup, you may be able to get away with not permitting. However, we’d still recommend it! The penalties for getting stopped when shooting commercially can be steep!
#3. How many shots and what shots do you need?
If you are trying to get a bunch of shots at specific locations, we’d highly recommend obtaining permits. This will give you 100% certainty that you can get the shots!!
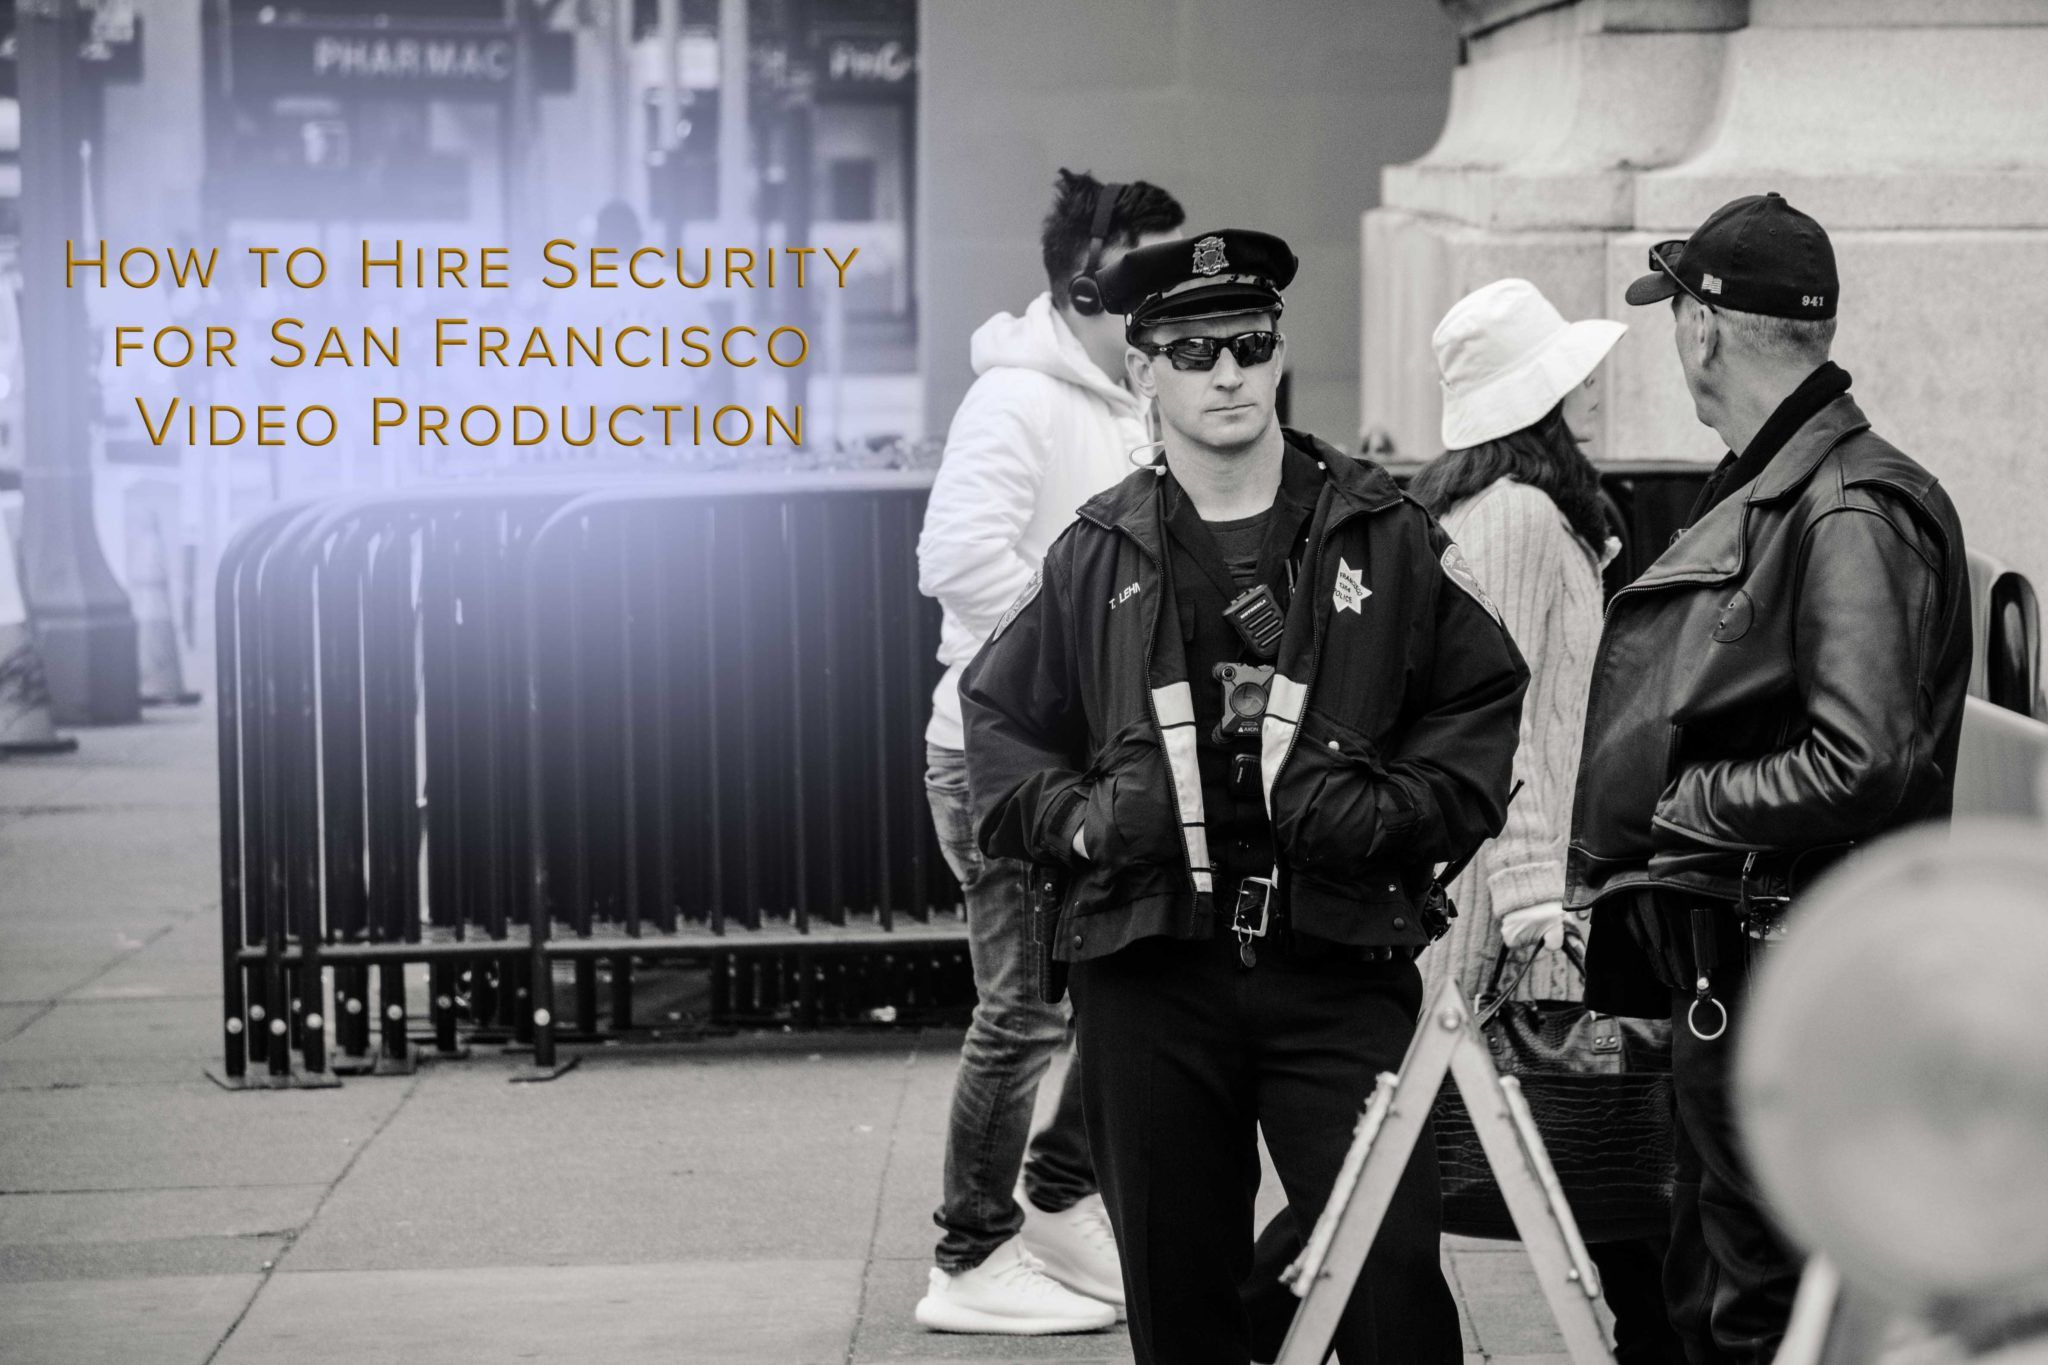
#4. Will you have security
If you are looking to film in San Francisco for more than a quick pickup shot, we’d highly recommend having security. There have been countless robberies over the last few years, and it doesn’t look like it’s slowing down! Even news crews aren’t safe. Permitting, such that you can hire security guards, is key! Usually, you can get security for around $25/hr per guard with an 8-hour minimum.
Overview
The first thing to know when applying for a film permit is where to get one. FilmSF is your key to getting a film permit. They’ve got a department of very friendly people who will guide you through the permitting process. According to the FilmSF website: “A production permit is required whenever you’re shooting on City property for commercial or non-commercial purposes except for private family use.”
However, that said, you’ve got to remember whose property you are shooting on. Although you might be on a beach in San Francisco, that doesn’t necessarily mean that it is city property. So FilmSF wouldn’t actually be the place to issue your permit. If your location is in SF but it’s technically not city property, check out this comprehensive list of contacts. Let’s break down how to get a film permit in San Francisco.
Timeframe
So you’ve determined you do need a permit to capture your shots, and they are on San Francisco city property. But how long does it take to get your film permit? The answer is that it takes 4 days to get the permit approved. During this time, they’ll review your application, review your insurance, approve (or deny) your parking request, and notify the appropriate jurisdictions of your filming dates and locations. That said, if you are looking to close down a street or use an SFMTA vehicle, it could take an additional 5-10 days. This means that the total process could take up to 2 weeks. Best to get started early.
Insurance
To apply, you need specific insurance: general liability insurance of $1,000,000 per occurrence and $2,000,000 aggregate, auto liability insurance of $1,000,000 combined single limit if vehicles are on site, and workers’ compensation insurance with statutory limits and employers’ liability of at least $1,000,000 per accident if you have employees. If there are no employees, you can submit a waiver of subrogation endorsement form. This process can be frustrating when seeking a film permit in San Francisco.
There’s a chance that you don’t have production insurance. In this case, you might consider getting a project production insurance plan. This would protect any rentals that you rent for the project as well as any liability insurance requirements!
Community Notice
Depending on where you are filming or what type of production you are looking to shoot, you may be required to give notice to the community. There are several ways to do this. Post with blue painter’s tape in public spaces where you will film. You should also tape notices near call boxes for apartment buildings. Further, hand them to doormen or front desk staff. You can also tape them to mailboxes(although do not put them inside).
Essentially, you just want to make sure that everyone in the area is aware that you will be filming. This should be done approximately 72 to 96 hours before you begin your first day of filming. The last thing you want while you are filming is to be disturbed and told to stop filming just because a neighbor was not informed!
Cost
There is no cost for the permit application. However, if they grant you a permit, you’ll be required to pay the fees to make the permit active. The fees range depending on your usage. According to the Wrapbook the costs are as follows:
Still Photography: $100/day
Commercial, corporate media, web and music video: $200/day
TV Series, movie, pilot, web series etc: Budgets less than $100,000: $50/day. Budgets of $100,000 to $500,000: $100/day. Budgets of $500,000 or greater: $300/day.
You may also be able to qualify for a significantly reduced rate if you can supply your budget for the project.
If you are working on a student film. Guess what? The permit is free. However, you’d still need to be able to provide the general liability insurance requirements. Your school may be able to help with this. On the other hand, if they can’t help you, then you’d need to pony up for some production insurance. You could try asking for a student discount.
Example
We filmed Pact in San Francisco a few years ago and utilized a permit to reserve a basketball court at a park and to shoot a quick run and gun scene at the Lyon street stairs. This meant we had to post notices in the neighborhood and provide proof of insurance, in addition to paying the permit fee. We were also required to put up signs in the immediate areas where we’d be filming and to notify the neighbors. The whole process took about two weeks.
Pact video we filmed in San Francisco
Conclusion
At the end of the day, getting a permit isn’t really all that hard. Yes, it will take you about 2-4 hours to complete the application and get your insurance documents, but then you’ll be free to rest easy knowing your production shouldn’t be bothered. I hope you’ve enjoyed this article on obtaining a film permit in San Francisco. We wish we had known about the steps earlier in our careers. There’s no need to make it more complicated than it is! If you are looking for other film permitting departments, check out the City of Oakland’s film permitting office. Or perhaps you are looking to get a film permit in San Jose.
Are you looking for San Francisco video production? We’ve got all the skills needed to permit in San Francisco. In fact, this is one of the reasons we are often chosen among the best video production companies in San Francisco. If you are looking for a local crew to get shots for your production company, contact us to find out how we can bring your remote filming needs to life!
Managing freelancers effectively is truly an art, much like painting or playing music. It requires a delicate balance between giving clear guidance to align them with project goals and allowing enough freedom for their creativity to shine. At Luma Creative, we carefully select specialized freelancers tailored to each project, whether it is a commercial shoot, covering a corporate event, or a brand video piece, bringing in the right experts for the job. Imagine trying to conduct an orchestra without stifling the musicians’ individual flair. This guide helps producers with managing freelancers without micromanaging. Let’s explore strategies that promote collaboration, creativity, and mutual success.
Setting the Stage: Understanding Freelancers
Before diving into the nitty-gritty of management strategies, it’s important to step back and understand the unique dynamics of freelancers. Unlike in-house teams, freelancers operate with a level of independence that many treasure deeply. Recognizing this difference is the first step toward managing them efficiently.
Flexibility and Autonomy: Many freelancers choose this career path because they value freedom. They appreciate being able to set their own hours and work from places that inspire them. As a producer, establishing project criteria early on is key, but it’s equally important to leave room for their creativity to flourish.
Diverse Time Zones: Freelancers often come from all corners of the globe. Coordinating schedules to accommodate various time zones can be a challenge, but it’s essential to ensure everyone stays in sync.
Multiple Commitments: Freelancers might juggle several projects at once. This means they are masters at time management, but also that they need clear deadlines and expectations to keep everything balanced.
Understanding these factors will shape how you go about managing freelancers, helping cultivate an environment where they are motivated to deliver their best. Read more here about what motivation does to creativity.
Managing Freelancers Like a Pro
Communication can either make or break collaborative efforts, especially when managing freelancers. It’s not just about sending messages but also about listening and adapting. Here are some tips to master this art:
1. Clear Project Briefs
Starting each project with a clear and comprehensive brief is crucial. These should include the objectives, deadlines, deliverables, and any relevant project details. Think of it as a roadmap that enables freelancers to navigate the project landscape independently.
2. Open Communication Channels
Fostering open communication is key. While managing freelancers, make sure they feel comfortable reaching out with questions or updates at any time. This two-way street encourages dialogue and ensures everyone stays aligned.
3. Use Technology Wisely
Tools like Slack, Trello, or Asana can keep communication streamlined and focused. These platforms allow for updates without overwhelming meetings. Read more about how technology empowers collaboration.
4. Regular Check-Ins
Scheduling regular but concise check-ins can help focus on big-picture alignment rather than daily tasks. This builds trust and shows that you care about progress and challenges without micromanaging.
Setting SMART Goals
Have you ever set a goal only to realize later that it was too vague or unrealistic? That’s where “SMART” goals come in: Specific, Measurable, Achievable, Relevant, and Time-bound. Clearly defined goals can:
Provide clarity and direction.
Help measure progress and outcomes.
Enhance motivation and focus.
Setting up these parameters will ensure that everyone knows what’s expected, thus minimizing misunderstandings and discrepancies.
Trust and Autonomy in Action
Trust is the backbone of any successful freelancer partnership. Without it, even the most skilled freelancers may find it hard to perform their best.
Building Trust
Choose Wisely: When selecting freelancers, look for those who are not only skilled but also align with your project’s ethos.
Empower Decisions: Allow freelancers to make decisions within set boundaries. This empowerment can lead to more innovative solutions.
Acknowledge Efforts: Regularly acknowledge work well done. A simple “good job” can be incredibly motivating and foster a positive working environment.
Autonomy Fosters Creativity
When you give freelancers autonomy, you’re providing them the space to explore creative avenues. Encouraging them to bring new ideas to the table can enrich the project and pave the way for future collaborations.
Tools for the Trade: Project Management Software
Using project management tools can streamline processes and empower freelancers to manage their workloads efficiently. It’s like giving them the right instruments to play a symphony.
Recommended Tools:
Monday.com: Ideal for organizing tasks and setting deadlines.
Slack: Comprehensive for team collaboration and communication.
By selecting the right tool, producers can provide the structure needed to keep teams organized without constant oversight.
Managing Client Expectations
Clients often expect seamless service without realizing the complexities of managing freelancers behind the scenes. As a producer, you act as the bridge between client vision and freelance execution. Here is how to keep client expectations realistic and positive:
Set clear boundaries early by explaining the workflow, revision rounds, and timelines upfront so clients understand the creative process.
Communicate regularly with consistent updates on progress, milestones, and any potential risks before the client hears it elsewhere.
Translate jargon by breaking down technical or creative language into client-friendly terms to avoid confusion and build trust.
Manage revision expectations by clarifying how many revision rounds are included and what constitutes extra work to prevent scope creep.
Be honest about challenges. If delays or issues arise, address them transparently and propose solutions rather than surprises.
Effective expectation management keeps clients confident, reduces friction, and sets the stage for a successful project.
Creating a Feedback Loop
Feedback is vital for growth and alignment. Here are strategies to ensure feedback remains constructive and beneficial:
Be Specific: Provide clear examples when giving feedback.
Balanced Approach: Combine constructive criticism with positive feedback to motivate.
Encourage Two-Way Feedback: Allow freelancers to provide their input on processes and workflows.
Developing a feedback loop promotes continuous improvement and a deeper understanding between the team and freelancers.
Handling Last-Minute Changes
In production, last-minute changes happen often. Whether it is a client tweak or a creative pivot, how you manage these shifts can make or break your project timeline and budget. The key is to stay calm and strategic:
Anticipate flexibility by building buffer time into your schedule and budget from the start to accommodate reasonable changes.
Establish a clear process for submitting, reviewing, and approving changes. This should include who needs to sign off and how it impacts timelines and costs.
Communicate quickly. Once a change request is received, inform all stakeholders immediately to reset expectations and adjust plans as needed.
Track scope creep by keeping detailed records of all changes and their impacts on hours and budget to avoid surprises.
Prioritize impactful changes. Not all last-minute requests carry equal weight, so assess and prioritize to maintain focus on what truly drives project goals.
Mastering last-minute change management helps you maintain control and keep your team and clients aligned even under pressure.
Recognition and Rewards
Recognition doesn’t always mean bonuses or gifts, although they’re certainly appreciated. Simple acknowledgments can be significantly motivating:
Shout-Outs: Recognize excellence in meetings or team newsletters.
End-of-Project Celebrations: Celebrate milestones or project completions together via virtual gatherings.
Feature High Performers: For content creators, publish their work in visible spaces, giving them credit.
Recognition ensures freelancers feel valued, encouraging them to align closely with the project’s goals.
Lessons Learned: Post-Project Reviews
Closing a project is more than delivering the final files. It is a crucial opportunity to reflect, learn, and improve future workflows. Here is how to run effective post-project reviews:
Gather all voices by including freelancers, clients when appropriate, and internal team members to get a full picture.
Focus on what worked and what did not by celebrating successes and identifying bottlenecks, communication gaps, or scope issues.
Document key takeaways by creating a brief report or checklist that captures lessons learned and recommendations for future projects.
Implement action items using insights to update your SOPs, improve onboarding, or tweak communication protocols.
Close the loop with your team by sharing learnings openly to promote a culture of continuous improvement and transparency.
Committing to post-project reviews turns every collaboration into a stepping stone toward smoother and more efficient productions.
Conclusion
The playbook serves as a guide for managing freelancers without needing to micromanage. This balance enhances creativity, leads to higher satisfaction, and ensures project goals are met efficiently. By applying strategies like clear communication, fostering autonomy, and utilizing the right tools, producers can transform freelancer relationships into successful partnerships.
As you navigate the freelance world, remember: respect and understanding are your most valuable tools. Create the space for creativity to flourish, and your projects will reflect the innovation and enthusiasm that only an inspired team can bring. Ready to embrace these strategies? Start implementing them today, and watch your projects soar!
Looking for the perfect freelance team tailored to your project’s unique needs? At Luma Creative, we connect you with skilled professionals who fit your vision and timeline.
Contact us today to build your custom creative crew and bring your next production to life with confidence!
In today’s fast-paced marketing world, it’s all about standing out, right? With so many strategies out there, one really shines when it comes to grabbing people’s attention across platforms like social media, animation in marketing! Digital marketers are always on the lookout for fresh and exciting ways to connect with their audience, and animation in marketing seems to be just the ticket. It helps to break down complex ideas into something everyone can get. So, why exactly is animation such a powerhouse in multi-channel marketing?
The Unique Edge of Animation
Animation is like that secret ingredient in your grandma’s famous recipe, it takes the ordinary and makes it extraordinary. Unlike plain old text or images, animated content pulls people in, keeps them interested, and makes sure they remember what they’ve seen. With so much vying for our attention these days, having something dynamic and visually engaging is crucial.
The Benefits of Animation and Its Impact on Audiences dives into why animation can be so effective. Think about it: when was the last time a simple image made you stop scrolling on Instagram? Animation in marketing does that and more.
Why Animation?
Versatility: It’s like a chameleon, effortlessly adapting to platforms like social media, emails, websites, and digital ads while keeping its message intact.
Engagement: Animation doesn’t just talk at people. It connects with them. This leads to higher click-through rates and conversions because it taps into emotions.
Simplicity: Got a tricky idea to explain? Animation breaks it down into bite-sized pieces that anyone can understand. It’s perfect for industries like tech and finance.
Consistency: It helps keep a brand’s look and feel the same no matter where people see it.
Cost-effectiveness: Compared to traditional video, animation can be more budget-friendly, providing creativity without all the heavy lifting of shooting live-action videos. For more on how animation is shaping the future, check out The Future of Animation.
Bringing it All Together with Multi-Channel Marketing
The heart of multi-channel marketing is about creating a seamless experience for customers across different platforms. This article from Marketing Evolution offers insights into why consistency is key. Animation fits right in by enriching these experiences and ensuring brand messages hit home. Here’s how animation in marketing performs wonders across various channels:
Social Media
Social media platforms like Instagram and TikTok are all about quick, catchy content. That’s where short animated clips shine, boosting shares and interactions. They turn boring information into engaging stories that stick with people. This is where our promotional video production can elevate your brand’s visibility to the next level.
Email Marketing
Ever opened a dull email and clicked away immediately? Animation in marketing can change that. By adding a touch of movement, newsletters become way more interesting. A simple GIF or an animated chart can entice readers to take action, whether it’s clicking a link or watching a video.
Websites and Web Design
Animations on websites are like friendly guides. They help users navigate, highlight important features, and make the whole experience more enjoyable. Features like virtual try-ons or 3D product views invite deeper interaction.
Paid Advertising
In digital ads, animation often beats static images hands down. Why? Because it grabs attention and doesn’t let go. Animated ads often have better conversion rates. Just think about Google’s display ads that use animation to increase brand recall.
How Animation Impacts Marketing Metrics
Let’s talk numbers. Reports show that using animation in marketing can boost engagement rates by up to 80% and offer a noticeable return on investment. Why is that? Here’s the scoop:
Higher Engagement: Animated content quickly catches the eye, leading to better engagement on social media and more interaction on websites.
Improved Recall: Relatable characters and storylines help make brand messages unforgettable.
Increased Conversions: Animation delivers complex ideas in a way that nudges consumers further along the sales journey.
Enhanced Storytelling: By creating emotional connections, animations help build loyalty.
Using Animation for Storytelling
In a crowded marketplace, brands need to stand out. Animation in marketing opens the door to creative storytelling, making it easier for brands to connect through relatable stories. Animated characters can embody a brand’s voice and values, creating narratives that stick. Think of it as the friendly face of your brand, telling stories that people want to hear.
Successful Animation Examples
Remember Coca-Cola’s animated polar bears? They’ve been a huge hit, creating a sense of nostalgia and aligning perfectly with the brand’s image. These animations aren’t just cute, they evoke emotions that resonate with audiences. Tech giants like Apple also use animations to make complex product features easy to grasp and engaging.
Real-World Impact: How SiFly Used Animation to Showcase Innovation
When SiFly, a drone startup, needed to demonstrate their cutting-edge product, they came to us with a challenge: show off complex technology in a way that felt sleek, cinematic, and budget-conscious. Our solution? A seamless blend of live-action drone footage and animation-driven VFX.
We used practical shots of the drone in flight to capture real-world performance, then layered in animated graphics to highlight key features, flight data, and use-case scenarios. This hybrid approach kept production costs manageable while delivering a polished, high-tech look.
By mixing animation with live visuals, SiFly was able to:
Demonstrate functionality clearly without relying solely on technical jargon
Elevate the production value without needing multiple expensive shoot days
Create versatile marketing content that worked across web, social, and investor decks
The result was a video that didn’t just show a product. It told a compelling, visual story that resonated with their audience and helped them stand out in a crowded drone market.
Top Tips for Using Animation in Marketing
Know Your Audience: Tailor animations to fit what different audience segments care about.
Pick the Right Platform: Use platforms that your audience prefers.
Simplify the Complex: Use animation to make complicated ideas easy to digest.
Stay Consistent: Ensure animations match your brand’s style and tone.
Create Stories: Develop narratives that connect emotionally.
Track Performance: Analyze metrics to fine-tune animation strategies.
Add Interactive Elements: Use interactive animations to boost engagement.
Mix It Up: Experiment with 2D, 3D, and other styles to keep content fresh.
Personalize: Tailor animations to meet the viewer’s specific needs.
Use Data: Leverage insights to target and refine your animated content.
Looking Ahead: Animation in Future Marketing Strategies
As digital marketing evolves, animation remains a key player not just for grabbing attention, but for holding onto it. Embracing animation in multi-channel marketing can make the difference between a campaign that’s simply seen and one that’s truly felt. Brands that weave animation into their strategies aren’t just communicating, they’re creating memorable experiences. You can take things a step further by implementing a behind-the-scenes content strategy and showing your audience phases of animation from the drawing board to screen!
By integrating animation into your multi-channel marketing strategy, you can create storytelling that resonates across every platform. So, why wait? Dive into the world of animation and unlock its potential to make your brand not just seen, but truly felt.
Looking to deploy animation in marketing to your next campaign? Contact us today to set up a discovery call!
How to Get a Job in Videography (Even Without Experience)
If you love storytelling through video and want to turn your passion into a career, you’re not alone. At Luma Creative, we get weekly calls from aspiring videographers looking for advice on breaking into the industry. Whether you’re a beginner or have some experience struggling to land paid gigs, this guide will walk you through how to become a videographer.
Understanding the Role of a Videographer
Before you start, it’s essential to understand what a videographer does. Unlike cinematographers who work in large teams on large corporate or commercial video production, videographers often wear multiple hats-shooting, directing, editing, and sometimes even handling audio.
Common Types of Videography Jobs
Freelance Videographer – Works independently for various clients, shooting events, commercials, or corporate videos.
In-House Videographer – Works full-time for a company, producing internal content, marketing videos, and branded stories.
Wedding & Event Videographer – Captures special occasions, often working weekends.
Documentary Videographer – Films real-world stories, often requiring extensive travel and research.
Social Media Videographer – Creates short-form, engaging content optimized for platforms like Instagram, TikTok, and YouTube.
How to Become a Videographer (Step by Step)
1. Learn the Basics of Video Production
You don’t need a film degree to become a videographer, but you do need a strong grasp of fundamental filmmaking techniques. Mastering these skills will set you apart from hobbyists and give you the confidence to tackle real-world projects.
Camera Settings & Technical Mastery
Understanding your camera is non-negotiable. Whether you’re using a DSLR, mirrorless, or cinema camera, knowing how to adjust your settings manually is crucial for achieving professional-quality footage.
Key settings to master:
Shutter Speed – Controls motion blur; typically double your frame rate (e.g., 24fps → 1/50s shutter).
Aperture (f-stop) – Determines depth of field; a low f-stop (f/1.8) creates blurry backgrounds, while a higher f-stop (f/8-f/11) keeps everything in focus.
ISO – Adjusts your camera’s sensitivity to light; keep it as low as possible to avoid grainy footage.
White Balance – Ensures accurate colors by compensating for different light temperatures (e.g., daylight vs. tungsten).
Frame Rates – Use 24fps for cinematic looks, 30fps for standard video, and 60fps+ for slow motion.
Practice Tip: Film the same subject using different settings and analyze how the changes affect the final image.
Composition & Framing: The Art of Storytelling
Good cinematography isn’t just about technical knowledge-it’s about visual storytelling. Learning how to compose your shots effectively can make an amateur video look professional.
Key composition rules:
Rule of Thirds – Divide your frame into a 3×3 grid and position subjects at the intersection points.
Leading Lines – Use natural lines (roads, railings, shadows) to guide the viewer’s eye toward the subject.
Headroom & Lead Room – Leave space above a subject’s head and in front of moving subjects for balance.
Depth & Layering – Foreground, midground, and background elements add dimension to your shots.
Symmetry & Negative Space – Experiment with centered compositions or minimalist framing to evoke different emotions.
Practice Tip: Analyze your favorite films or YouTube videos and pause to study how each shot is framed.
Lighting Techniques: Make Your Shots Stand Out
Lighting can make or break your footage. You don’t need expensive equipment-just an understanding of how light behaves.
Three-Point Lighting – The gold standard setup:
Key Light – Main light source (e.g., softbox, window light)
Fill Light – Reduces shadows, usually at half the intensity of the key light
Back Light – Separates subject from the background, creating depth
Natural Light vs. Artificial Light – Learn to shape and diffuse light using reflectors, softboxes, or ND filters.
Color Temperature (Kelvin Scale) – Daylight is ~5600K, while tungsten lighting is ~3200K.
Hard vs. Soft Light – Harsh shadows create drama, while diffused light is more flattering for interviews.
Practice Tip: Film a subject at different times of the day and observe how lighting affects mood and clarity.
Audio Recording: Don’t Let Bad Sound Ruin Good Video
Audio is often overlooked, but poor sound quality instantly makes a video feel unprofessional.
Key audio principles:
Use External Mics – Built-in camera mics are low quality; use a shotgun mic, lavalier mic, or external recorder (e.g., Zoom H4n).
Record in a Quiet Space – Background noise is difficult to remove in post.
Monitor Audio Levels – Keep levels between -12dB and -6dB to avoid peaking/distortion.
Use a Pop Filter & Windshield – Reduce harsh plosives (P and B sounds) and wind noise when recording outdoors.
Practice Tip: Record in different environments (indoors, outdoors, noisy locations) and adjust your mic placement accordingly.
Editing Software: Where the Magic Happens
Post-production is where raw footage becomes a polished video. Learning how to edit effectively is just as important as capturing great shots.
Popular editing software:
Adobe Premiere Pro – Industry standard for professional editors.
DaVinci Resolve – Best free alternative with high-end color grading tools.
Final Cut Pro X – Optimized for Mac users, great for fast-paced editing.
Editing skills to develop:
Cutting on Action – Makes transitions smoother and more engaging.
Color Correction & Grading – Adjust brightness, contrast, and color tones to achieve a cinematic look.
Sound Design – Add background music, sound effects, and ambient noise to enhance the video.
Motion Graphics – Simple animations or text overlays can add polish to your edits.
Practice Tip: Download free footage from sites like Pexels Videos or Artgrid and practice editing.
You don’t need a high-end, $5,000 camera to start creating professional-quality videos. In fact, some of the best filmmakers and content creators began with entry-level gear or even just a smartphone. Your skill and creativity matter far more than the price tag on your equipment.
What sets excellent videographers apart is their ability to work with what they have-mastering composition, lighting, and storytelling regardless of their camera. Even a budget-friendly DSLR, mirrorless camera, or an iPhone can produce stunning results when used effectively.
Best Beginner Cameras for Videographers:
Sony ZV-1 – A compact, high-quality option for vlogging and run-and-gun shooting. Features built-in stabilization, fast autofocus, and a flip-out screen-perfect for content creators.
Canon EOS R50 – A fantastic entry-level mirrorless camera with interchangeable lenses, excellent color science, and great low-light performance-ideal for aspiring filmmakers.
Blackmagic Pocket Cinema Camera 4K – A top choice for those serious about cinematic filmmaking, offering RAW recording, professional color grading options, and a film-like aesthetic at a fraction of the cost of high-end cinema cameras.
Can You Start with a Smartphone? Absolutely.
If you don’t have a camera yet, your smartphone is a potent tool. Many modern iPhones and Android devices offer:
4K video recording with impressive dynamic range
Cinematic mode for shallow depth of field
Third-party apps like Filmic Pro to give you manual control over exposure, focus, and white balance
Compact and always accessible-no extra gear needed!
Pro Tip: Don’t let a lack of expensive equipment hold you back. Start shooting with what you have, focus on improving your skills, and upgrade when the time is right.A great story and strong fundamentals will always trump high-end gear.
3. Master Video Editing – Where the Magic Happens
Shooting great footage is only half the battle-the real storytelling happens in the editing room. Whether you’re crafting a cinematic short film, a corporate promo, or a fast-paced social media video, editing can transform raw clips into a polished masterpiece.
Mastering professional video editing software is essential for creating seamless cuts, dynamic transitions, and visually compelling content. Learning to edit efficiently and creatively is a must if you want to stand out as a videographer.
Best Video Editing Software for Beginners & Pros
There are plenty of editing programs available, but here are the top industry-recommended options:
Adobe Premiere Pro – The gold standard for video editing. Used by professionals in Hollywood, YouTube, and commercial production, Premiere Pro offers powerful timeline editing, advanced effects, and seamless integration with Adobe After Effects.
DaVinci Resolve – The best free editing software with high-end features. Ideal for those looking to master color grading, multi-camera editing, and professional effects without a hefty price tag.
Final Cut Pro X – A Mac-exclusive, fast, and intuitive editor known for its magnetic timeline and optimized performance. Great for filmmakers and content creators who prefer an Apple ecosystem.
Other Notable Mentions:CapCut (for mobile editing), iMovie (for absolute beginners), and HitFilm Express (free with VFX capabilities).
Learn Video Editing: Best Free & Paid Tutorials
Want to sharpen your editing skills? These resources offer step-by-step training from industry professionals:
Edit with Purpose – Every cut should serve the story. Avoid unnecessary transitions and keep pacing natural.
Use Keyboard Shortcuts – Learning hotkeys can speed up your workflow by 50% or more.
Master Color Grading – Even minor contrast adjustments, white balance, and saturation can make a huge difference.
Improve Audio Quality – Background music, sound effects, and proper voice mixing can enhance the viewer’s experience.
Export Settings Matter – Always export in H.264 or ProRes for best quality-to-file-size ratio.
Start Editing Today!
The sooner you start practicing, experimenting, and learning, the faster you’ll develop a unique editing style. Whether you’re working on short films, corporate videos, or YouTube content, great editing can make or break your project.
4. Build a Portfolio (Even If You Haven’t Been Paid Yet)
Your portfolio is your videography resume-it’s the first thing clients, employers, and collaborators will look at to determine your skills. If you don’t have professional experience yet, don’t worry! You can still create an impressive portfolio that showcases your talent and gets you hired.
How to Build a Videography Portfolio from Scratch
Shoot for Free (Strategically) – Offer to create videos for local businesses, nonprofits, artists, or community events in exchange for portfolio material. Prioritize projects that align with the type of work you want to get paid for.
Create Spec Work – If no one is hiring, make your own projects. Film short commercials, travel vlogs, music videos, or documentaries-even if they’re just for fun, they show off your creativity and skills. Many of our first and favorite projects were spec videos!
Edit a Killer Demo Reel – A 90-second highlight reel is the best way to grab attention. Showcase your best shots, dynamic editing, color grading skills, and storytelling ability in a fast-paced, engaging format.
Upload Your Work Online – Vimeo and YouTube are great platforms to share your portfolio, optimize for SEO, and attract potential clients.
Add Case Studies – Instead of just showing the final videos, include a breakdown of your process, before-and-after shots, or behind-the-scenes clips to demonstrate your expertise.
Need inspiration? Check out Luma Creative’s portfolio for professional examples of high-quality video production work.
5. Network and Find Your First Paid Gigs
Breaking into videography is all about who you know-and the best way to get hired is to put yourself in the right places. Building strong industry connections is key in whether you’re looking for freelance gigs, full-time positions, or passion projects.
Where to Find Videography Work
Facebook Groups & Reddit Communities – Join groups like r/filmmakers, r/videography, and local Facebook production groups where companies and freelancers post job opportunities.
Local Production Companies – Contact production houses, marketing agencies, and creative studios. Offer to help as a PA (Production Assistant), camera operator, or behind-the-scenes (BTS) shooter. Any production company would LOVE behind-the-scenes shots of their work, and it’s a great way to get on set and build relationships.
Freelance Platforms – Websites like Upwork, PeoplePerHour, and Mandy.com often have gigs for videographers, editors, and camera operators.
Event Planners & Wedding Vendors – If you’re interested in wedding or event videography, connect with wedding planners, DJs, and photographers-they frequently refer videographers to clients.
LinkedIn & Cold Outreach – Connect with marketing managers, business owners, and creative directors who may need video services. A simple cold email with your portfolio can lead to long-term opportunities.
Pro Tip:Never just ask for work. Instead, offer value-“I’d love to help capture BTS content for your production” or “I noticed your business could benefit from more video content. Here’s a sample of what I can do.”
6. Market Yourself as a Videographer
If you want to land consistent, high-paying work, you need to treat your videography career like a business, not just a creative passion. The more you market yourself, the easier it will be to attract clients and grow your reputation.
How to Market Yourself as a Videographer
Create a Professional Website – A personal website showcasing your portfolio, services, client testimonials, and contact info makes you look legit.
Optimize Your LinkedIn Profile – Use industry keywords like “Freelance Videographer,” “Video Producer,” and “Content Creator” in your bio and connect with marketing agencies, brands, and production companies.
Leverage Social Media – Post your work on Instagram, TikTok, and YouTube to attract followers and potential clients. Behind-the-scenes footage and editing breakdowns perform exceptionally well.
Use Google My Business – If you’re offering videography services locally, set up a Google My Business listing so people searching for videographers in your area can find you.
Collaborate & Cross-Promote – Work with photographers, models, musicians, and small businesses who need video content. This expands your reach and gets you in front of new audiences.
Pro Tip:Show, don’t tell.Instead of saying, “I make great videos,” post-high-quality reels, time-lapses, client testimonials, and case studies demonstrating your expertise.
7. Keep Learning and Improving
The best videographers never stop learning-staying ahead of trends, new gear, and editing techniques is what separates good from great. Continuous improvement will keep your work competitive whether you’re just starting out or already booking gigs. Before you know it, you’ll be reading up on managing freelancers as you scale your business!
How to Stay Sharp as a Videographer
Attend Film & Industry Workshops – Learn from top professionals at events like:
NAB Show – The world’s largest trade show for media, entertainment, and technology.
CineGear Expo – A must-attend event for cinematographers, showcasing the latest gear and industry innovations.
Local Film Festivals & Workshops – Check out your city’s film scene for networking opportunities and industry talks.
Take Online Courses & Masterclasses – Platforms offering advanced training in cinematography, lighting, color grading, and editing:
Pro Tip:Revisit your old work every six months to see your progress and identify areas for improvement. Challenge yourself to reshoot an old project with new techniques to measure your growth.
Final Thoughts – Start Now, Perfect Later
If you’re serious about becoming a videographer, the best thing you can do is start today. Don’t get caught up in having the best gear or waiting for the perfect opportunity. Shoot videos, build your portfolio, and market yourself-the rest will follow. We hope you enjoyed this guide on how to become a videographer.
Need more advice? Contact Luma Creative-we’re always happy to chat with aspiring videographers!
Storyboarding is the backbone of video production, providing a visual blueprint that transforms creative ideas into polished projects. While traditional storyboarding has long been a manual, time-intensive process, we can now use AI storyboarding to revolutionize how creators approach this crucial stage.
From indie filmmakers to corporate video teams, AI storyboarding offers a mix of speed, accessibility, and scalability. But is it the right solution for your project? This guide explores the ins and outs of AI storyboarding, providing you with everything you need to decide.
Table of Contents
What Is AI Storyboarding?
AI storyboarding uses artificial intelligence to automate and enhance the process of creating visual storyboards. Instead of manually sketching or designing, creators input details like text descriptions, scripts, or images, and AI generates storyboard panels complete with suggested compositions, camera angles, and scene layouts.
This process integrates tools such as Natural Language Processing (NLP) and image-generation algorithms to interpret and visualize your ideas. AI storyboarding bridges the gap between concept and execution, allowing teams to iterate faster and focus on refining creative elements.
How AI Storyboarding Works: A Step-by-Step Breakdown
Understanding how AI transforms your input into storyboards can clarify its potential for your project:
1. Input Your Creative Vision
Script Uploads: Many AI tools can analyze detailed scripts to identify key elements such as settings, actions, and dialogue.
Text Descriptions: Describe the scenes in plain language. For example, “A woman walks through a bustling city street at dusk, surrounded by glowing billboards.”
Visual References: Include images, mood boards, or sketches to guide the AI’s stylistic and compositional choices.
2. AI-Driven Interpretation
Natural Language Processing (NLP): Tools like StoryboardHero analyze text inputs to identify visual elements, emotions, and actions, transforming them into scene-specific visuals.
Generative AI: Platforms like Runway ML or DALL-E generate unique visuals based on your descriptions, often incorporating advanced lighting, perspectives, and styles.
3. Generate and Customize
AI outputs a sequence of frames, which you can edit to match your vision. Many platforms offer options to adjust elements like character placement, camera angles, and visual tone.
4. Collaborative Refinement
Share the AI-generated storyboard with your team for feedback. Tools like Boards allow annotations, comments, and revisions in real time.
5. Final Output
Export your storyboard as PDFs, slideshows, or even animatics for use in pre-production planning.
The Benefits of AI Storyboarding
Why are more creators turning to AI for storyboarding? Here are some of the top advantages:
1. Speed and Efficiency
Traditional storyboarding can take days or weeks. AI can generate a complete storyboard in minutes, saving precious pre-production time.
2. Cost-Effectiveness
Hiring a storyboard artist or designer can cost thousands of dollars. AI tools, often subscription-based, provide a budget-friendly alternative for small teams and independent creators.
3. Accessibility for Non-Artists
AI eliminates the need for artistic expertise. Whether a producer, director, or marketer, you can create professional-quality storyboards without prior design skills.
4. Improved Collaboration
Many AI tools are designed for team use, enabling seamless sharing, feedback, and editing. This streamlines communication during pre-production.
5. Rapid Iteration
With AI, creators can test multiple visual approaches and iterate on ideas quickly. This is especially useful for projects with evolving creative directions.
Challenges and Limitations of AI For Storyboarding
Despite its advantages, AI storyboarding is not without challenges. Here’s what to consider:
1. Lack of Artistic Nuance
AI tools may struggle with subtle storytelling elements like emotional depth, symbolic imagery, or cultural context.
2. Generic Outputs
AI-generated visuals can sometimes feel templated or uninspired, lacking the uniqueness that a human artist can bring to a project.
3. Customization Efforts
While AI accelerates the initial phase, highly tailored or unconventional projects may require significant manual tweaks, offsetting time savings.
4. Ethical and Legal Concerns
AI may inadvertently pull from copyrighted or proprietary sources when generating visuals, raising potential legal issues. Additionally, reliance on AI tools can spark debates about the displacement of human creative roles.
5. Learning Curve
While many AI tools are intuitive, some require time to effectively understand and integrate into workflows.
Here is an AI-generated storyboard for the opening scene of the film No Country For Old Men.
Looking for a balance of efficiency and creativity? Explore our Video Production Services to see how we bring human expertise to every stage of the process.
When to Use AI for Storyboarding
AI storyboarding isn’t suitable for every project. Here’s a guide to when it works best-and when it doesn’t:
Use AI For:
Explainer Videos and Ads: Straightforward, structured visuals can be quickly produced using AI.
Concept Development: Early drafts and brainstorming sessions benefit from AI’s speed.
Tight Budgets: When cost is a major constraint, AI offers an affordable alternative.
Fast Iteration Needs: Projects with frequent revisions can leverage AI to minimize rework time.
Avoid AI For:
Complex Narratives: Intricate storylines and character-driven projects require a human touch.
Creative Branding Campaigns: Unique visual identities often exceed AI’s capabilities.
Highly Artistic Films: Traditional methods prevail for projects where storytelling relies heavily on visual artistry.
Advanced Tools for AI Storyboarding
Here’s a closer look at leading AI tools and their standout features:
1. StoryboardHero
Features: Script-to-board capabilities, collaborative editing, and a focus on shot planning.
Best For: Teams seeking a seamless workflow from script to storyboard.
Check out this video to learn how to apply AI storyboarding to your workflow.
Case Studies: Real-World Applications of AI Storyboarding
1. Corporate Training Videos
A San Francisco-based tech company used StoryboardHero to streamline storyboarding for a 10-part training series. The AI tool reduced pre-production time by 60%, enabling faster project delivery.
2. Indie Short Film
An independent filmmaker leveraged Runway ML to storyboard a sci-fi short. AI helped visualize intricate spaceship interiors and dynamic camera movements, saving on both time and cost.
3. Marketing Campaign
A global marketing agency used Boords for a high-profile campaign. The tool’s collaborative features allowed team members in different time zones to review and refine the storyboard in real time.
The Future of AI in Storyboarding
1. AI-Powered Animatics
The next evolution involves converting static frames into motion-based previews, helping creators better visualize pacing and transitions.
2. Virtual Reality Integration
AI tools may soon enable 3D and VR-based storyboarding, allowing creators to immerse themselves in scenes and refine spatial details.
3. Enhanced Style Matching
Future AI platforms could mimic specific artistic styles, offering a higher degree of personalization.
How Luma Creative Leverages Storyboarding
AtLuma Creative, we integrate AI tools into our workflow while maintaining a human-led approach. Whether developing corporate explainer videos or creative campaigns, we ensure every storyboard balances efficiency with creativity. Typically, we are still using real storyboard artists, but that doesn’t mean that we aren’t leaning into AI storyboard generation when budgets don’t allow a real artist.
Conclusion: Should You Use AI for Storyboarding?
AI storyboarding offers game-changing possibilities for specific projects but is not a replacement for human creativity. The human touch remains indispensable for complex, artistic, or high-stakes productions. AI can deliver impressive results quickly and affordably for straightforward or budget-sensitive projects.
If you’re ready to take your video production to the next level, Contact Luma Creative today. Let’s bring your vision to life.
Diving into videography can be a blast, whether you’re doing it for fun, for a job, or just exploring a new hobby. For beginners, figuring out how to film, edit, and tell a story might feel overwhelming. No worries! Here are 5 essential videography tips for beginners to help you get your videography journey started.
1. Get to Know Your Gear
Before you start recording, it’s important to understand the gear you’re working with. First things first, you’ll need a camera. Luckily, today’s phones in our pockets are perfectly capable of capturing exceptional video. Regardless of your camera choice, knowing how your equipment works is key, so do your research!
Camera Settings:Learn about resolution (like 1080p vs. 4K) and frame rates (24fps for that movie vibe or 60fps for smooth action). These settings can make a huge difference in how your video turns out. Also, read up on white balancing; nailing the whites in the camera goes a long way in producing high-quality results
Stabilization: No one likes shaky footage. A tripod, gimbal, or even a simple handheld stabilizer can help keep your shots steady. It’s worth the investment!
Audio Equipment: Good audio can make or break a video. If you can, use an external mic and keep an ear out for background noise. Clear audio makes your video feel more professional.
Learning the nitty-gritty of your gear is the first step in your journey as a beginner videographer. Browse sites like B&H Photo to start building out a kit. Beware: There are many cool tools and pieces of equipment, but being a gearhead without the skills to match is an expensive path to go down. Start small with the bare essentials and purchase according to your needs. This is just one of five essential videography tips for beginners; keep reading to learn the rest!
2. Master Composition Basics
Composition is all about arranging visual elements in your frame. It’s crucial for storytelling and making your video engaging. Here are a few basics:
Rule of Thirds: Imagine your frame is split into nine parts with two horizontal and two vertical lines. Place important elements along these lines or where they intersect to make your shots more balanced and interesting.
Leading Lines: Use lines in your environment to guide the viewer’s eye toward your subject. This adds depth and can make your shots more dynamic.
Framing: Make sure your subject is well-framed. Check for enough headroom and use foreground and background elements to add depth.
Angles and Perspective: Play around with different angles and perspectives. Your point of view is unique so show it off!
Photography and videography go hand-in-hand. After all, videos are just many images cut together to form the illusion of motion-hence, motion pictures. If you imagine that every still of your shot would make a pleasing photograph on its own, you’re on track to producing a beautiful video to be proud of. History lesson: The GIF on the right is called The Horse in Motion, an example from 1877 that’s touted as “the world’s first bit of cinema.”
3. Plan Your Shots
Planning ahead can save you a lot of time and hassle. Storyboarding is a great way to map out your shots before you start filming. You can find a template to start your first shot list here!
Create a Shot List: Write down all the shots you need and their order. This will help ensure you don’t miss anything and keep your video on track.
Sketch or Use Software: You can draw simple sketches of each scene or use storyboarding software. It doesn’t have to be super detailed-just enough to give you a clear plan.
Think About Lighting and Location: When planning, consider the lighting and location. Natural light is great, but you might need extra lighting for indoor or low-light shots.
Any shoot without a shot list or storyboard backing it up is doomed to be a nightmare for everyone involved. Save yourself the headache and conceptualize the video before you even pick up the camera. That way, once you’re on set, you know what needs to be done and won’t miss anything important. Of course, unforeseen circumstances will arise, but showing up with a plan makes your vision so clear that these obstacles won’t stop you from getting that shot and showing off your point of view!
4. Focus on Lighting
Lighting can make or break your video. Good lighting can set the mood, highlight your subject, and make everything look more professional.
Natural vs. Artificial Light: Natural light is nice but not always reliable. Use artificial lighting to get consistent results and control your environment.
Three-Point Lighting: This classic technique includes key light (main light source), fill light (to soften shadows), and backlight (to separate the subject from the background). It’s a tried and true way to light up your scenes.
Avoid Harsh Shadows: Use diffusers or softboxes to soften indoor light and reduce harsh shadows. For outdoor shoots, aim for early morning or late afternoon for the best light.
Light is fundamental to how cameras work; like fuel in a car, a camera needs light to operate. As a videographer, use light to your advantage to make your subjects shine. While modern cameras can produce quality images with minimal light, they really excel in properly lit spaces. Whether that means using three-point lighting to capture someone speaking in an office or waiting until the sun is at the perfect position to nail that landscape shot, the quality of your video depends on these moves.
5. Edit with Intention
Editing is where everything comes together. Good editing turns your clips into a cohesive story and makes your video shine. After making a shot list, and executing those shots, it’s at this point your project finally comes to life!
Choose the Right Software: Pick an editing tool that matches your needs and skill level. From beginner-friendly options to professional software, find what works best for you.
Trim Wisely: Be selective about what footage you use. Cut out anything unnecessary and focus on the clips that best tell your story. A well-edited video packs more punch. Think of it as sharping a knife, any excess dulls effectiveness.
Use Transitions Sparingly: Transitions can enhance your video but don’t overdo it. Simple transitions are usually best for keeping things smooth and professional.
Add Music and Sound Effects: Music and sound effects can really polish up your video. Choose tracks and effects that match the vibe of your content and improve the overall experience.
The best shots in the world are nothing if they are poorly cut together. On the flip side, great editing makes the mundane exciting, but it’s up to you to get creative and make it happen! Next time you watch a film, pay close attention to the intentional decisions made by the editor and how they affect your emotional response to the images.
Conclusion
Videography is a mix of technical skills and creative fun. By getting to know your gear, mastering composition, planning your shots, focusing on lighting, and editing carefully, you’ll be well on your way to making awesome videos. And don’t forget, follow your passions! Shoot the content you want to see and show the world your point of view. Practice these 5 essential videography tips for beginners, experiment with different techniques, and most importantly, have fun with it! With time and a bit of dedication, your videos will keep getting better and more impactful. Want more? Read our guide on how to become a videographer!
Looking to hire a videographer in the San Francisco Bay Area? Contact Luma Creative today!
Outside of Hollywood or other major film production hubs, many production companies’ projects fall under the corporate video production category. The San Francisco Bay Area, where Luma Creative is located, is home to many companies in tech, consumer goods, and real estate that have video production needs in today’s digital age. These companies aren’t looking to put out next summer’s blockbuster. Instead, they seek informational and professional videos to educate their customers, train their employees, or secure the next round of investing. We use on-set etiquette for video production in a corporate setting to foster the client’s vision in a professional way that has them calling Luma Creative for all future projects.
Table of Contents
Corporate Video Production: A Different Approach
Creating these videos isn’t much different from a technical standpoint than making feature films. However, you trade the glitz, glamor, and large budgets for real people, clean looks, and fewer resources. The way we use on-set etiquette in a corporate setting for our San Francisco production company has many similarities to a film set. However, there is a slightly different approach.
Etiquette Tip #1 – Be on Time
First, punctuality is crucial. Time is money, and arriving late wastes precious time and leaves a poor impression on the client. Timely arrival to set allows you to familiarize yourself and tackle any obstacles you may face in a corporate setting.
Why Time Management Matters
These spaces are not always conducive to video production. Without the sense of being rushed, the frantic energy stays at the door, showing the client they’re in good hands.
Etiquette Tip #2 – Be Respectful
Respecting everyone on set goes a long way in conducting a successful shoot. Basic manners, such as introducing yourself and learning the names of everyone involved, from the client side to the production side, break the ice and create a friendly atmosphere.
Building Rapport
You will work closely with these people throughout the production, so maintaining a friendly and respectful demeanor helps avoid tension. Being polite and well-mannered, even when things get stressful, leaves a positive impression for future collaborations.
Etiquette Tip #3 – Conduct On-Set
When cameras are rolling and mics are hot, staying silent and still is crucial. Footsteps or a crunching water bottle can and will ruin the perfect take. Avoid any unnecessary conversations or movements during takes. If you need to navigate the set (ideally not during a take), be cautious not to cross in front of the camera, as it can disrupt a shot.
Move with Intent
Be careful not to touch or move any equipment or props unless you’ve been explicitly instructed. Respecting these guidelines helps maintain focus and ensures that the shoot runs smoothly, minimizing disruptions and keeping everything on track. Your attention to these details contributes to a professional and efficient production environment.
Etiquette Tip #4 – Cultural Awareness
Every company has its own unique culture, and tuning into that can be the key to a successful shoot. Beyond just using respectful and appropriate language, really understanding and honoring the company’s values, communication style, and work environment is crucial.
Aligning with Client
This awareness not only helps build a strong working relationship but also ensures that the final product aligns perfectly with their brand identity. Just like being respectful, being culturally aware helps keep things running smoothly and ensures your work hits the mark.
Etiquette Tip #5 – Dress Appropriately
Unless told otherwise, all black and closed-toe shoes are the golden standard for set attire. You might think Birkenstocks and a patterned button-up shirt are a good way to showcase your relaxed personality.
Set Attire Reflects Professionalism
Instead, opt for black attire with supportive footwear. As you know, standing for hours on end is an inevitable part of life on set. You can demonstrate your cool and relaxed personality through your calm demeanor and respectful behavior.
Etiquette Tip #6 – Be Patient
When on-set in a corporate setting, you’re likely to encounter people with little to no on-set experience. Clients may be using production services for the first time and have expectations outside what is possible.
Guiding Clients Through the Process
Your job is to be patient and walk them through the process, particularly when challenges arise. For example, when conducting an interview, you may need to guide someone through their first time as an interviewee on camera. Speaking on camera is a skill that takes practice and can make people nervous, so be patient and help them feel comfortable to produce a quality product.
Etiquette Tip #7 – Use Discretion
Corporate videos often include sensitive information, and it’s your responsibility to use discretion. In order to maintain the client’s trust and protect your reputation, avoid sharing any details about the project on social media or discussing it with anyone not directly involved.
Protecting Client Trust
You don’t want to damage your image despite how interesting your followers may find what you’re working on. A strong reputation and client trust are crucial. Refrain from taking unnecessary pictures and focus on the job.
Etiquette Tip #8 – Safety First
Video production involves hazardous equipment and requires strict adherence to safety protocols, where it is essential to avoid accidents and maintain professionalism. Heavy lights, expensive cameras, and delicate microphones connected by cables can cause accidents if not properly secured. In the image to the right, you can see how quickly the room can fill up with equipment.
Don’t Be That Person!
A Rube Goldberg reaction started by a pulled cable will bring the production to a dangerous and embarrassing halt. Be mindful of your surroundings and communicate about potential hazards. For example, using lingo like “Points!” when carrying items signals people to clear the way. Preventing injuries on set is crucial to keeping the production smooth and safe. An injury on set is nearly always preventable and a surefire way to bring spirits down and drive costs up.
Etiquette Tip #9 – Understand The Hierarchy
On a typical film set, crew members report to their department heads. For example, an assistant in the art department reports to the production designer, who in turn reports to the director. Directors oversee all departments to ensure their vision is executed effectively. Understand the chain-of-command and go to the appropriate person with your questions or concerns. In a corporate setting, hierarchies are often condensed due to the smaller scale of projects, but they still exist.
Film Vs Corporate
The key difference between an artistic film and a corporate video project is the addition of the client. Ultimately, the client’s satisfaction is top priority. While they pay for your expertise, you may need to balance your creative vision with their expectations, ensuring the final product meets both your aesthetic standards and their requirements.
Etiquette Tip #10 – Be Proactive
Keep your finger on the pulse! Anticipating the needs of the production and the client by staying one step ahead is key to a smooth operation. Whether it’s having backup equipment ready, addressing potential issues before they snowball, or offering creative solutions, proactive behavior ensures everything stays on track and highlights your professionalism. Staying proactive helps prevent disruptions and keeps the production running like a well-oiled machine.
Never Been On-Set?
In addition to The Ultimate Guide to On-Set Etiquette for Video Production, check out this quick video to understand the basics. Stepping onto a set for your first time, especially as a production assistant or PA, can be intimidating. Anyone with filmmaking aspirations will likely spend time as a production assistant, and everyone starts out green. Having an understanding of what makes a good PA is a great way to be called next time there is a shoot near you.
Conclusion
Operating to the highest standards for video production in a corporate setting shows clients why they hired the right team to communicate their message. Courtesy and respect leave a lasting impression that can lead to future opportunities and referrals. Remember, video production can be mysterious and intimidating to clients, so maintaining a patient, positive attitude helps lift the curtain. It leaves clients satisfied and ready to bring you on for their next project.
Have corporate video production needs in the San Francisco Bay Area? Reach out today.
There are a lot of people involved in any given video production. We have all heard of Producers, Directors, Actors, Directors of Photography, etc. However, there is a crucial behind the scenes role most people have not heard of called a film fixer. Film fixers are the unsung heroes who ensure everything runs smoothly throughout the filming process. So, what exactly does a film fixer do?
Responsibilities of a film fixer
A film fixer is a key figure in film production, overseeing everything from pre-production logistics to editing and marketing efforts. They ensure smooth coordination across all stages of the filmmaking process. Not everyone will refer to this position as a “film fixer”, other terms you may have heard are local producer, production coordinator, and local fixer. Fixers are crucial, especially in new places. They use their developed connections and experience to help productions find the services they need within different budgets. This allows non-local productions to start filming smoothly without worrying about local logistical problems, saving time and money.
Locations
Firstly, a film fixer is responsible for scouting and securing locations for shooting. This involves finding the perfect spots that match the director’s vision and obtaining the necessary permits and permissions to film there. There are very specific steps involved in location scouting, and every location is different. A film fixer helps non-local producers whether it’s scouting a bustling city street, like Market street in San Francisco, or permitting a national landmark like the Golden Gate Bridge. This important role makes sure everything is in place and in accordance with local regulations.
For our commercial with Sitpack we were able to use our local Bay Area location knowledge to find the perfect secluded beach!
Film fixers are logistics specialists
Once the locations are locked in, your hired fixer moves on to logistics. They coordinate transportation for the cast and crew, arrange accommodation if needed, and ensure that everyone and everything arrives at the right place at the right time. Sometimes we travel with gear for an out-of-town shoot; a film fixer can help you understand what you should bring and how you can source equipment at the shoot location. This requires excellent organizational skills and the foresight to understand local accommodations. For turo our crew went to Austin, Maui, New Orleans, and Vancouver. In Vancouver we hired a fixer to help us with logistics, locations, crew hiring, etc. While we are experts in producing video shoots from start to finish in San Francisco, it benefited us to bring in an expert while traveling to Canada.
For our shoot with Turo we shot in many different locations. Bringing in a local film fixer helped us navigate logistical challenges
Film fixers are local liaisons
Furthermore, a film fixer serves as a liaison between the production team and the local community. They foster positive relationships with residents and businesses in the filming area, addressing any concerns and ensuring minimal disruption during shooting. For example, for a San Francisco based shoot we would hire crew members that we know are compatible with each other. Further, we have vetted local locations and know what will draw negative attention in the community.
Case Study: Local Fixer in Bali
There are many reasons to pick a shooting location including feasibility, story, and budget. However, picking a location in a foreign country can create new options for creative visual imagery. Film and media hubs such as Los Angeles, New York, Paris, etc can only offer a fraction of the diverse locations the world has to offer. With just a quick google search you can find film fixers in virtually any location on the globe. Want crystal clear water and island topography? Look no further than Bali. There are film fixers there who will help you with pre-production, location scouting, visa application, legal documentation, local crew, and more. In addition, the visa application process in Bali is famously rigorous, and this local company can help you breeze through customs. The scope of these local companies is endless, they can take potentially draining logistical challenges off of a producer’s hands.
Example of the local scenery available in the island province of Bali. There, you can hire local film fixers to source everything from visas to transportation for your film crew
Local Connections
In addition to their logistical duties a film fixer also assists with providing their network of local connections, which can be a huge advantage in areas like Santa Cruz that may be further from a hub. They will have plenty of contacts within the industry such as talent agencies, prop houses, drone operators, gear rental companies, etc. Further, this can ease a foreign producer’s workload but can provide better rates and responsiveness from the providers.
Considering using a film fixer
Overall, the role of a film fixer is multifaceted and dynamic. They provide a combination of organizational skills, and “on the ground” knowledge that is impossible for outside productions to have. Without their behind-the-scenes efforts, many video productions would never get off the ground. So, the next time you consider planning a production in a place you are not an expert in, consider the services of a film fixer.
The world of video production is evolving rapidly, with technological advancements pushing the boundaries of what’s possible. Among these advancements, RAID (Redundant Array of Independent Disks) systems play a pivotal role in enhancing data storage capabilities. With Dropbox elminating their “unlimited” plans, many video production companies are looking to alternatives. This guide explores the benefits and considerations of building a RAID for video production. Should you build a raid for video production? Let’s find out!
Chapter 1: Understanding RAID
Section 1.1: What is RAID?
RAID stands for Redundant Array of Independent Disks, a technology that combines multiple physical disk drives into a single unit for the purposes of data redundancy, performance improvement, or both. Developed in the late 1980s, RAID has evolved to become a cornerstone of data storage strategies, offering solutions that can significantly enhance the reliability and speed of data access, particularly in environments where data integrity and performance are critical.
The Basics of RAID
Purpose: The primary goal of RAID is to increase data reliability and/or performance compared to single drives. This is achieved by employing various strategies to distribute and replicate data across multiple drives.
How It Works: RAID combines multiple physical disks into one or more logical units. Depending on the RAID level, the data is either split across disks (striping), copied onto multiple disks (mirroring), or a combination of both along with parity checks for error detection and correction.
Components: A RAID setup typically involves the disks themselves and a RAID controller, which manages the array and handles the distribution of data according to the specific RAID level’s algorithms.
Key Concepts
Striping (RAID 0): This technique splits data into blocks and spreads them evenly across two or more disks, without redundancy. It improves performance by allowing multiple disks to read and write data simultaneously, but if one disk fails, all data in the array is lost.
Mirroring (RAID 1): Mirroring duplicates data across two or more disks. It provides redundancy, as the data remains accessible as long as one mirrored disk is operational. While mirroring doesn’t improve read/write speed to the same extent as striping, it offers a high level of data protection.
Parity (RAID 5, RAID 6): Parity involves spreading data across multiple disks and adding parity information, which can be used to reconstruct data in the event of a disk failure. RAID 5 uses one disk’s worth of parity data for the entire array, allowing it to withstand a single disk failure. RAID 6 extends this by using two disks’ worth of parity data, offering protection against two simultaneous disk failures.
Hybrid RAID Levels (RAID 10, RAID 50, RAID 60): These configurations combine the features of basic RAID levels to achieve a balance of performance, redundancy, and storage efficiency. For example, RAID 10 combines the striping of RAID 0 with the mirroring of RAID 1 to provide fast data access and high fault tolerance.
Benefits of RAID in Video Production
In the context of video production, RAID can offer several benefits:
Enhanced Performance: RAID, especially levels that employ striping, can significantly speed up data access times, which is crucial for editing and rendering large video files.
Increased Data Reliability: Mirroring and parity provide redundancy, ensuring that video projects are not lost in the event of a disk failure.
Scalability: RAID arrays can be expanded by adding more disks, offering a flexible solution that grows with storage needs.
Understanding the fundamentals of RAID is essential for anyone considering its implementation in a video production environment. By leveraging RAID’s capabilities, video professionals can ensure their workflows are supported by fast, reliable, and efficient data storage solutions.
Section 1.2: Types of RAID Configurations
RAID configurations vary widely, each offering a different balance of performance, data protection, and storage capacity. Understanding the nuances of these configurations is crucial for selecting the most appropriate RAID setup for video production needs. Below is an overview of the most commonly used RAID levels and their respective advantages and disadvantages.
RAID 0 (Striping)
Description: RAID 0 splits data evenly across two or more disks without redundancy, improving performance by enhancing read/write speeds.
Advantages: Maximizes speed and disk space, as no capacity is lost to redundancy. Ideal for tasks requiring high performance, such as editing multiple video streams simultaneously.
Disadvantages: Offers no data protection; the failure of a single disk results in total data loss. Not recommended for storing irreplaceable video footage without a separate backup solution.
RAID 1 (Mirroring)
Description: RAID 1 duplicates data across two or more disks, providing redundancy and increasing data security.
Advantages: Protects against data loss by mirroring data on two or more drives. If one drive fails, the data remains accessible from the other drive(s).
Disadvantages: Effective storage capacity is halved, as each piece of data is stored twice. Offers improved read speeds but does not enhance write speeds.
RAID 5 (Striping with Parity)
Description: RAID 5 distributes data and parity information across three or more disks. It offers a balance of performance, storage efficiency, and data protection.
Advantages: Provides data redundancy to survive a single disk failure without losing data. Improves read speeds and offers more efficient storage utilization than RAID 1.
Disadvantages: Write speeds can be slower due to the overhead of calculating and writing parity information. Rebuilding the array after a disk failure can be time-consuming, especially with large disks.
RAID 6 (Striping with Double Parity)
Description: Similar to RAID 5 but with an additional layer of parity, allowing it to withstand the failure of two disks.
Advantages: Offers enhanced data protection, suitable for systems where data loss cannot be tolerated. Provides good read speeds and more redundancy than RAID 5.
Disadvantages: Loses more storage capacity to parity than RAID 5, reducing the effective storage space. Like RAID 5, it also experiences slower write speeds and long rebuild times.
RAID 10 (Mirrored Sets in a Striped Set)
Description: Combines the features of RAID 1 and RAID 0, mirroring data for redundancy and then striping across the mirrored sets for performance.
Advantages: Offers a strong combination of speed, redundancy, and data protection. Can survive multiple disk failures as long as no two failed disks are part of the same mirrored pair.
Disadvantages: Requires at least four disks and sacrifices half of the total disk space to mirroring, making it more costly in terms of storage efficiency.
Choosing the Right RAID Configuration for Video Production
When selecting a RAID level for video production, consider the following factors:
Performance Needs: If speed is the primary concern, RAID 0 or RAID 10 configurations may be most appropriate. RAID 0 offers the highest speed but no data protection, making RAID 10 a better choice for those also needing redundancy.
Data Protection: For projects where data loss is unacceptable, RAID 1, RAID 5, or RAID 6 provide varying levels of redundancy and data security. RAID 6 offers the most protection with its double parity feature.
Storage Efficiency: When maximizing storage capacity is vital, RAID 5 or RAID 6 configurations offer a good balance between redundancy and efficient use of disk space.
Budget Constraints: The cost of the RAID setup, including the number and type of disks required, should align with budgetary limitations. RAID 1 and RAID 10 tend to be less storage-efficient, potentially leading to higher costs for the needed capacity.
Understanding these RAID levels and their implications for video production can guide the selection of a storage solution that optimally supports the workflow, budget, and data security requirements of any project.
Section 1.3: RAID Controllers
In a RAID setup, the RAID controller is a critical component that manages how data is distributed across the disks in the array. It can be a physical hardware device or software-driven, each with its own set of features, performance levels, and use cases. Understanding the differences between hardware and software RAID controllers, as well as how to choose the right controller for your needs, is essential for optimizing your video production workflow.
Hardware RAID Controllers
Description: A hardware RAID controller is a dedicated processor that manages the RAID array independently of the host system’s CPU. It usually comes in the form of a PCI or PCIe card installed in the server or workstation.
Advantages:
Performance: Because it operates independently of the host’s CPU, a hardware RAID controller can offer superior performance, especially in configurations that require complex calculations, such as RAID 5 or RAID 6.
Features: Hardware RAID controllers often come with built-in features such as battery-backed cache, which can protect data in transit in case of a power failure.
Reliability: Being a dedicated solution, hardware RAID is generally considered more reliable and less prone to software conflicts or operating system crashes.
Disadvantages:
Cost: Hardware RAID solutions are typically more expensive than software RAID options, both in terms of initial investment and maintenance.
Compatibility: There may be compatibility issues with certain types or brands of drives, and upgrading the system can sometimes require purchasing a new RAID controller.
Software RAID Controllers
Description: Software RAID manages the array through the host system’s operating system, using its CPU to perform RAID-related calculations.
Advantages:
Flexibility: Software RAID is often more flexible in terms of hardware compatibility and can be easier to configure and manage through the operating system.
Cost: There is typically no additional hardware cost for software RAID, as it uses the existing system resources.
Ease of Upgrade: Upgrading a software RAID setup can be as simple as adding new drives and adjusting the configuration settings in the operating system.
Disadvantages:
Performance: Depending on the RAID level and workload, using the host CPU for RAID operations can impact overall system performance, particularly for CPU-intensive video production tasks.
Reliability: Software RAID might be more susceptible to issues related to software bugs, operating system crashes, or improper configuration.
Choosing the Right RAID Controller for Video Production
When selecting a RAID controller for video production, consider the following factors:
Performance Requirements: For high-resolution video editing and rendering that demand maximum performance, a hardware RAID controller might be the best choice. The dedicated processing and cache can significantly reduce latency and improve read/write speeds.
Budget: If cost is a major concern, software RAID offers a viable and cost-effective solution, especially for smaller projects or studios just starting out.
Scalability and Flexibility: Software RAID typically offers more flexibility for future expansion. If you anticipate needing to scale your storage solution as your projects grow, software RAID might be more accommodating.
Reliability and Data Protection Needs: For environments where data integrity is paramount, hardware RAID’s additional features like battery-backed cache can offer an extra layer of protection against data loss.
In summary, the choice between hardware and software RAID controllers depends on a balance of performance needs, budget constraints, and the specific requirements of your video production workflow. Hardware RAID provides superior performance and reliability, ideal for high-end, professional video production environments. In contrast, software RAID offers a flexible and cost-effective solution for smaller projects or studios. Understanding these distinctions and evaluating your specific needs will help you select the most appropriate RAID controller.
Chapter 2: RAID and Video Production
Section 2.1: Why Consider RAID for Video Production?
In the realm of video production, managing vast amounts of data efficiently is not just an advantage; it’s a necessity. High-definition, 4K, and even 8K content creation demand more from storage solutions than ever before. RAID configurations stand out as a compelling solution for several reasons:
Speed: RAID can dramatically increase the speed of data access and writing. For video editors and producers, this means shorter loading times for video files and faster rendering speeds. RAID 0, known for striping data across multiple drives, offers significant speed boosts, allowing real-time editing of high-resolution footage without lag.
Data Redundancy: Video production projects are valuable and often irreplaceable. RAID configurations like RAID 1, 5, and 6 provide varying levels of data redundancy, automatically duplicating data across multiple drives. This redundancy ensures that in the event of a single (or even multiple, depending on the setup) drive failure, no data is lost, and operations can continue with minimal downtime.
Large File Handling: Modern video files, especially those in 4K or 8K
Section 2.2: RAID in Workflow
Incorporating RAID into a video production workflow can significantly enhance efficiency and reliability at various stages-from editing to rendering and archiving. Understanding how RAID impacts each of these stages can help you design a system that meets your specific needs.
Editing
During the editing process, speed and responsiveness are crucial. Editors often work with multiple streams of high-resolution video, requiring quick read/write speeds to prevent lag. RAID 0 is particularly beneficial here, as it stripes data across several drives, allowing faster access to the files. However, because RAID 0 lacks redundancy, it’s often used in combination with other RAID configurations (such as RAID 1 or RAID 10) to add a layer of data protection.
For projects where data loss is not an option, RAID 5 or RAID 6 can provide a good balance of speed and redundancy. These configurations allow for one or two drives to fail without data loss, respectively.
Rendering
Rendering video, especially in high resolutions or with complex effects, can be time-consuming and resource-intensive. RAID setups can reduce render times by enabling faster data processing. The parity in RAID 5 or RAID 6 configurations, while providing redundancy, also allows for relatively fast write speeds, which can be advantageous during the rendering process. Moreover, the ability to access data across multiple drives simultaneously can lead to more efficient use of the video editing software’s capabilities.
For environments where rendering is a continuous necessity, such as in animation or visual effects studios, RAID 10 might offer the best mix of speed and redundancy. It combines the mirroring of RAID 1 with the striping of RAID 0, providing fast data access and tolerance for drive failures.
Archiving
Once a project is completed, it’s essential to archive the data safely. RAID isn’t typically the first choice for long-term storage due to its higher cost and operational requirements, but it can play a role in a comprehensive archiving strategy. RAID 1, 5, or 6 configurations can be used for short to medium-term archival purposes where quick access to archived projects is necessary, and data integrity is paramount.
For long-term archival, combining RAID with other storage solutions, such as Network-Attached Storage (NAS) systems or cloud storage, can provide both the redundancy needed for data protection and the scalability to accommodate growing archives. A NAS configured with RAID can serve as an accessible, centralized archive for finished projects, while cloud storage can offer off-site redundancy and disaster recovery options.
Considerations for RAID in Video Production Workflow
Performance vs. Redundancy: Balancing the need for high performance with the necessity for data redundancy is key. Choose a RAID level that offers the right mix for your specific workflow requirements.
Upgrade Path: Consider future scalability. As project sizes and resolutions increase, you’ll need a RAID setup that can grow with your demands, either by adding more drives or by supporting larger-capacity drives.
Cost: Higher levels of redundancy and performance come at a cost, both in terms of the initial investment in drives and RAID controllers, and in ongoing maintenance. Budget accordingly and consider the value of the data and time saved against the cost of the RAID configuration.
Backup Strategy: RAID is not a substitute for a comprehensive backup strategy. Always maintain regular backups of important data off-site or in the cloud, in addition to any RAID redundancy, to safeguard against all forms of data loss.
Incorporating RAID into your video production workflow can significantly enhance your ability to manage large video files efficiently, speed up your editing and rendering processes, and provide a safety net against data loss. By carefully considering your needs at each stage of production and selecting the appropriate RAID configuration, you can create a more robust, efficient, and reliable video production environment.
Section 2.3: Case Studies
Examining real-world applications of RAID in video production environments provides valuable insights into its benefits, challenges, and implementation strategies. These case studies span small independent studios to large-scale operations, highlighting how RAID configurations can be tailored to meet diverse workflow needs.
Small Independent Studio: Embracing RAID 5 for Balance
Background: A small independent film studio specializing in documentary filmmaking found themselves struggling with data management and protection. Their projects often involved weeks of footage from remote locations, making each byte of data incredibly valuable.
Challenge: The studio needed a cost-effective solution that offered both speed for editing 4K footage and redundancy to protect against data loss, without requiring a significant investment in hardware.
Solution: The studio implemented a RAID 5 setup using four 4TB SSDs. This configuration provided the balance they needed: it offered redundancy to protect against a single drive failure and improved read speeds beneficial for editing. The parity data in RAID 5 added a slight overhead but was a worthy trade-off for the data protection it provided.
Outcome: The RAID 5 setup significantly improved the studio’s workflow, allowing for smoother editing of 4K footage and providing peace of mind with its redundancy features. The studio was able to complete projects faster, with less downtime due to technical issues, and without the fear of losing irreplaceable footage.
Mid-Sized Production Company: Leveraging RAID 10 for High Performance
Background: A mid-sized production company, like ourselves, producing high-end commercial and corporate videos, faced challenges with their growing need for faster data access speeds and more reliable data storage.
Challenge: With the move to 8K video production, file sizes exploded, and the existing storage solution became a bottleneck, slowing down editing and rendering processes. Additionally, the company sought to minimize the risk of data loss which could derail tight production schedules.
Solution: The company upgraded to a RAID 10 (1+0) configuration, combining the speed of RAID 0 with the redundancy of RAID 1. This setup involved eight high-performance SSDs, offering both the high data transfer rates required for editing 8K footage and redundancy to protect against drive failures.
Outcome: The RAID 10 setup dramatically increased the efficiency of the company’s video production workflow. Editors experienced no lag when working with 8K footage, and the company enjoyed a newfound confidence in the reliability of their data storage. The balance of speed and redundancy perfectly suited their needs, making RAID 10 an essential component of their production process.
Large Broadcast Network: Utilizing RAID 6 for Maximum Redundancy
Background: A large broadcast network with a vast archive of digital video content needed to overhaul their storage infrastructure to support 24/7 operations and ensure the highest level of data availability and integrity.
Challenge: The network required a solution that could not only handle the high volume of data but also offer robust protection against multiple simultaneous drive failures, considering the critical nature of their archival footage and live broadcast content.
Solution: The network opted for a RAID 6 configuration, employing a large array of high-capacity HDDs. RAID 6 was chosen for its ability to withstand the failure of up to two drives simultaneously, offering an extra layer of security over RAID 5. This setup was implemented across multiple storage arrays to manage and archive content efficiently, from raw footage to finished broadcasts.
Outcome: Implementing RAID 6 provided the network with a highly reliable storage solution, ensuring continuous access to their valuable video archives and live content. The additional redundancy was instrumental in maintaining operations during drive failures, with no loss of data or on-air time. This setup underscored the importance of RAID 6 in environments where data integrity is paramount.
Chapter 3: SSDs vs. HDDs in RAID Configurations
Section 3.1: Understanding SSDs and HDDs
Before delving into how Solid State Drives (SSDs) and Hard Disk Drives (HDDs) fit into RAID configurations for video production, it’s essential to understand the fundamental differences between these two types of storage technologies. Each has its unique advantages and limitations, which can significantly impact their performance, reliability, and cost-effectiveness in a RAID setup.
Technology Overview
HDDs: Hard Disk Drives have been the standard storage technology for decades. They store data on magnetic disks (platters) read by a moving read/write head. The technology’s main advantages are its cost-effectiveness for high storage capacities and its proven reliability over time. However, HDDs are mechanical devices; they’re susceptible to physical wear and tear, and their moving parts can make them vulnerable to shock and damage. Additionally, the mechanical nature of HDDs limits their read/write speeds compared to SSDs.
SSDs: Solid State Drives store data on flash memory chips and have no moving parts. This difference results in faster data access times, making SSDs significantly quicker in read/write operations than HDDs. SSDs are also more durable and resistant to physical shock, quieter, and consume less power. However, these benefits come at a higher cost per gigabyte than HDDs, and SSDs have a limited number of write cycles, although this is generally not a concern for most video production applications due to modern SSDs’ longevity.
Performance Comparison
Speed: SSDs offer superior speed compared to HDDs. This is particularly noticeable in tasks requiring frequent read/write operations, such as video editing, where the faster data access times of SSDs can drastically reduce loading and rendering times.
Durability: SSDs are more resistant to physical shock and damage because they lack moving parts. This makes them a safer choice for video production environments where equipment may be frequently moved or subjected to less-than-ideal conditions.
Capacity and Cost: HDDs still hold an advantage in terms of cost per gigabyte and maximum capacity per drive. For large video archives or projects where budget constraints are a significant concern, HDDs may be the more economical choice.
Lifespan: SSDs have a limited number of write cycles, but modern SSDs can handle a large amount of data written over their lifetime, making them suitable for video production tasks. However, it’s essential to monitor SSD health over time, especially in high-write environments.
RAID Considerations
When configuring a RAID array for video production, the choice between SSDs and HDDs will largely depend on the specific needs of the workflow. SSD-based RAID arrays offer significant performance advantages, ideal for editing and rendering high-resolution video in real-time. On the other hand, HDD-based RAID arrays can provide large amounts of storage at a lower cost, suitable for archiving vast amounts of footage.
Hybrid configurations, which use both SSDs and HDDs, can also be an effective strategy. For example, an SSD RAID array could be used for current projects needing fast access speeds, while an HDD RAID array stores completed projects and raw footage not currently in use.
Understanding the differences between SSDs and HDDs is crucial for anyone considering a RAID setup for video production. The choice between SSDs and HDDs in a RAID configuration should be based on a careful assessment of the production’s specific needs. including performance requirements, budget constraints, and long-term storage considerations. Balancing these factors will help ensure that the selected RAID setup enhances the video production workflow’s efficiency, reliability, and overall success.
Section 3.2: Advantages of SSDs in RAID for Video Production
Solid State Drives (SSDs) have increasingly become a popular choice for RAID configurations in video production environments, thanks to their superior speed, reliability, and efficiency compared to Hard Disk Drives (HDDs). When SSDs are integrated into a RAID setup, these advantages are amplified, providing significant benefits for video editing, rendering, and storage workflows. Let’s explore the key advantages of using SSDs in RAID configurations for video production.
Enhanced Speed and Responsiveness
Fast Data Access: SSDs offer rapid data access times, drastically reducing the latency involved in reading and writing data. This is particularly beneficial for video production, where accessing, editing, and rendering large video files frequently can be time-consuming.
Improved Read/Write Speeds: RAID configurations, such as RAID 0, leverage the speed of multiple SSDs to increase throughput. For video editors, this means quicker file transfers, faster rendering times, and the ability to work with multiple high-resolution video streams in real-time without experiencing lag or delays.
Increased Reliability and Durability
No Moving Parts: Unlike HDDs, SSDs have no moving parts, reducing the risk of mechanical failures. This makes SSDs inherently more reliable, an essential factor for video production where the loss or corruption of data can be catastrophic.
Shock Resistance: SSDs are more resistant to shock and vibrations, making them suitable for on-location shoots and environments where equipment might be subjected to rough handling.
Energy Efficiency and Cooler Operation
Lower Power Consumption: SSDs consume less power than HDDs, contributing to lower energy costs and longer battery life for mobile workstations, an advantage during on-location shoots.
Cooler Operation: SSDs generate less heat than HDDs, reducing the need for cooling within the storage system. This can be especially beneficial in RAID configurations, where multiple drives are operating simultaneously, potentially generating a significant amount of heat.
Space and Weight Advantages
Compact Form Factor: SSDs are typically more compact than HDDs, allowing for more storage capacity in a smaller physical space. This is particularly useful for video production setups where space is at a premium, such as mobile editing suites or compact studio environments.
Lighter Weight: For mobile rigs and on-location shoots, the lighter weight of SSDs compared to HDDs can make a significant difference in the ease of transportation and setup.
Considerations
While the advantages of SSDs in RAID configurations for video production are significant, there are a few considerations to keep in mind:
Cost: SSDs are generally more expensive per gigabyte than HDDs. While prices have been decreasing, the initial investment in a high-capacity SSD RAID array can still be substantial.
Capacity Limitations: Although SSD capacities have been increasing, they typically offer less storage space than HDDs at a similar price point. This may require careful management of storage space or the use of hybrid systems that combine SSDs for performance-critical tasks and HDDs for archival storage.
Wear and Tear: SSDs have a limited number of write cycles, but this is becoming less of an issue with modern SSD technology. For most video production applications, the lifespan of an SSD will be adequate, though it’s still important to monitor drive health and plan for eventual replacement.
Integrating SSDs into a RAID configuration for video production offers a compelling mix of speed, reliability, and efficiency. These advantages can significantly enhance the workflow of video professionals, from faster editing and rendering to more reliable storage for precious footage. When planning a RAID setup, considering the balance between performance, capacity, and cost will ensure that the benefits of SSDs are fully leveraged to meet the unique needs of video production projects.
Section 3.3: Considerations
When contemplating the integration of SSDs in RAID configurations for video production, several critical considerations come into play. These factors can significantly influence the overall performance, cost-effectiveness, and longevity of the storage solution. Understanding these aspects is crucial for making informed decisions that align with the specific requirements and constraints of video production projects. You might be wondering why you should build a raid for video production if you have SSD’s?
Cost Analysis
Initial Investment: SSDs are generally more expensive per gigabyte than HDDs, making the initial setup of an SSD-based RAID array more costly. It’s essential to evaluate the budget and the return on investment, considering the performance benefits and the potential for increased productivity in video production workflows.
Long-term Savings: Despite the higher upfront cost, SSDs can offer savings over time due to their lower power consumption, reduced cooling needs, and potentially lower failure rates, which can translate to less downtime and maintenance.
Capacity Needs
Storage Requirements: Video production, especially in high resolutions like 4K or 8K, requires substantial storage capacity. While SSDs offer superior speed, their cost per gigabyte means that achieving the same storage capacity as HDDs can be significantly more expensive. Balancing the need for speed with storage requirements is a key consideration.
Scalability: Future-proofing the RAID configuration is another important factor. As video production demands evolve, ensuring that the RAID setup can be easily expanded or upgraded to accommodate larger storage capacities or higher speeds without a complete overhaul is essential.
Lifespan and Durability
Wear and Tear: SSDs have a finite number of write cycles, although advances in technology have extended their durability. In high-write environments, such as those involving frequent video editing and rendering, considering the lifespan of SSDs in the RAID array is important.
Maintenance and Monitoring: Implementing tools and practices to monitor the health and performance of SSDs can help in preemptively identifying issues before they lead to failure, thereby extending the lifespan of the RAID array.
Performance Requirements
Speed vs. Storage: The choice between SSDs and HDDs in a RAID configuration often comes down to a trade-off between speed and storage capacity. SSDs are unmatched in speed, making them ideal for tasks requiring fast data access, such as video editing and rendering. However, for long-term storage or projects with less intensive speed requirements, the higher capacity and lower cost of HDDs might be more appropriate.
RAID Level Selection: Different RAID levels offer varying balances of speed, redundancy, and storage efficiency. Selecting the right RAID level to match the performance requirements of video production tasks is crucial. For instance, RAID 0 offers the best performance but no redundancy, making it risky for critical data unless combined with other backup solutions.
Backup and Data Redundancy
RAID is Not a Backup: While RAID configurations can provide redundancy to protect against drive failures, it’s important to remember that RAID is not a substitute for a comprehensive backup strategy. Regular backups to separate media or cloud storage are essential for safeguarding video projects against all types of data loss.
Environmental Considerations
Power Consumption and Heat Generation: SSDs consume less power and generate less heat than HDDs, which can be beneficial in reducing energy costs and cooling requirements in video production environments. This aspect becomes increasingly relevant in larger RAID configurations or in settings with limited ventilation.
In conclusion, integrating SSDs into a RAID setup for video production involves a careful consideration of various factors, including cost, capacity, lifespan, performance requirements, and environmental impacts. By thoroughly evaluating these considerations, video production professionals can design a RAID system that optimally supports their workflow, ensuring fast, reliable, and efficient access to and management of video content.
Chapter 4: Building Your RAID System
Section 4.1: Planning Your RAID Setup
Planning the right RAID setup for video production involves a careful consideration of various factors. This section provides a comprehensive guide to help you assess your needs and make informed decisions about configuring your RAID array to support your video production workflow effectively.
Assessing Your Needs
Before diving into RAID configurations, it’s crucial to evaluate your specific requirements:
Performance: Determine the speed at which you need to access and write data. High-resolution video editing and rendering, for example, demand faster read/write speeds, which can be achieved with RAID 0 or RAID 10 configurations.
Data Redundancy: Consider how critical data redundancy is for your projects. If losing data could significantly impact your production schedule or costs, prioritize RAID configurations that offer redundancy, such as RAID 1, RAID 5, or RAID 6.
Storage Capacity: Estimate the amount of storage you’ll need for your current and upcoming projects. Remember, some RAID levels, like RAID 1 and RAID 10, reduce the available storage capacity due to mirroring.
Budget: Calculate how much you can invest in your RAID setup, keeping in mind both the initial costs and potential future expansions. Hardware RAID controllers and SSDs offer better performance but at a higher price.
RAID Configuration Options
Once you’ve assessed your needs, explore the RAID configuration options that best match your requirements:
For Maximum Performance: If speed is your top priority and you have a solid backup strategy, RAID 0 offers the fastest read/write speeds. However, for a balance of speed and redundancy, consider RAID 10.
For Essential Data Redundancy: RAID 1 is simple and offers a direct mirror of your data, but RAID 5 or RAID 6 provides redundancy with better storage efficiency and is suited for larger arrays.
For Large Storage Capacity with Redundancy: RAID 5 or RAID 6 are optimal choices, offering a good balance between storage capacity and data protection.
Budget Considerations
Cost-Effective Solutions: If budget constraints are significant, software RAID can be a cost-saving option, especially with RAID 1 or RAID 5 configurations that don’t require specialized hardware.
Investing in Hardware RAID: For professional video production environments where performance and reliability are non-negotiable, investing in a hardware RAID controller can be worthwhile.
Compatibility and Future-Proofing
Hardware and Software Compatibility: Ensure that your chosen RAID level and controller are compatible with your existing hardware and software, including your operating system and video editing software.
Scalability: Consider how easy it is to expand your RAID setup. As your storage needs grow, you should be able to add more disks or switch to higher-capacity drives without significant downtime or reconfiguration.
Implementing a Backup Strategy
RAID Is Not a Backup: Remember, RAID provides redundancy to protect against drive failure, but it is not a substitute for a comprehensive backup strategy. Regular backups to an external drive, NAS, or cloud storage are essential for safeguarding your projects against all types of data loss.
Planning your RAID setup for video production is a multifaceted process that requires balancing performance, redundancy, and budget considerations. By carefully assessing your needs and understanding the trade-offs between different RAID configurations, you can design a storage solution that supports your video production workflow efficiently and reliably.
Section 4.2: Step-by-Step Guide to Building a RAID
Building a RAID setup for video production involves several key steps, from selecting the right drives and RAID level to configuring and testing the array. This step-by-step guide will walk you through the process, helping ensure your RAID system supports your workflow effectively and reliably. Let’s face it, it’s not easy but is an important question when considering if you Should build a raid for video production!
Step 1: Selecting the Right Drives
Drive Type: Choose between HDDs and SSDs based on your budget, capacity needs, and performance requirements. SSDs are faster and more reliable but come at a higher cost per gigabyte.
Capacity and Speed: Determine the capacity and speed (RPM for HDDs and read/write speeds for SSDs) that best match your video production needs. Larger and faster drives offer better performance but at a higher price.
Uniformity: Ensure all drives in the RAID array are of the same model and capacity to prevent performance bottlenecks and compatibility issues.
Step 2: Choosing the RAID Level
Based on the assessment of your needs (Section 4.1), select the RAID level that offers the best balance of performance, redundancy, and storage efficiency for your video production workflow. Consider RAID 0 for speed, RAID 1 or RAID 10 for redundancy with performance, and RAID 5 or RAID 6 for an efficient mix of capacity and data protection.
Step 3: Acquiring the RAID Controller
Hardware vs. Software RAID: Decide between a hardware RAID controller and software RAID based on your performance needs and budget constraints. Hardware RAID offers better performance and features but at a higher cost.
Compatibility: Ensure the RAID controller is compatible with your system’s motherboard, the chosen RAID level, and the type of drives you’re using.
Step 4: Installing the Drives and RAID Controller
Physical Installation: Carefully install the drives in your system’s drive bays and connect them using the appropriate cables (SATA, SAS, etc.). If using a hardware RAID controller, install the card in the appropriate expansion slot on the motherboard.
Power and Data Cables: Connect each drive to the power supply and to the RAID controller (for hardware RAID) or directly to the motherboard (for software RAID).
Step 5: Configuring the RAID Array
Hardware RAID Setup: Access the RAID controller’s BIOS or management software during system startup to configure the RAID array. Select the desired RAID level and choose which drives to include in the array.
Software RAID Setup: Use the RAID management tools provided by your operating system or third-party software to create and configure the RAID array. This typically involves selecting the RAID level and adding the drives to the array through a graphical interface.
Step 6: Initializing and Formatting the Array
Once the RAID array is configured, you may need to initialize and format it before use. This process prepares the array for data storage, creating a file system that’s compatible with your operating system.
Warning: Initializing and formatting the RAID array will erase all data on the included drives. Ensure you have backups of any important data before proceeding.
Step 7: Testing the RAID Array
Performance Testing: Use disk benchmarking software to test the read/write speeds of the RAID array, ensuring it meets your expectations and requirements for video production.
Redundancy Testing: If your RAID level includes redundancy (e.g., RAID 1, RAID 5, RAID 6), consider testing the failure recovery process by temporarily removing or disconnecting a drive (if possible) and verifying that the array continues to function.
Step 8: Implementing a Backup Strategy
Remember, RAID is not a backup solution. Implement a comprehensive backup strategy that includes regular backups to external drives, NAS devices, or cloud storage to protect your video projects against all forms of data loss.
By following these steps, you can build a RAID setup tailored to your video production needs, enhancing your workflow’s performance, reliability, and data security.
Section 4.3: Maintenance and Monitoring
After successfully setting up a RAID array for your video production environment, ongoing maintenance and monitoring become crucial to ensuring its long-term reliability and performance. This section covers best practices for maintaining your RAID setup, tools for monitoring its health, and troubleshooting common issues.
Routine Maintenance Practices
Regular Checks: Schedule regular checks of the RAID array’s status, including drive health, array integrity, and any error logs provided by the RAID controller. This proactive approach can help catch and resolve issues before they lead to data loss or significant downtime.
Software and Firmware Updates: Keep the RAID controller’s firmware and any associated management software up to date. Software updates can address bugs, improve performance, and enhance security. Always back up your data before applying updates.
Drive Health Monitoring: Utilize tools that support S.M.A.R.T. (Self-Monitoring, Analysis, and Reporting Technology) to monitor the health of the drives in your RAID array. Look for signs of impending failure, such as reallocated sectors, read errors, or significantly slowed performance.
Environmental Considerations: Ensure that your RAID system operates in an environment with adequate cooling and minimal dust. Overheating and excessive dust can lead to hardware failure, including drives and RAID controllers.
Tools for Monitoring RAID Health
RAID Controller Software: Most hardware RAID controllers come with dedicated software for monitoring and managing the RAID array. This software can provide detailed information on the status of the array and individual drives.
Third-Party Monitoring Tools: There are numerous third-party tools available for monitoring RAID arrays, especially for software RAID configurations. These tools can offer more user-friendly interfaces and additional features compared to default operating system utilities.
Operating System Built-in Tools: Operating systems like Windows, macOS, and Linux distributions often have built-in tools for basic RAID monitoring and management. While not as feature-rich as dedicated software, they can provide a quick overview of your RAID status.
Troubleshooting Common Issues
Drive Failure: In the event of a drive failure, replace the failed drive as soon as possible to restore redundancy. Most RAID levels are designed to continue operating in a degraded mode until the failed drive is replaced and the array is rebuilt.
Performance Degradation: If you notice a significant drop in performance, check for failing drives, overheating issues, or bottlenecks in your system’s data transfer chain (such as an overloaded CPU or insufficient RAM).
RAID Array Rebuilds: Be aware that rebuilding a RAID array, especially for levels with parity like RAID 5 or RAID 6, can take a considerable amount of time and slightly degrade performance during the rebuild process. Avoid intensive data operations until the rebuild is complete.
Backup Strategy Reminder
Regular Backups: Emphasize the importance of a comprehensive backup strategy that goes beyond RAID redundancy. Regularly back up critical data to offsite locations or cloud storage to protect against all forms of data loss, including catastrophic events.
Maintaining and monitoring your RAID setup is an ongoing process that requires attention to detail and a proactive approach to data management. By adhering to these best practices, you can ensure that your RAID array remains a reliable foundation for your video production projects, safeguarding your data against hardware failures and optimizing your workflow for efficiency and performance.
Chapter 5: Alternatives to RAID
Section 5.1: Cloud Storage Solutions
In the context of video production, cloud storage solutions offer an alternative or complementary option to RAID for managing and safeguarding digital assets. While RAID setups provide localized storage with varying degrees of redundancy and performance, cloud storage brings distinct advantages, particularly in accessibility, scalability, and off-site data protection. This section explores the pros and cons of cloud storage solutions and provides insights into when they might be considered over, or alongside, RAID configurations. With Dropbox eliminating their non enterprise unlimited account this is what convinced us to build a raid! But let’s explore some of the Cloud Pros and cons.
Advantages of Cloud Storage Solutions
Accessibility: Cloud storage allows for the access of video content from any location with an internet connection, facilitating remote collaboration among video editors, producers, and other stakeholders. This can significantly enhance workflow flexibility and efficiency.
Scalability: One of the most significant advantages of cloud storage is its scalability. You can easily increase your storage capacity based on the demands of your projects without the need for physical hardware upgrades or additional investments in on-site infrastructure.
Off-site Data Protection: Cloud storage inherently provides off-site backup, protecting your data against local disasters such as fires, floods, or theft. This level of data protection is difficult to achieve with on-site RAID configurations alone.
Cost-Effectiveness: For small to medium-sized video production operations, cloud storage can be cost-effective, with subscription-based models that eliminate the need for large upfront investments in hardware. However, costs can scale with increased storage needs and data transfer volumes.
Disadvantages of Cloud Storage Solutions
Dependence on Internet Connectivity: Access to data stored in the cloud is contingent upon reliable internet connectivity. Slow or unstable connections can hinder the ability to stream or download large video files efficiently.
Ongoing Costs: While cloud storage can be cost-effective for smaller operations or short-term projects, the recurring subscription fees can become substantial over time, especially for operations with large volumes of data.
Data Security and Privacy Concerns: Storing sensitive or proprietary video content on external cloud servers introduces potential concerns regarding data security and privacy. It’s essential to select reputable cloud service providers with robust security measures and compliance with relevant data protection regulations.
Latency Issues: Depending on the geographical location of the cloud servers and the size of the files being accessed, users may experience latency when uploading or downloading content, which can impact the efficiency of video production workflows.
When to Consider Cloud Storage Over or Alongside RAID
For Remote Collaboration: Projects involving remote teams can benefit significantly from cloud storage, as it enables seamless sharing and collaboration on video content from anywhere in the world.
For Scalable Storage Needs: If your video production projects vary significantly in size and storage requirements, cloud storage provides a flexible and scalable solution that can adjust to your needs without the need for physical infrastructure changes.
For Cost Considerations: Small operations or freelance video producers with limited budgets may find cloud storage to be a more viable initial option due to its lower upfront costs compared to setting up a RAID system.
In summary, while RAID configurations offer reliable, high-performance storage solutions for video production, cloud storage solutions present a flexible, scalable, and accessible alternative or complement. By carefully assessing the specific needs and constraints of your video production workflow, you can determine the most appropriate use of cloud storage solutions in conjunction with, or as an alternative to, traditional RAID setups.
Section 5.2: Direct-Attached Storage (DAS) and Network-Attached Storage (NAS)
In addition to RAID and cloud storage solutions, Direct-Attached Storage (DAS) and Network-Attached Storage (NAS) serve as critical components in a comprehensive data storage strategy for video production. Each offers unique benefits and considerations, making them suitable for different aspects of the video production process. Understanding their roles and how they compare can help you make informed decisions about integrating these technologies into your workflow.
Performance: DAS provides high data transfer rates, especially useful for video editing and rendering tasks that require fast access to large files.
Cost-Effective: Generally, DAS is more affordable than NAS, making it an attractive option for small studios or individual professionals.
Ease of Use: With its direct connection, DAS is straightforward to configure and manage, requiring minimal technical knowledge.
Disadvantages:
Scalability: Expanding storage capacity can be more challenging with DAS, as it often requires adding additional external drives or replacing existing ones with larger capacities.
Limited Accessibility: DAS can only be accessed by the connected system, making it less suitable for environments where multiple users need simultaneous access to the stored data.
Network-Attached Storage (NAS)
Description: NAS is a storage device connected to a network, allowing multiple users and client devices to retrieve data from centralized storage. It operates independently with its own IP address, managed through a web-based interface.
Advantages:
Accessibility: NAS allows multiple users to access and share files simultaneously over the network, facilitating collaborative video production workflows.
Scalability: It’s generally easier to expand storage capacity with NAS by adding more drives to the existing network or connecting additional NAS units.
Data Protection: Many NAS devices offer built-in RAID configurations, providing redundancy and data protection without requiring a separate RAID setup.
Disadvantages:
Cost: NAS systems can be more expensive than DAS, especially when considering higher-end models designed for business use with advanced features and scalability.
Performance: While NAS offers the convenience of network accessibility, the data transfer speeds can be limited by network bandwidth and may not match the performance of a directly connected DAS in high-demand video production tasks.
Use Cases in Video Production
DAS for High-Performance Needs: DAS is ideal for individual editors or colorists who require maximum performance and work primarily on a single workstation. It’s particularly well-suited for editing high-resolution video files where speed is crucial.
NAS for Collaboration and Accessibility: NAS shines in collaborative environments where multiple editors, producers, and other team members need to access and share files seamlessly. It supports a more distributed workflow, enabling efficient team-based projects.
Combining DAS and NAS
Integrating both DAS and NAS into your video production environment offers a balanced approach, combining the high performance of DAS for intensive editing tasks with the collaborative and scalable advantages of NAS. For example, a video editor might use DAS for real-time editing of 4K or 8K video while relying on NAS for shared access to raw footage, project files, and archives.
In conclusion, both DAS and NAS play vital roles in a comprehensive video production storage strategy, complementing RAID and cloud storage solutions. By carefully considering the specific needs of your video production workflow, including performance requirements, collaboration needs, and budget constraints, you can effectively leverage DAS and NAS to enhance productivity and safeguard your digital assets.
Chapter 6: Future Trends
Section 6.1: The Evolution of Storage Technology
The landscape of storage technology, especially within the realm of video production, is continually evolving. Advances in hardware, software, and networking have paved the way for more efficient, reliable, and scalable storage solutions. Understanding these trends is crucial for anyone involved in video production, as the choice of storage can significantly impact workflow. This section explores emerging trends in storage technology and their implications for the future of video production.
Advancements in Solid State Drive (SSD) Technology
Increased Capacities and Lower Costs: SSDs are rapidly increasing in capacity while their cost per gigabyte continues to decrease. This trend is making high-capacity SSDs more accessible for video production, enabling faster and more efficient workflows with large video files.
NVMe Technology: The adoption of NVMe (Non-Volatile Memory Express) technology has significantly improved the performance of SSDs, offering substantial increases in read/write speeds and lower latency compared to SATA SSDs. This is particularly beneficial for editing high-resolution video content, where speed is crucial.
Higher Speed Networking: With the adoption of 10 GbE (Gigabit Ethernet) and even 40 GbE in NAS devices, the speed at which data can be transferred over a network has greatly increased. This development supports more efficient collaboration on video projects across different locations.
NAS with Hybrid Cloud Integrations: Modern NAS devices often come with built-in cloud integration, allowing seamless synchronization and backup of data to cloud services. This hybrid approach combines the accessibility and scalability of cloud storage with the speed and security of local NAS systems.
Developments in RAID Technology
Software-Defined Storage (SDS): SDS solutions are making RAID configurations more flexible and easier to manage. By abstracting the storage hardware from the management interface, SDS allows for more dynamic allocation of resources, improving efficiency and scalability.
Advanced RAID Levels: Newer RAID levels and algorithms are being developed to optimize for the specific characteristics of SSDs, such as RAID 5E, RAID 6E, and others designed to enhance performance and data durability in SSD arrays.
The Rise of Object Storage
Scalability and Accessibility: Object storage is gaining popularity for handling large volumes of unstructured data, such as video. It offers virtually unlimited scalability and is accessible through standard HTTP APIs, making it ideal for cloud-based video production workflows.
Cost-Effectiveness: With its flat namespace and metadata features, object storage can be more cost-effective for long-term archiving of video content, especially when integrated with cloud services.
Implications for the Future of Video Production
4K, 8K, and Beyond: As video resolutions continue to increase, the demand for faster, higher-capacity storage solutions will grow. Emerging storage technologies will play a critical role in enabling the efficient editing and storage of ultra-high-definition video content.
Collaboration Across Distances: Advances in NAS and cloud integrations are breaking down geographical barriers, enabling video production teams to collaborate more effectively, no matter where they are located.
Data Security and Redundancy: With the increasing value of digital video content, the importance of data security and redundancy has never been higher. Future storage technologies will need to balance performance with robust data protection mechanisms.
In summary, the evolution of storage technology is poised to address the growing demands of video production. Staying informed about these trends will enable video production professionals to make strategic decisions.
Section 6.2: Adapting to Future Needs
As the video production industry continues to evolve, driven by technological advancements and changing viewer expectations, the need for adaptable, forward-looking storage solutions becomes increasingly critical. The future of video production is likely to be shaped by several key trends, including higher resolutions, immersive formats, and AI-driven workflows. Understanding how to prepare and adapt your storage strategy to meet these future needs is essential for maintaining efficiency, competitiveness, and creativity.
Embracing Scalability
Modular Storage Systems: Invest in storage solutions that offer modular scalability, allowing you to expand capacity and performance incrementally as your needs grow. This approach can prevent over-investment in technology that might become obsolete or insufficient to meet future demands.
Cloud and Hybrid Models: Leverage cloud storage for its virtually limitless scalability and flexibility. Hybrid models, which combine local (NAS, DAS) and cloud storage, can offer the best of both worlds, providing local performance where needed and cloud scalability for archiving and remote access.
Investing in High-Speed Connectivity
Faster Network Infrastructure: As file sizes grow with higher video resolutions and more complex data streams (e.g., 8K, VR content), the importance of high-speed network infrastructure, including 10 GbE or even 40 GbE, becomes paramount. This ensures that your storage can serve data quickly enough to keep up with intensive editing and rendering workflows.
Emerging Protocols and Interfaces: Stay informed about and ready to adopt emerging connectivity protocols and interfaces that offer higher speeds and efficiency, such as Thunderbolt 4 or future iterations of NVMe technology.
Leveraging AI and Automation
AI for Storage Management: Utilize AI-driven tools for storage management and optimization, including automated data tiering and predictive analytics for maintenance and capacity planning. These tools can help ensure that your storage resources are used efficiently and that potential issues are addressed before they impact your workflow.
Automated Archiving Solutions: Implement automated archiving solutions that seamlessly move older projects to more cost-effective storage tiers or cloud services, keeping your primary storage clear for current projects without manual intervention.
Ensuring Data Security and Redundancy
Advanced Data Protection Strategies: Beyond traditional RAID configurations, explore advanced data protection strategies that incorporate real-time replication, snapshotting, and encryption to safeguard against data loss, corruption, and security breaches.
Regular Review and Testing of Backup and Recovery Plans: Establish a schedule for regular review and testing of your backup and recovery plans to ensure they remain effective against current threats and capable of recovering data quickly in the event of a failure.
Staying Informed and Flexible
Continuous Learning: The storage technology landscape is continually changing. Stay informed about new technologies, standards, and best practices through industry publications, forums, and professional networks.
Vendor and Technology Agnosticism: Whenever possible, avoid locking yourself into single-vendor solutions or proprietary technologies that may limit your ability to adapt and upgrade in the future. Opt for standards-based, interoperable solutions that offer flexibility.
By anticipating future trends and challenges in video production, you can design a storage strategy that will meet your needs. Embracing scalability, investing in high-speed connectivity, leveraging AI, ensuring robust data security, and maintaining a flexible, informed approach to technology selection will position your video production workflows for success in the years to come.
Conclusion
The landscape of video production is one of constant evolution. This is driven by advances in technology, shifts in consumer expectations, and the ever-growing demand for higher quality content. Within this dynamic environment, the role of effective data storage solutions cannot be overstated. These storage solutions form the backbone of video production workflows.
As we’ve explored, RAID setups offer a blend of performance, redundancy, and capacity. The choice between hardware and software RAID, and among the various RAID levels, should be informed by a clear understanding of your specific needs, balancing speed, data protection, and budget considerations. Meanwhile, cloud storage solutions present a flexible and scalable alternative or complement to RAID.
Direct-Attached Storage (DAS) and Network-Attached Storage (NAS) further expand the storage options. The decision to integrate DAS or NAS into your workflow will depend on your collaboration needs, project sizes, and performance requirements.
Looking ahead, the future of video production storage is set to be shaped by several key trends. This includes the increasing adoption of SSDs, advancements in network infrastructure, the integration of AI and automation in storage management, and the ongoing need for robust data security measures. Adapting to these trends will require a proactive and informed approach. One that embraces scalability, leverages the latest technologies, and prioritizes the protection of valuable digital assets.
In conclusion, crafting an effective storage strategy for video production is a complex but critical task. By carefully considering the options and strategies discussed in this guide, you can ensure that your storage solutions not only meet the demands of today’s video production landscape but are also poised to adapt to the challenges and opportunities of tomorrow.
If you are looking to learn more about how we use Raid’s in our video production company, reach out today!
At Luma Creative, we had the privilege of producing keystone content for Cellares, a San Franscico Bay Area gene therapy startup valued at an impressive $3.2 billion. It was a highly technical video production project with multiple stand-alone outputs. We worked with them over several times on set as well as countless post production days to ensure the upmost success of their video content. This San Francisco biopharma video production was a wonderful opportunity for us to combine our cinematic prowess with a very informational subject matter.
We aimed to ensure the success of their public announcement via professional, cinema grade visual media, appreciating the trust Cellares placed in us given this substantial product release. Although Cellares had a limited timeframe, we were sure to hit their deadlines every time.
Project Overview
Project Type: Marketing video production
Location: South San Francisco, CA (2022-2023), New Jersey (Drone footage 2022)
Client: Cellares
Objectives:
Crafting a range of deliverables, including:
A compelling Leadership video.
An immersive End-to-End (E2E) run video for investors.
A dynamic and refined public E2E Software demo video to showcase the Cell Shuttle’s forefront design and technological prowess.
A montage Culture video to convey the company’s ethos.
Engaging ‘Mouse-over’ videos to enhance user experience.
Software video to demo the companies platform
Modeling for the company’s website.
Timeline
Pre-production meetings, several shoots, followed by post-production & editing.
There were two separate production dates during the years 2022-2023. The first for producing investor content, and the second focused on video production and other modeling content for public web distribution.
We first met with the Cellares team to establish clarity on the best ways to portray the product, company, and the impact of both. Would we shoot this with a small and nimble crew with a quantity approach or a larger, more polished and cinematic crew. They chose the latter. Looking for the best production quality within their budget.
As we dove into pre production. There were a few core questions. How was this story to unfold? How would visuals reveal it? How would the immense gravity of such a product be accurately expressed to viewers – instilling trust?
Deliverables and Portfolio
A Leadership video starring the notable immunologist Carl June (who pioneered gene therapy in the 70s and 80s), expressing his support and approval of Cellares’s cutting-edge services. A massive turning point for product adoption. This video lives on the front page of Cellares’ website.
This was followed by a dynamic Software demo E2E video outlining the straightforward and fundamental advantages of the Cell Shuttle with visuals of the workflow. The seamless transitions and complex product showcasing were executed with concise precision. Furthermore, one crucial visual includes a 360-degree production investigation, breaking down the core functions of the cell shuttle.
A short culture video (no audio) was produced to communicate the overall company persona, internal culture, and external impact. This would be used as a background video on the company’s careers page.
Among the noteworthy deliverables was a full-length E2E investors video we produced in 2022. This video offered an extensive journey into what Cellares could offer, which was pivotal in their product adoption and 2023 Series C funding success.
Software Demo which highlights the back end of how the cell shuttle processes can be customized for each application.
We also provided a few models based on their CAD files to precisely show in a 2d fashion the intricacies of their product.
Our portfolio showcases all of our publicly viewable Cellares projects. You can explore them in detail by clickinghere.
Behind the scenes
Conclusion:
In our partnership with Cellares, our goal was simple: to create a straightforward, clean narrative and informative visual content. We are proud to have been part of their market success. These videos now reside on Cellares’s website, enhancing user engagement and product adoption and conveying valuable insights about the future of gene therapy.
Our journey with Cellares has been a privilege, and we look forward to more collaborations that bring innovative ideas to life!
If you are looking for San Francisco biopharma video production, contact us today!
The Big Picture – Determining The Purpose Of The Interview
If you want to know how to prepare for an on-camera interview as an interviewee, you came to the right place. Let’s face it – gearing up for an on-camera interview might feel like a daunting task. But if you have ever represented your company face-to-face or know how to conduct an interview you will be glad to know that the path to success isn’t much different. The most important thing you can do is prepare.
Before you begin memorizing a grand speech, you will want to know the purpose of the interview and the audience. Consider the following questions:
Who will be viewing the interview?
Where will the interview be shared? [Will the interview be distributed internally at your company? Will the interview be shared on social media?]
Will the interview be broadcasted as a livestream or will you have the chance for multiple takes?
What are the main points of the subject you will present?
Prepare by answering these key questions. Do your research on the subject matter and know how the details connect to the bigger picture. In general, be ready to share about the subject matter as an outsider. Let the purpose of the interview and how it will be broadcasted guide the tone in which you will speak. Once you know the talking points and have a gameplan to address each possible question, run through your lines until you get it right.
Filming Day – Deciding What To Wear On-Camera
Now that you are ready to ace your response, don’t forget that presentation matters! The videography team will do everything they can to make sure you look good on camera. There are, however, a few things you can do to help out:
Avoid logos and clothing with small prints
Opt for darker fabrics but be sure to ask beforehand what is recommended for the setting and light set up
Bring a back up outfit to set
Aside from following these guidelines on how to dress for an on-camera interview consider again the purpose and audience of the interview and dress accordingly.
Ready to record! – Making A Good Impression As Interviewee
You prepared your talking points and you are looking sharp. You know just what to say but now that you have arrived on set, keep in mind these useful tips for how to say it:
Don’t respond with ‘yes’ or ‘no’. Respond to each question in a full sentence. [Ex: When asked what your favorite city is, don’t say “San Francisco”, but instead say, “my favorite city is San Francisco”. And if asked if you prefer San Francisco, don’t say “yes”, but instead say, “I prefer San Francisco.”
Avoid wandering eyes. Maintain solid eye contact with your interviewer. If you are instructed to look into the camera, do the same, and consider imagining someone you know to shake off any nerves.
Keep good posture. If you are sitting during the interview, be mindful of your legs and feet.
Speak succinctly. Keep your sentences short and simple. Avoid all filler words.
Avoid a monotone voice. Take your time and smile!
Don’t fidget. Keep your arms and hands relaxed but remember that body language is a tool. Use your hands to naturally aid your words.
When applicable, tie in a summary of your key message.
Finally, trust yourself and the preparation you have done. Just because you have prepared your response does not mean you need to read from a script like a robot. You want to appear comfortable and confident. Approach the session like a conversation. This is now your chance to shine as a storyteller!
Looking for more advice about on how to prepare for an on-camera interview as an interviewee? Check out these golden tips from those who have nailed it before.
Are you looking for a San Francisco video production company? Reach out today!
In the realm of video creation, two primary options await those seeking to create content. You have the option to hire a videographer or contract a video production company. While both can produce quality results, their processes, scope, resources, and costs can differ significantly. In this article, we’ll break down the core differences to help you decide which choice aligns best with your needs. What is the primary difference between a videographer vs a video production company?
1. Scope of Work:
Videographer: A videographer, often a solo professional or part of a small team, typically handles everything from shooting to editing. They’re best suited for smaller projects like events, interviews, and simple promotional videos.
Video Production Company: This is a full-scale operation involving a team of specialists for each phase of production. This may include scriptwriting, storyboarding, post-production, and distribution. They handle larger, more complex projects like commercials, corporate videos, and cinematic storytelling. Video production companies can bring in a specialized crew to get precision shots that require a lot of logistical planning or building sets that aren’t feasible for a solo videographer.
2. Equipment & Resources:
Videographer: Videographers usually own or rent their gear, which might be limited in variety but is professional-grade. They might not have access to the latest or most specialized equipment.
Video Production Company: These companies invest in state-of-the-art equipment and have a wider array of tools at their disposal – such as drones, specialized lighting, and top-tier editing software.
3. Cost:
Videographer: Given their smaller scale, hiring a videographer is generally more budget-friendly. This makes them a popular choice for startups and small businesses. Is your company just getting started? Do you want to see how your customers will react to a video? A low-investment videographer-based project might be the best fit!
Video Production Company: Given their resources, expertise, and the scale of projects they handle, these companies come with a higher price tag. However, the investment often translates into higher production value. Want a detailed breakdown of pricing? Please read our full guide on how much video production costs.
4. Flexibility & Personal Touch:
Videographer: Videographers often offer more flexibility in terms of last-minute changes and can provide a personal touch to their projects. Changes are faster to implement for the team.
Video Production Company: While they operate within a structured process, many production companies value client input and collaboration. They may be less agile with last-minute changes due to the larger teams and predefined processes involved. However, they may offer more flexibility with scheduling or have multiple crews to finish your project sooner.
5. Specialization:
Videographer: Many videographers develop niche specialties based on interest or demand, such as wedding videos, documentary-style content, or corporate interviews.
Video Production Company: These companies often cover a broader range of styles and can pull from a team of specialists to best match the needs of a specific project.
6. Post-Production:
Videographer: While many videographers have editing skills and can offer basic post-production services, their offerings are limited compared to full-scale companies.
Video Production Company: With dedicated post-production teams, these companies can provide advanced editing, sound design, color grading, graphics, animation, and more.
7. Scale and Multiple Projects:
Videographer: Videographers might be more suited for one-off projects or a series of small-scale videos. They may be more effective for projects like monthly social media retainers which require frequent content creation at a lower production value.
Video Production Company: If you’re looking to produce a series of videos or need content on an ongoing basis, a video production company, can often handle multiple projects simultaneously. Agencies have more resources at their disposal to scale.
Take a look at this short video for more info.
Conclusion:
Your choice between a videographer and a video production company should depend on the scale, budget, complexity, and specific needs of your project. For budget-conscious projects, a videographer could be the perfect fit. For larger undertakings aiming for a grander scale and top-tier production value, investing in a video production company might be the best route. A video production company like Luma Creative can also help with your social media presence with our social media marketing services.
Remember, the ultimate goal is to effectively convey your message and engage your audience, so choose the option that aligns best with your vision and objectives. Thanks for reading our article on a videographer vs video production company.
Luma Creative can provide an experienced videographer or full video production services. Our offerings are based on your needs and budget. Reach out today to learn more!
Picture this. You’ve just finished up editing your 30 second commercial masterpiece. Your pacing is spot on. The foley sounds great and your sound mix is finally locked. To your surprise the client only had a few minor changes and loves it. Your deadline is in two days but you are wondering if you should send the final video to a professional colorist? If you are looking for this video to have as much polish as possible, we couldn’t recommend it more. In this article we’ll discuss if you should hire a professional colorist for your video production.
What is a professional colorist?
You might be wondering, what is a professional colorist? The simple answer is that they are someone or a team of people who will make your video’s colors fit your desired look. Not only will they work with you to develop a look but they’ll make sure that all the images fit together. Is there was some underexposure in half of your shots? Did your DP tend to shoot warmer then you would have liked?
According to Adobe, “color correction will unify your footage.” The colorist will take care of matching all the shots together. They’ll start by doing simple color correction of the hues and tones. Once they have matched the footage, then they will usually move on to doing a more complex color grade.
The color grade is where things really come to life. At this stage they’ll likely start any motion tracking and creating track masks, fixing simple technical errors, and directing the viewers attention to the subject. This could mean darkening everything in the image except the product or lightly blurring out the background. In today’s world, the line is sometimes blurred between simple VFX and things a professional colorist can do. For the sake of this article, we’ll assume the colorist isn’t handling any green screen VFX or more complicated tracking, but it can be done!
How much time does it take to color a video?
Color correction can take a drastically different amount of time depending on how complex the color correction is. Is there complicated tracking and a lot of re-lighting for a feature film? Or is the video a simple 30 second spot with more of a simple grade? Most commercial’s are graded in a single day. Often times even less.
Depending on the level of the color correction artist or studio, you may even be able to video chat or go in for an in person color correction session. We find it’s very helpful to pull references for our colorist so they know what world we are looking to end up in. Typically we’ll color a few shots with them over a video chat and then let them get to work for a few hours finishing it up. A good colorist can take your film from bland to grand!
How much does a professional colorist cost?
Just like most things in the video production world. The costs can vary highly. If you are wondering should you hire a professional colorist for your video production this will definitely be the biggest concern. We’ve found that rates vary quite drastically. From several hundred dollars for a project to several hundred dollars per hour.
The skill level of your color correction artist will likely dictate how much they charge. Is the colorist represented by a color correction or talent agency or are they a freelancer? Are they working out of a studio or their living room? At the end of the day, a strong portfolio and ease of collaboration will dictate much they are charging. Some of the more well known post production studio’s in the Bay Area are Roast N Post and MFD.
Conclusion
Thanks for checking out our article. Simply put, if you are shooting a professional video and spending the money on a fancy cinema camera and lenses, you should definitely consider having your video professionally colored. Let us know if you have any questions. We are a San Francisco based video production company who will elevate your brand!
As a production company in San Francisco, we make all types of videos. We shoot events, explainers, interviews, commercials, and everything in between. Every job is different. We often work directly with clients or under an agency. The main difference is oftentimes who takes care of the initial creative. Has the agency been working with the client for many months to hone their messaging, or do they need our creative support? If we are responsible for the creative, then oftentimes, after pitching the initial idea, our director will create a director’s treatment. When we first started, we asked ourselves, “How to create a director’s treatment”?
When we first started, we found the idea of a director’s treatment quite intimidating. What are they, and when should we make one? Surely, we didn’t need to send it to every client! After much research and many times making them, we think we’ve finally got a handle on them. In this article, we’ll break down how to create a director’s treatment.
What is a director’s treatment?
A director’s treatment is a visual document comprised of words, photos, or GIFs that describe a story. It is typically broken down into sections, including, but not limited to, the intro, story, characters, look, wardrobe, production design, editing, sound design, and conclusion. According to Thefutur.com, “The director’s treatment is an important tool in the pre-production process to give potential clients a clear roadmap of what to expect from the final video.”
When should you write a director’s treatment?
Let’s say your client comes to you wanting to shoot a commercial for a new coffee mug. They tell you their idea and ask you to pitch them yours. Sure, you could just describe it to them, but would they really be able to see your story come to life? As creatives, we often have a very visual mind, but it’s important to visually convey that story for everyone on the client’s team to see.
It is much more cost effective for you to make a treatment before shooting instead of shooting and editing only for the client not to like the visual direction. Maybe it was too light and bright for their taste, or the locations just didn’t fit their brand. Each section you write gives a conversation starter so you can express your ideas and have a jumping-off point.
Are they top secret?
Many directors feel that their secret to winning jobs is in their treatments. This could be due to their ability to resonate with the client’s vision or their ability to articulate themselves via text and images. It’s important as a director to find your own voice. It can take time, but through repetition, you’ll start to get a rhythm for what works for you and your clients. Sure, looking at examples can give you some ideas, but it may actually end up stifling your creativity in the long run!
Key sections explained
Intro: This is where you should introduce yourself and relate to the project. How can you connect with the mission or product? How can you elevate this video?
Story: After taking a look at their story, how can you elevate it? Do you go bold and take it another direction? Or do you play it safe and just make a few small tweaks? We’ve had success with both approaches. It can be helpful to ask how bold they’d like you to be before writing something. Maybe they already have the idea and just want it polished? Other times, they may just have a seed of an idea and really want it fleshed out. Either way, this is where you’ll write out the core storyline.
Characters: Who are the key characters in your story? How can you give them a personality that comes to life? It can be helpful to describe their ethnicity, age, hobbies, and background. It might also be helpful to note that a location or non-living thing can sometimes be a character.
Look: How is this piece going to feel? Is it dark and moody? Light and bright? What aspect ratio are you looking to use? Are you going to shoot anamorphic? Use this section to describe and show what they should expect with the images you will capture. This would also be a good place to mention your Director of photography and any relevant work.
how to create a director’s treatment
Wardrobe: What do you imagine your characters wearing? Can you draw on references from any other movies, periods of history, or styles?
Production design: How will the worlds you create look? Once again, try to use as much visual language as possible. If you were to read this to somebody else with their eyes closed, could you put them in the world? What would they be seeing? What would be in the scenes?
Editing:Editing is critically important to have a story turn out. What kind of editing will you use to make this story flow? Will you use chronological editing? Will you use time-shifting? Should it be paced fast or slow? Will you linger on certain moments more than others? Asking yourself these key questions can help you decide what the editing will add to the story.
Sound design: Not all videos have sound design, but from our perspective, sound is one of the most overlooked elements of a good story. They can play up subtle moments or give the viewer extra motion. What kind of music will be playing? Will there be any music at all? Will there be sound effects or any sort of Foley to bring it to life?
Conclusion: Thank your readers for reading your treatment. Leave them feeling inspired and ready to get started! You’ve just learned the last step of creating a director’s treatment.
Where to find reference images?
You might think that once you are done writing your treatment, you are done. However, that is far from the case. You should be spending just as long looking for reference images as you should writing your treatment. At first, this section can seem overwhelming and daunting, but it truly is the most important part. Likely, you are not re-creating the wheel and can find images that look somewhat like what you are trying to describe in your writing.
In the past five years, many websites have been released where you can find cinematic-looking images, whether those are from previous commercials or feature films. A few of our favorite websites to look for images on are Shotdeck, Film Grab, and Film.AI. Another helpful place is to look at other directors or DP’s Vimeos. Try looking at what they like and see if you can find something you resonate with for your story. Lastly, try looking at other brands’ commercials in similar spaces to see if you can find what you are looking for.
Conclusion
Thanks for taking the time to read our article on creating a director’s treatment. Hopefully, it has been helpful and will take your treatments to the next level. If you are looking for a San Francisco video production company, reach out to us today!
While most of our video productions occur within the San Francisco Bay Area, we get the opportunity to travel for work a few times a year. Recently, we were sent to Austin, New Orleans, Vancouver and Maui for a Bay area tech company. With any travel job, we ask ourselves if and how much equipment we should bring with us. Sure, we could source everything locally, but that often requires more costs and prep time. For this shoot, we decided we’d bring camera equipment with us and source grip and electric locally. The equipment would be comprised of our personal gear as well as rented equipment from a few rental houses. Given this was our first time shooting internationally, we found ourselves asking our if we need a carnet. In this article we’ll talk about if you need a carnet for international video production and the details it entails.
What is a carnet?
When we booked our last job, we knew it was time to get educated on what a carnet was. In simple terms, a carnet allows you to import and export equipment into another country without paying import duties. Think of it this way: a foreign country doesn’t want you bringing goods into their country and selling them and then taking that money back to your home country. Instead, without the carnet, they’ll collect an import tax to make up for this cost assuming you’ll sell the goods in their country. You might be asking yourself, can I get away with not bringing a carnet? Legally, you should have one, but if you are there with just a few pieces of small and inexpensive gear for a personal trip, you should be fine. There are around 80 countries that require them, so do your research before heading on your trip
How do I get a carnet?
If you’ve decided you need to get a carnet, it’s now time to make it happen! There are many companies that will help you get one including: Boomerang carnets, Filmlogic, Roanoke Group and more. The fees associated with each company vary widely so it’s important to inquire before selecting your processing company. The steps for each one should be relatively similar.
Collect name/serial number/ value of each piece of equipment you’ll be temporarily importing.
Provide travel information and fill out application
Submit tax return or financial statements for surety bond.
Receive your Carnet.
You might be thinking “why do I need to submit a tax return or financial statement?” According to Boomerang carnets, “The U.S. national guaranteeing association for carnets requires that all U.S. ATA Carnets be financially secured.” This means that they want to be sure you can pay the import or export duties should you bring extra equipment with you either direction. To complete this step you’d either need a surety bond or a certified check for a specific amount of the total important amount. Read more on that here.
How long does it take to get a carnet?
The process of getting a carnet is pretty quick if you have all the serial numbers and equipment compiled. From there its just about filling out a quick application and providing your proof of business income. Within 24hour you should hear from your chosen company and can have your carnet within 24hour of confirmation via overnight shipping!
What do you need to do with the carnet?
There are a few important steps with the carnet to ensure you don’t get billed anything afterwards.
Get the stamp before leaving your home country that proves you are taking the equipment you say you are. This will likely require additional time at the airport as you’ll need to find customs inspection. For our recent trip this was on the complete other side of the airport.
When going through customs in your destination country get another stamp where they verify you are not importing anything other than what is on your list.
Once again, when leaving the destination country, you’ll need to arrive early to go and visit the customs inspection station. We might also recommend making an appointment. This will give you your final departure stamp.
When you arrive back in your origination country, find the customs inspection, or have the info center bring an inspector to you. They will give the final signature and stamp to prove you are not importing anything other than what you left with!
Conclusion
All in all the idea of a carnet can be a bit frightening at first. If planned properly, it is not a big deal at all. My biggest tip would be to start your gear prep early to collect serials and plan plenty of time at the airports to get the required stamps! If you are looking for any information on a carnet for international video production, feel free to reach out!
As live events are coming back to San Francisco, it’s obvious people are excited to get back together. From concerts, to museums and beyond, people are ready to get out there! Recently, we were hired to film an event sizzle video for Allraise at the Midway in the Dogpatch. We also captured the keynotes and provided photography for their two day event in San Francisco. Our team delivered a 60 sec cutdown, a 30 sec sizzle video, 8 hours of session content and an edited photography gallery within one week of the event. We provide San Francisco event sizzle video and photography for companies looking to stand out!
Allraise sizzle video
Day 1 – How we captured the content
On day one of the event, the first thing we captured was content of the participants signing in to the event and networking. This gave the participants a chance to warm up to the event as well as get some food! We captured signage and a few establishing shots. These intro aerials provide us stunning shots of the skyline to set the scene in San Francisco. After the welcome meet and great, the high energy sessions began! They started with a marching band to bring everyone into the main auditorium. The anticipation was palpable! It was critical for our San Francisco event sizzle video that we get snippets of this! Our photographer also made sure to get into the action and capture as much as possible.
These keynotes were highly engaging and you could feel everyone’s excitement! From industry overviews to the current state of the economy, the presenters were flawless. The day wrapped up with us capturing a few breakout sessions which were a bit more intimate than the larger keynotes. During this time, we took the time to capture more networking for both our photography and videography. At the end of the day, the event organizer and countless staff flipped the main keynote room into a gorgeous dinner where the attendees got to sit back, network, and enjoy some tasty food and wine. Our video production wrapped up for the day at this point, but we had to get a few shots for the video!
Day 2 – Why we captured the content
On day two, we focused on getting more audience reactions during the keynotes for both photography and videography. This day was a similar flow to day one with just as much engaging content and information. We wrapped up shooting the event with some more formal photos of the participants as well as the Allraise team members. The excitement to get out there and seize the day was infectious. We left feeling hopeful and looking to the future for more great San Francisco event sizzle videos!
Why make a sizzle video?
They are bite sized and easy to share.
They build momentum after the event to generate more interest in future events.
There are many different types of Bay Area video production that we offer at Luma Creative. From commercials to explainer videos and everything in between, we shoot nearly everything. Some of our videos require interviews, so we feel we’ve gotten pretty good at capturing the content we need to make the video a success. One of the most common questions we get is regarding our professional tips on how to conduct an interview on video. There are many different styles of interviews such as documentary interviews,corporate, or video journalism. Below are some universal tips that we wanted to share for your next interview:
Know Your Purpose – Make sure that you are clear with the goals of your end deliverable or video piece.You should know the overall story you are looking to get out of the interview before it begins. Leave some room for discovery but ultimately, you are responsible for getting the soundbites that will make your video come to life.
Choose the Right Interviewee. Pick someone who will represent your purpose, who is articulate, comfortable on camera, and has all the questions in advance so they can prepare.Often times it also helps to hop on a pre-interview call to connect with them and make sure they are setup for success. Most people are not used to be on camera, so making them feel comfortable before arriving can go a long way. With our crowdfunding videos, it’s often the first time someone is on camera so it can be easy for them to get nervous! Looking for some preparation tips for your talent? You can send them this article on preparing for an on-camera interview.
Do Your Research – It’s important to be able to think on your feet. Have an understanding of the subject before you sit down with them. This means being informed on the subject and knowing the right questions to ask. Sure you could use a teleprompter for your subject, but often times this feels staged or too rehearsed.
Have a proper crew – When learning how to conduct an interview for video production, it’s important to remember this is a team activity. It’s ideal to always have an interviewer next to the Videographer, so the videographer can focus on the shot/sound and the interviewer can focus on the content.You always want to makesure the lens is perfectly aligned so when the interviewer answers the questions, it looks like the eyes of the subject are aligned in the shot, vs looking shifty or all over the place.Another tip can be to use an eye direct, which allows your interviewer to be a bit further away and have the interviewee look directly into the lens to see them.
Light Your Subject – We can’t stress this enough. Lighting is everything and will set up the mood. The interview won’t be useable if the light looks too dramatic or the subject hates how they look. We will often show the subject their shot, so they approve it verbally. You’ll need at least two lights, preferably three. A soft source is best for your subject, a second light for the background, and a third for either fill light, hair light, or a side light (variously called an “edge” light or “rim” light)
Test Your Sound – Audio is everything. Not only should you be recording sound in multiple ways, but you should be monitoring it throughout. We often times will use both a lav mic, hidden under the subjects clothing as well as a boom mic. This will give you a few options in case one doesn’t sound ideal.
Prepare, but be spontaneous. Go into the interview with a plan. What sound bytes are you looking to get out of the interview? Once you’ve got the soundbites you need, feel free to ask the subject if they have anything to add or if there is anything they think that they missed.
Get the interviewee comfortable. I can not stress enough how building a rapport is essential to the success of the footage.Do they need any water? How has their day been so far?
Have the subject repeat your question when they answer. Avoid “yes” or “no” answers.This way when you cut yourself out of the interview, they’ll set up their answer for you!
Keep your mouth shut when the subject talks. Or if the subject starts talking when the interview question is not complete, you need to have them repeat so the editor has footage they can work with.Yes it is a conversation, but at the same time, keep the edit in mind?
Do you have any thoughts on how to conduct an interview for video production If so, let us know! We are a San Francisco video production company who will take your production to the next level! Contact us today!
Video Production in San Francisco presents many challenges. For starters, it’s a logistical nightmare. Busy streets. Extremely limited parking. Not to mention challenging weather. To make matters worse, security has been a big concern over the last several years. Too many stories of camera’s being stolen on film sets or people being followed home to get their camera gear. In this article we’ll discuss the different kinds of security as well as the few options, whether armed or unarmed? How many guards do you need? In this article we’ll show you how to hire security for San Francisco video production.
When do you Need to Hire Security in San Francisco?
This is the question we get asked most often. When clients from out of town see this line item on a budget, we often get asked about it. Do you really need security to film in San Francisco? The answer to this question is almost always “Yes!” Anytime you are permitting a location in San Francisco or shooting with any sort of a setup, it’s almost imperative that you consider security. Not only do you want your crew to feel safe, but you want to put up your best efforts to keep your camera equipment safe. After all, cameras and lenses we shoot on are anywhere from a few thousand dollars up into the 100’s of thousands of dollars.
Do you Need Armed/Unarmed Security or Off Duty Cop?
At first this question didn’t make make much sense to us. Would an armed security guard really be able to fire a weapon? The short answer is “yes”. After talking to a security company who provided services on one of our recent sets. They are legally allowed to fire anytime someone on set has their personal safety at risk. That means if a potential robber pulls out a weapon, it’s okay. However if they do not present a weapon, the security guard must use their non lethal option. Pepper Spray or similar. This isn’t to say that an unarmed guard doesn’t carry a non lethal weapon as well, but they don’t carry a gun. However they still provide a deterrent and let potential robbers know that this production is taking safety seriously. The last option is an off duty Cop. They can carry a weapon and fire it as well. Likely the provide the biggest deterrent. But of course is subjective.
How Much Does Security Cost?
The rates vary by company, but the last time we hired security we were quoted $75/hr for unarmed guards. $100/hr for armed guards and $150/hr for off duty cops. If you are wondering how to hire security for San Francisco video production you’ve probably already thought of the costs.
How Many Guards do you Need?
Most companies have a four hour minimum and the guards need a single break during that time. This means that likely it’s smart to have to in case of anything happening during one of their breaks. Depending on the size of your set you might consider additional. Are you blocking down a street with multiple entrances to your set? Perhaps you could have a guard at each entrance? Do you need your camera or lighting vehicles watched? Sure a production assistant could do this, but likely don’t provide the same deterrent that a guard does.
Summary
Thanks for reading our article on how to hire security for San Francisco Video Production. We hope you understand how easy it is! There are many companies that offer this service and are happy to make your shoot go smoothly!
Here’s a list of Security companies providing security to film sets in SF.
As video production technology has advanced time and time again, the bar has been raised on how fast and at what quality videos can be delivered! There was film that turned into tapes and then eventually turned into digital and now there is instantaneous offload. We were part of a shoot recently where only minutes after thirty-minute interviews were captured, the editor had proxies show up in their Premiere timeline. This was thanks to the new Frame.io Camera to Cloud or C2C. How did this work? What additional hardware and software is required? In this article, we’ll show you how a camera to cloud can speed up your workflow!
With this new technology, you’ll be able to speed up your workflow like never before. Long gone are the days of waiting to get home to offload to a drive. Then mail it to your editor with expensive overnight shipping or stressful mishaps. Now, literally within moments, your editor will be able to start cutting the footage, so you’ll have a rough cut before the day is even over. Yes, there are products such as Gnarbox which allow you to edit in the field, but this Frame.io C2C is much more powerful! We’ll break up the sections into Frame.io subscription, hardware, software, workflow, and final thoughts.
Frame.io subscription
The first thing to consider when you want to do C2C is that you’ve got to have a subscription to Frame.io’s paid plans. Their plan pricing is broken down on their website. Essentially you’ve got to decide how much storage space you want. Even with their Pro $15/month plan, you’d be off to the races with C2C. And quite frankly, with how expensive overnight shipping can be, this price is an absolute bargain. You will not have to stress about a hard drive getting lost and missing a deadline. No after-hours fees for your editors, just a solid platform that will make a difference in your workflow.
This isn’t even getting into the plethora of other features that frame.io has, such as notes dropping right into a Premiere timeline! Maybe you were like us, and were using Vimeo review pages for client feedback. While this works well, you’ve still got to toggle back and forth between the web browser and your editing software. When considering how a camera to cloud can speed up your workflow, this is definitely the first start. Not only will you have your footage immediately drop into your timeline, but you’ll several other features that will add value as well! Check out the Frame.io website for more information
Hardware
Now that you have a subscription to Frame.Io’s pro plan, let’s explore what hardware you need to make C2C work. The most important piece of hardware would be a video encoder like the Teradek Cube 655. This device encodes h.264 files and uploads them to the internet. It also has onboard SD card recording for onsite proxies. You no longer need to bog down your camera creating proxies as well as recording the high-resolution media. On a recent shoot, we used a Canon C300ii, to create local recordings as well as proxies. One of the proxy SD cards had an issue so we were happy to have the Cube’s backup copies!
The next thing to consider with your workflow is how mobile you’ll need to be and in what locations. If you are in an office environment, you’ll likely have access to power and solid internet access. But what if you were out in the field and running everything off of batteries and with somewhat unreliable service? The great thing about this workflow is that it is flexible! If you are wanting to keep your camera build small, and not have the cube directly on the camera, you can either hardwire to the device or use a Teradek Bolt XT or 4k compatible wireless set.
Internet Access
Additionally, because the files are saved locally to your cube on the SD card, if you hotpot your phone and then lose service, the files will automatically resume uploading after you regain service. It’s important to note that these files will only upload up to 24 hours after the shoot.
Another benefit of using the Cube is that it is encoding for the Vuer app. This means that clients can remotely watch on set with minimal latency. You won’t need to have expensive monitors for all clients and even with distance protocols in plce. This app will also pass along audio for remote clients in other parts of the building on the same network!
The next piece of hardware that the Frame.io C2C workflow is compatible with is the Sound Devices 888 and the Scorpion. If you are recording audio separately from your camera, you’d be able to transfer either original audio files or proxy files to the cloud and into Premiere pro as well! This means that your sound tech can have a remote team as well! The possibilities are truly limitless.
Software
In order to make the C2C workflow happen, you’ll need to have the subscription, hardware as well as compatible video editing software. Adobe Premiere Pro is our editing software of choice, but this C2C is also compatible with other software as well such as Final Cut Pro X or Davinci Resolve. At the end of the day, switching to one of these platforms even to just ingest your clips would probably be worth it to save time! You can always take those proxy files and auto import them into other NLE’s as well. The editor can follow along as the shoot progresses or they can import the clips at the end of the day!
All in all, we firmly believe that C2C is going to change the game forever! You’ll be able to deliver higher quality video’s in shorter periods of time! For more information check out the Frame.io C2C FAQ’s. Remember, this software is still in the early stages and we expect to see updates to the compatibility and workflow suggestions as well!
Thanks for reading our article about how the camera to cloud workflow can speed up your workflow! If you are looking for extremely fast and high-quality San Francisco video production, contact us today!
As work gets back to pre-pandemic levels, digital content is more important than ever before. Events need sizzle videos, brand-name products need commercials, and non-profits need informational content. Video production is critically important to a brand’s success. In this article, we’ll breakdown a few ways to budget for video production to ensure maximum budget utilization and efficiency for the best outcome.
We often get asked, how much will our video cost?. It would be great if we could just throw out a number, but it’s rarely as simple as a few-second decision. Due to the number of variables that go into production, costs can vary. In the article linked above, we discuss the many factors that can impact your video production budget. For this article, let’s discuss a few methods we’ve used to help maximize the on-screen value for the most impact. We’ll outline a few tips according to each stage of the production process: Pre-Production, Production, and Post Production.
Pre-Production
While it might seem obvious that a big chunk of the video production budget comes from production, it’s actually in the pre-production phase that can help save costs down the road. Having a solid game plan can help set up the team for success and prevent unnecessary and costly delays.
First: Finalize your creative concept before moving on to pre-production. This will prevent wasted resources trying to make the production happen before the creative aspect is even finalized. Once you start locking down crew, locations, actors, and insurance, a change of the underlying story can significantly complicate the project quickly.
Second: Lock your budget before you finalize creative. For example, a creative brief that relies on a high-speed chase sequence through a downtown area will cost more than an actor walking in a public park. Just on the insurance cost alone, the video production budget can be dramatically different. Depending on the level of production, you may get a brief from an agency and be working with repped directors providing production support or you’ll just be a hybrid agency/production company working on both the creative and production side of things. The sooner this budget gets locked, the quicker you can get the pre-production underway.
Third: Decide which crew members are absolutely necessary and which are nice to have. It would be awesome to have a 2nd AC or an extra grip on every production. But many jobs’ budgets don’t justify the cost. You may be able to adjust your budget allocations to different production aspects later in the process. Every job is different and you should talk with your department heads to discuss the best choice crew and the minimum to get it done well. A happy crew will work much better than a grumpy crew!
Production
Now that your pre-production is complete and you are ready to shoot your video production, let’s break down a few ways to help allocate a budget wisely.
First: Avoid overtime by eliminating numerous takes. Does the director need coverage from three angles? Do you really need all those insert shots? When overtime is on the line, you’ve got to decide which elements are absolutely necessary to tell the story. Before the shoot day, we highlight the “critical shots” and what are “nice to haves” if we have extra time. You want to make the best video possible, but is it worth going into overtime for a few additional options?
Second: Stagger your shoot day to give different departments a lunch break when they are not actively needed. This primarily applies to Grip and Electric (G&E). If you are rolling the same set for a few hours but have a change after lunch, have your G&E team take lunch an hour before general crew lunch. This would allow them to start setting up for the next shot while the other crew is eating. Be 100% sure you won’t need anything from them during lunch or things could get complicated quickly!
Third: Ensure solid communication. We aren’t just hiring workers, we are hiring humans. As video production sets get bigger and chains of command get longer, it’s often easy to lose sight that a person is doing a task. From actors to the crew, everyone plays a role! If someone misses something, it can get costly quickly. If one task is delayed, other aspects are delayed and you risk going overtime. Yes, it’s work, but film production should be fun when it’s appropriate!
Post Production
You’ve almost finished your video production, but now you’ve got to do post! Let’s see what we can do to save some cash.
First: Ensure you have a strong treatment and final outline for the video before starting editing. This can help minimize the number of revision rounds and editing day rates.
Second: Create a stages of post-production document for your client and have them sign off each stage of the way. It might seem great to go back and change the order of shots after the picture is locked, but it’ll create additional costs with your editor and colorist to sync things up again.
Third: Consider alternative sources of music licensing, depending on your project and delivery platform. Music licensing fees can add significant costs to your budget. Instead of paying a pricey corporate license for a song, you might consider hiring a musician who is familiar with music scoring to help create a custom piece. This can also be costly, but less so than a generic song with extreme licensing costs. The cost and creative outcome of a custom piece can elevate your creative vision.
When people think of nonprofit video production, they usually think of low budgets. They wouldn’t be wrong in that thinking, as most don’t have big budgets. But that said, there is still money to be made. Over the past 10 years, we’ve had the privilege to work with several nonprofits including the Boys and Girls Club and Pajaro Valley Shelter Services. Not only were these shoots profitable, but they gave us a chance to give back to the community and make a big difference for these organizations. In this article, we’ll show you how to make profitable videos for nonprofit organizations.
Before we dive in, let’s define what a non-profit is! These organizations are operating “not primarily to make a profit”. Meaning their primary purpose is something for the better good of society. Think charities, shelters, churches or other organizations making a social difference in the community. The most common type of non-profit is a 501(c)3. Think YMCA, American Cancer Society, Society of Leukemia and Lymphoma, Red Cross etc. All of these are potential clients when it comes to nonprofit video production. We’ll walk you through how to budget, potential tax incentives, goodwill as well as potential referrals.
Budgeting
Camera
Our best suggestion when trying to determining how to make profitable videos for nonprofit organizations is to be smart about your budgeting for a project. This means that even if their budget is low, you may have to approach these projects differently than others. Maybe you shouldn’t rent that super expensive camera, or hire a 2nd AC. Could your DP also listen to audio? While there are obvious trade-offs to your film crew wearing multiple, hats, on these projects it’s obvious that you can’t have all the luxuries usually afforded with larger productions. Set your budget early on and stick to it. Remember story is king! If you can tell an emotional story with a Sony A7siii or a dry story with a Alexa Mini, it’s probably a tough choice.
Crew
Perhaps the client has told you that they have 7k max for the project. How much profit margin are you trying to keep for your video production, including pre-production, production, or post-production. Perhaps you are looking for 30% margin plus a day rate for yourself with a slight discount since it is nonprofit work. Maybe that leaves you with $4000 to put back into the production. How can you maximize this number? First, let’s assume we are shooting a testimonial and not a commercial. This means, likely it’s a genuine story from real people, and not hiring actors. This will significantly cut down on acting costs. Likely locations will also be free since you’ll be highlighting the organization’s real location!
Therefore this 4k can go to cover crew, rental, and post-production costs. Maybe you can wear two hats and just get away with a DP and a PA/grip. This combo can likely cost you less or equal to $2000 so you’ve got another $1000 for a BASIC camera package and a light or two and $1000 for post-production. While definitely a slim budget, there is still quality to be had. Perhaps the DP already has a camera you can rent for a reasonable, or they have some lights they can throw in? While we like to pay crew full rates, sometimes they can be a little flexible with their rate or rentals if they know it’s for a nonprofit. Just be sure to give them their full rate on future projects, as it can go a long way in the industry!
Post Production
So now you’ve got $1000 for post-production. Likely this will go to an editor or a colorist to put the final polish on the production. Depending on the number of revisions this could take anywhere from a few days to over a week! Definitely not the budget we’d like to post-production, but maybe you can upsell some additional cut downs, down the line.
Tax Incentives
This section can get a little tricky, depends on your tax situation. Given their budget is likely less than you would typically quote for the project, you might be able to get a form donating part of your services as a charitable donation. This portion of the project is tricky because it involves extra steps at tax time. We’ve also heard stories of companies getting challenged about the amounts they put for these donation values. Be diligent to put real numbers here based on actual costs but be realistic about all the unpaid time you put into the preproduction. This is one of our biggest tips on how to profitable videos for nonprofit organizations!
Goodwill
The next section talks about goodwill. As citizens of the planet, we have an obligation to do better for the community and our planet. That means, making films that will make a difference really help make this happen. Yes, it is your job, but every once and again these videos can really make you smile and help those in need. If this was a corporation and they were haggling you, that’s a tough pill to swallow, but frankly, if this is a legitimate non-profit, likely their budget truly is very small!
Referrals
The last section has to do with referrals. You never know where one job could take you. Do a good job and you’ll likely be back for another video. Do a great job, and you’ll likely be doing video production for other companies as well. Likely viewers will see it and be curious who made it. Or perhaps the person you are working with, has a spouse in a for profit organization! You never know who you might meet through someone else. Over the years, we’ve found networking in the industry can go a long way! Whether its with other crew we might be able to hire in the future, or other potential clients who we know through new friends!
Hopefully, this article gave you a good idea of how to produce videos for nonprofit organizations! It really doesn’t have to be that hard. Just scale down the production and you’ll be off to the races. Last but not least, don’t forget to have fun while making these videos. Likely you choose to do this project instead of the sheer profit margin calling your name!
One of the many factors that go into the final quality of a video is Its color. Maybe you are shooting your video production on a Sony Venice or an Alexa Mini LF. High-end cameras that produce high-end looks. That’s awesome! But if you are just going to put a standard LUT and not tweak the image much, you will not be maximizing the value these cameras provide. The out of the box looks will get you to a great starting point, but without fine-tuning the image, the quality will likely not be as good as a cheaper camera with a solid color grade. In this article, we’ll discuss when to hire a colorist for your video production.
But what exactly does a colorist do? Sure, maybe you are familiar with basic color grading or use tools such as Lumetri in Adobe Premiere Pro to get your video dialed in. A colorist’s whole job is to adjust the image in order to suit the look the video. This can involve, balancing different cameras. Motion tracking parts of the image. Isolating or changing colors. Etc. It’s definitely one of the most overlooked parts of video production as far as small video production operations go.
Yes, you can get yourself pretty close by yourself! But likely, by the time you get to the color correction part of the project, you’ll be burnt out and ready to move on. It’s takes a video editor some serious focus and a plethora of time to be able to accomplish both a thoughtful edit as well as a killer color grade. In this article, we’ll break down the few questions to ask yourself when trying to evaluate if you want to hire a colorist.
Do you need it to look as good as possible?
The first question to ask yourself when evaluating when to hire a colorist for your video production, is who will be watching this video? If it’s an internal video for a company that won’t get too many views, then likely this additional cost won’t make a big difference in you getting more work. Likely for these jobs, you’ll just use Lumetri or a similar grading program to get the image looking good but not the best it could. But if you feel it’s got a great story and the potential to push your portfolio further. You might consider it. At the end of the day, certain projects need to have that polished look, while others can get by with something a bit simpler. It’s really up to you to decide.
For example, when we shot our Sitpack project, we knew this was going to get a lot of external views. It was going to be displayed prominently on a big crowdfunding campaign. We also knew it had a cool story. To us, this meant it had the potential to bring more work and would help generate revenue for the crowdfunding campaign. We decided to hire a colorist and we feel it was one of the best decisions we made on the project! Obviously, we needed money to make this decision, and because we had a little bit left over at the end of the project, it wasn’t a hard choice.
Do you have time to send your project to a colorist?
The next question to ask yourself is if you and your team have time to send it to a colorist. Although the process isn’t exactly super tough, it definitely takes time. You need to send the original project files either over the internet or on a hard drive. You’d also need to export the data from your timeline. Likely in an EDL format. If you used effects such as warp stabilizer or other titles or graphics, you need to remove those and then add them back in once the colorist sends the project back to you. Here’s a cool guide on how to prep your project for color correction. This can be frustrating if you forget something!
Color prepping
The next step of the process once you have prepped it for color is to wait for them to color the project. Some colorists are pretty fast for a relatively simple project. Others take a lot of time and are extremely meticulous. You can also attend virtual color sessions to dial in the look even more. Be sure you are using a calibrated monitor for this. Once they start to create the base look for the project, they will likely ask you for feedback before continuing on to make more granular choices. After this, they will send the video to you to review. Hopefully, it’s looking great, but if not, you may have to spend another day or two to get the image precisely how you want!
Once the colorist has finished the project, they’ll then export all the clips back to you(usually with handles for adjustment if needed). At this point, you’ll need to relink all the files and then add back in all your effects and graphics. When evaluating when to hire a colorist for your video production, definitely don’t forget to budget for at least three days to round trip the whole project.
Bonus time saving tip!
While we are on the topic of speeding up your workflow, one of the newest trends in video production is camera to cloud. This will allow your editor to get the project that much faster! You’ll be able to save at least a day at the beginning of your project, as your editor can literally start editing the project as your shooting day progresses. The cost for something like this is the Teradek Cube 655 plus the Frame.io plan! So perhaps around $2200 to get set up for a year. Then you are off to the races. This can allow you to have more time for your color colorection.
Are you matching different cameras?
Let’s say you got the time and the money, but aren’t exactly sure if it’s going to be portfolio-worthy. This is a tricky spot to be in. Do you just finish the project quickly and move on? Do you have at least a basic understanding of matching cameras? Did you shoot with a color chart? One of the big questions to consider when deciding to hire a colorist for your video production is if you’ll be matching different cameras. All cameras handle color, contrast, and highlight roll-off slightly differently.
If you shot with different brands of cameras, didn’t use a color chart and you have a high-end brand to maintain, we’d highly recommend hiring a colorist. We typically say that if you can get 95% of the image there, then it’s okay to do it yourself. But if you really want to push your brand forward. Hire a colorist!
If you do want to consider doing it yourself and you have a color checker, check out this Youtube video by Tom Antos!
Remember, shooting with different cameras, is just one of the factors to consider when evaluating if you want to hire a colorist.
Do you have the budget?
The last question to ask yourself, is if you have the budget? First, you might check out our article on budgeting for film production. We break down a few different ways to maximize your budget. As there are many factors that go into a budget, color is just one of them. We’ve spent everywhere from $500 for a colorist, up to $1500 for a more complicated commercial. Many colorists, charge much more than this. Sometimes in the range of $500/hr! They are incredibly fast at making tweaks to get the best image possible! It’s about finding someone who’s in your price range, who will still deliver incredible looks at a rate that is sustainable.
Remember, if you are going to rent a top-tier camera and use cinema glass, hiring a colorist is pretty much a non-negotiable! Don’t skimp on getting that image to look its absolute best!
Wrap up
Thanks for taking the time to read our article on when to hire a colorist for your video production. We know there are many factors to consider when you are putting together a video. Don’t let the final polish stop your project from being the best it can. That said, also be sure that your colorist does your project justice! If they are really cheap, there is likely a reason!
As things slowly go back to normal, many video production companies are returning to the pre-pandemic workflow. A huge part of producing top-quality video content is choosing the best location for your story. Location scouting can be both fun and hectic at times. There’s a lot of elements to be checked before you can start filming. We’ll show you how to choose a location for video production.
Being a video production company in San Francisco has presented several opportunities to work in locations in and out of the city. From beaches to gyms to parks, and a lot more, we must say that finding each location was a unique experience for us. Let’s get into it!
Know How You’ll Get There
Logistical factors are as essential as the other creative aspects in video production. This is a no-brainer! It’s important to know how you’ll reach a location, how many hours it will take to get there, travel expenses, availability, etc.
Before arriving at your location, check if you can view the area using Google Earth. This will give you an idea of what to expect, especially if it’s your first time visiting the place. Once you’re there, survey the nearest buildings, the community, the roads, and so on to strategize how your crew should set up in your chosen spot. Sometimes providing a detailed map for the crew with logistical information can be very helpful for your video production.
Choose a Location that Suits Your Plot
Pick a venue that matches what you envision in your script. This is one of the ways on how you’ll find the perfect setting for your video content. Focus on the fact that you’re trying to share a story or a message through your video, so selecting the right spot that fits your plot plays a big factor!
Are you looking for an abandoned building for a scary video? A nice beach in San Francisco for your surf-themed content? Or a park with many flowers for a romantic scene? Understand what the script requires and create a checklist of qualities and elements you’re looking for. This will narrow down your options which will eventually lead you to the right location.
Lights Please!
Okay, so now you found a venue that looks nice and has a good feel into it. The next thing you need to know is if the location has good lighting levels.
Knowing the lighting available in the location gives your video production crew an idea of how many lights and what tools you should bring to achieve the right mood for your scene. Make the most out of the light the space has. It’s important to create a vibe that looks natural on video. Knowing the amount of both natural light and artificial light in the location is important before you start shooting. This is one of the key’s to how to choose a location for video production.
Sound Check, One, Two
All good with the lights? Great! The next step is checking the sound in and around your location. You would definitely want less noise to achieve high-quality audio.
Echoes, the buzzing traffic, barking of dogs in the house nearby, etc. are some of the things you have to watch out for when doing location scouting. Record the sound in the surroundings using your camera’s microphone and listen to what it picks up using a headset. Take note of any interference that can cause interruptions when filming. Is there any construction scheduled nearby? You may be able to check with the city for upcoming noise disruptions due to traffic.
I’ve Got the Power!
Surveying power sources in the location is important during pre-production. This goes for both indoor and outdoor spaces. You may have brought all the equipment you need but what are you going to do with them if the venue doesn’t have the power needed to turn them on?
Having enough power options to work with makes the video production team’s job easier. Another aspect you have to check is the safety of the power system. Make sure that it can handle the load from your tools to avoid any accidents.
Take Notes and Pictures
Creating a detailed report for the locations you’ve checked is very important in video production. This helps your crew make the right decision on where to shoot. Take as many images and notes as you can and review them carefully when choosing the best spot for your script.
Make sure that all the gathered information can easily be absorbed by the whole team. Some of the details you can include in the report are population, landmarks, fire exits, number of rooms, windows, and any element which you feel should be taken note of.
You might also consider using the Sunsurveyor app to see where the sun will be. Will this cause any issues?
Ask for Permission
Lights? Check! Sound? Check! Power Source? Check! So what else should you need to know about your location? Availability! You have to know if you can legally shoot in the spot or not. Do you need a film permit?
It’s important to secure permits before you film at a specific location. Check if the venue is privately-owned or if it’s a public place to know who you should talk to before you proceed.
If the location is private property, reach out to the owners so you can come up with an agreement. But if it’s on a street or a park, make sure to get in touch with officials to get the legal documents you need. Remember, it’s a lot better to get permission before video production starts to avoid any interruption from property owners or local authorities.
And if you’re not allowed to film at your chosen venue, don’t waste your time trying to push it. Look for other locations where you can get permission to film.
Wrap Up
One small issue with the location can make a big impact on your project. This is why investing time doing the required research is essential to avoid any interruptions or additional costs. Looking for more info on scouting for film production? Check out this videomaker article.
Remember, you might need more than one location for your content. This is why you have to put in the preparation needed to make sure your crew found the right spot and has everything ready before the camera starts to roll.
If you are opting for a sound stage, a few of our favorites are: Ciel(Berkeley), and Intrepid(San Raphael).
If you are looking for actors for your video production process, it’s important to follow the right steps involved so you can get the right talent and skill. The process of finding actors for a film pre-production process is called casting. The person in charge of the casting is referred to as the casting director. So what exactly does a casting director do to source for the best team out there? And how do you cast actors for video production? Let’s get you started.
There are two options you could go for when casting actors for your video production. First, you could hire a casting director if you want to make things more professional and streamlined. Second, the director or the producer handling the production could own the casting process. It all boils down to your budget and what you are looking for.
Another additional option for a cost-effective budget production would be the showreels. It’s quick and cheap. What you need to do is to ask for a showreel of their highlighted work. Most union actors will have a reel. But the more inexpensive or newer actors most likely will not. If wondering where to get them, you can find the showreels on specialized websites such as SF Casting or backstage casting. Watching a showreel helps you get an impression of potential actors’ talents, physical presence, and versatility.
It’s also important to note that you can further break the casting director role to the principal casting director and the background casting director. The principal casting director typically handles all speaking roles, while the background casting director will be in charge of all non-speaking roles. Check more insights on background casting directors.
Why casting actors can make or break your production
Even with all the filming equipment in the world and a gorgeous location, having a miscast for your video production will directly affect performance and a disconnect with your target audience.
You want actors who will suit and bring out well the performance of a particular role. Can the audience believe in your actors’ performance? Because, believe me, if they won’t believe, they won’t be invested. While the script might be good enough, you have to keep the audience interested; otherwise, anything to the contrary will work against your TV show or video.
The casting process is extremely systematic, and it calls for ample time that is hard to rush. The timing also has to be good coupled with instinct and critical analysis.
Casting Actors for Video Production
There are vital steps you should take when casting. You’ll want to check out the tips below.
#1. Do a Script Breakdown
First, casting directors will need to read and reread the script to familiarize themselves with the plot, characters, and major themes. After that, they will need to create a speaking role for each character description. Ideally, the casting director should come up with a character breakdown sheet containing detailed information on age, character, personality, interests, dislikes, etc. This exercise gives the casting director ideas on the best talent to source. It also helps a potential candidate more easily fit the role, if the description is poignant instead of vague.
#2. Open Casting Call
Getting the right talent follows that you send out calls to interested actors. Your options are wide. There are actors with experience, while others are ripe graduates from college seeking to build a portfolio. Post your call on online platforms and also in places you know actors like to hang out regularly. Your other option would be film schools; it’s easy finding great actors there. Casting sites and forums can also be your go-to points for actors.
You want your post to include some basic information that lists who you are, your business or company’s name, and your list of requirements. You should also let people know how they can reach out to you. Are you able to get more detailed? For example, you will need to tell them what the role is about and their age and gender preferences.
You have to set clear expectations. Have a balance between mystery and openness to not come off as too open or quite selfish with information. This is one of the key steps to how to cast actors for video production. In essence, you’ll want the actors to be able to find themselves at the audition and bring life to the role. Maybe it’s a sad role and they really go for it with the emotion! Or perhaps they hold it back and then let it loose at a particular line on the script.
#3. Schedule Auditions
Once you start getting enough responses to your casting call, schedule auditions. Auditions are a key and fun stage that involves putting your potential actors into action to bring your characters into life. There are two ways of conducting auditions: The self-tape and the in-person. With self-tape, the potential talent will record their audition and send it to the casting director. The in-person option involves the director meeting with a multitude of actors and putting them in character with their roles. In-person auditions are more optimum since they allow you to communicate with your actors more effectively.
#4. Have Callbacks
Scheduling and holding auditions is never a one-time process. You want to interact with many actors as much as possible. This helps you to understand their talent and abilities for given roles before narrowing them down. An actor may have exhibited a dismal performance in one role yet fit very well in another. Callbacks allow you to analyze that; you compare performance and pick the best. The other thing you should look for during callbacks is the chemistry between the actors. How do they relate and do performances with fellow actors? It is something your audience will love and cherish if you do it right. You should give your actors the chance to perform vital scenes with their colleagues, record the sessions and see how it plays out. At the end of the process, ensure you get the best talents for your roles.
#5. Do a Screen Test
A film audition is what we call a screen test. It involves an actor performing sides on camera. The casting crew uses the screen tests to analyze performance, costumes, counterparts’ chemistry, and make-up. Your role as a casting director is to ensure that actors are falling in line regarding the parameters. Apart from the in-person auditions, doing a screen test will help you know how good your actor can perform for the camera and whether they fit the role. When trying to cast the best actors for video production, you’ve got to keep the end of your project in sight. Will this actor really resonate with your final video?
#6. Select the Right Actors
The decision to choose the cast for a video production squarely lies on the casting director and the producers. Depending on your budget, only select the best talents in the market to give you the results you desire.
Wrap Up
You now know how to cast actors for video production. The tips provided should guide you in the auditions and the decision-making process. Never rush through the process; this is something you want to invest as much time as possible. Putting down a good script is good, but you have to get the right talent in place for playing out the roles. Your job is to get the right talent and not make friends, so don’t be afraid to send out rejections. We hope you choose the best actors.
As video shoots get larger and the budgets increase, it’s pretty natural to look at what would increase your production value and reduce your stress. For most companies, bringing less equipment of their own and relying on more talented production professionals to help get the job done. Perhaps this is hiring an assistant camera with a prep day to pick up and build cameras. It could also be hiring a gaffer and grip and electric crew with a grip truck. In this article, we’ll break down when should you rent a grip truck.
What is a grip truck?
For those that don’t know, a grip truck is a vehicle designed to carry film production gear such as lights, stands, and modifiers. Most of these trucks are just standard vehicles that have been specially outfitted to carry this equipment. The goal is to make the equipment quickly and easily accessible to the crew working the job. On most film sets, the days are scheduled in such a way that everyone must work quickly in order to get the shoot done. Now if you packed a small car to the brim with equipment, chances are you’d need to unload everything just to get the last piece of gear out. With a grip truck, this is not the case. Most of the equipment on these trucks is on carts that quickly and easily come off on carts.
Video production shoots can be quite chaotic. There are often numerous pieces of equipment needed by multiple departments at one time. Without a system in place to get everyone their gear, it’s likely that the shoots would be much longer than desired.
The great thing about grip trucks is that while there isn’t necessarily a standard kit that every grip truck has, they all pretty much have the same equipment. There are different sizes(with different gear) depending on your video production needs.
When should you rent a grip truck? Part 1
Whether you are shooting a small music video or a feature film, there’s a good chance that a grip truck might make sense for you. There are a few primary reasons for this.
The first is that they are extremely convenient. Long gone are the days of renting several stands and lights just to jam them into the back of your small car. With the best of luck, this process will be a little frustrating. In the worst case, you’ll likely damage your upholstery. This can be frustrating and leave a lasting impact on your car and ego. Second, they really aren’t that expensive. Sure you could rent a small grip and electric package and pack it into your own car, but likely those several items will probably equal around half of what you’d just spend on the truck itself. Below we’ll break down some fairly standard rates for grip trucks.
But how do you know if you actually need a grip truck? For us, it comes down to if we are hiring a gaffer? A gaffer is the chief lighting technician whose responsibility is to work with the director of photography to design the lighting setup and modifiers used on a film production set. These talented professionals have a vast knowledge of lights, diffusion, blocking as well as motion in order to make your shots look their best. For most jobs, you’d also have a key grip. And if this is the case, it is a no-brainer that we absolutely need a grip truck. After all, if we are supplying the equipment from the back of our car, it’s very likely that there isn’t much to work with!
When should you rent a grip truck? Part 2
A Key grip is typically responsible for modifying the lights. This could be through blocking light. Bouncing light. Diffusing light or even helping to operate dolly’s that can be moved around with the camera and/or operator on them! These men and women are typically great at rigging pieces of equipment in temporary, yet safe, ways. They’ll help you get the desired lighting in a shot.
All this to say, if you are on a small no-budget shoot, it’s obvious that there just isn’t the resources to hire a gaffer and key grip, and therefore unlikely that you’d need a grip truck. Perhaps it’s just yourself and a friend shooting a small passion project with two actors. Likely you’d just be using the few lights you already own or rented as well as a few diffusion pieces. Sure it might not be the greatest looking thing ever made, but you are having fun doing it. Perhaps it doesn’t require much lighting or modifying of lighting. We’ve worked on several projects of this caliber. Quite frankly there is definitely a budget and a time for them!
What equipment is on a grip truck?
This is a great question because while there isn’t typically a set number of items, there is a sort of standard to work off of, regardless of who’s truck you end up renting. Take a look at these videos below for some walkthroughs!
How much do grip trucks cost?
The standard rate in the bay area for a grip truck ranges from $275 to around $850/day for a 5 ton. There are also additional mileage costs to cover wear and tear which can vary from 50 cents to over a dollar per mile. Lastly, there is typically a fuel cost which ranges based on the current fuel cost.
Are there any additional requirements?
The biggest hurdle for many new production companies would be production insurance. Grip and electric rental houses are going to require a certificate of insurance that covers leased and rented vehicles and well as drivers. While there is a low chance of anything happening to these trucks, it’s better safe than sorry to ensure you are covered. Many insurance companies will offer day or per project insurance to cover this. While our insurance is a few thousand per year, it can get much higher depending on the specifics involved! Best to research insurance companies that would best suit your needs. It’s worth a mention, that Hill and Usher’s package choice has been awesome over the years!
Are there any San Francisco bay area rental houses you’d recommend?
In our time as a production company we have worked with several grip and electric houses around the bay area. There are also some owner/operator “rental houses” that don’t necessarily rent to others unless they are hired as the gaffer on the job. Below is a list of a few we’d recommend
Bolt Lighting: Located in Berkeley, they are a small rental house with a few sprinters, 1 ton and three ton trucks.
DTC Lighting: Located in Emeryville, DTC is probably the biggest most well-known in the bay area with a plethora of trucks. They’ve got a few 1 tons, a 3 ton, 4 ton, 5 ton, and 10 ton available for rent. They likely also have the biggest selection of lighting equipment available.
Rebel Sun: Located in Cupertino in the south bay, they are a smaller shop that offers a 1 ton, 2 ton, 3 ton and 4 ton option as well as most main lights.
Little Giant and grip: Located in the Mission district in San Francisco they are one of the best lighting and grip rental houses with a 1 ton, sprinter, 3 ton, and 5 ton available.
Owner Operator grip trucks
Luke Seerveld at Seerveld Lighting – Also creator at Meet The Gaffer
Thanks for taking a look at our article on when to rent a grip truck. Hopefully, it gave some insight into when it would make sense to jump in on one. We know it can seem overwhelming, but having one of these trucks, will likely elevate your video production!
In much of the video production world, a lot of the success of both companies and contractors is who you know. Whether that’s a friend of a friend who’s a marketing executive of a big company. Or a local grip house that has a roster of talented gaffers. Being courteous and networking with other talented individuals can go a long way! We have built up a solid network over the years, but you never know when you’ll need additional help! In this article, we’ll discuss where to find San Francisco video production crew.
Networking events
The first area we’d recommend to find San Francisco video crew is at networking events. These happen every so often and are typically posted on Instagram or on SF bay area film maker Facebook groups.
FB Groups
The next area where we’d recommend to find San Francisco video production crew would be Facebook groups. Some of our favorites are “I hella wanna be on set” or “Crew up“. These groups focus solely on finding crew members for your job. They recommend that you follow a standard format to keep things concise. There are often talented people on here who will refer others and you can usually see with the number of likes or comments how well known they are. There are also other groups like the Commercial videographers group. You can post what crew you are looking for and likely you’ll find exactly what you’d need. Maybe you are looking for a Director of photography or an Assistant camera? Whatever the case, you’ll likely find that bay area crew in this group.
On-set introductions
As we get back to work on set, I’d say the best way to find San Francisco video production crew is on-set introductions. This can work a few different ways. Depending on what your role on the production is, you may be able to network with other people. For example, if you are a grip and meet a 1st Assistant director, you can likely network with them. However, in our opinion, even though it’s networking, it’s also about making new friends in the industry. After all, in the freelance film world, these watering hole conversations are sometimes all that we have!
Grip Houses
The next place to find SF video production crew would be through grip houses. These places are often chock-full of talent. And while they primarily focus on lighting and electric, it’s obvious that they know other departments as well. At these grip houses, you’ll likely be able to source your lights and a grip truck but also likely a full grip and electric team. From a gaffer, best boy, Key grip, electric and more. They most likely have a big list for you to look through. In the San Francisco bay area that would likely be Little Giant, Bolt, DTC or Rebel Sun.
The cool thing about these places is that if you are trying to run an out of town production, often times they’ll have a gaffer or Key grip that can drive the truck to set for you. This means that your logistical challenges will be easier and you can focus on other problems. to be solved! However, just keep in mind that often times they will want their hours to be “portal to portal”, such that their 10 hour day(in bay times) start and ends when they leave this grip house and come to set. Not a big deal if it is relatively close, but if it’s an hour drive both ways, then likely you’ve just shortened your day significantly.
Camera Rental houses
After you’ve locked down your Grip and electric team, you may also need a crew in the camera department. We’d recommend checking out Chater Camera’s crew list. You might also consider Element camera. Whether you need a 1st AC, 2nd AC, camera PA or even a Director of photography, they’ve got a chalk full list of the crew for you to pick from. One thing to keep in mind with your crew is likely that the department heads will be able to help you source people to work under them. This means that your Director of photography likely already has a list of 1st assistant cameras to help them or even other support they may need. You’ve got to tread a fine line between being overbearing with your crew and letting them have free reign. It’s you who are likely paying them, but it’s them who are actually doing the work.
At a minimum, we’d recommend having a conversation with each crew member just to discuss rates and expectations for the job. Especially if you are not going to have them sign a deal memo. We recommend at a minimum putting the day rate and the terms in a text message such that you both have a copy of it. Since most of the local productions in the San Francisco bay area are nonunion, it makes sense that there really isn’t a perfect standard. Other than lunch needs to be before 6 hours and the days are usually 10 hour workdays. There are also other subtleties such as if you give a thirty-minute or an hour lunch or if that adds on to the end of the day.
Production Services locations
The last place we’d recommend finding a San Francisco video production crew would be at production services locations. The biggest one in the SF bay area would be Ranahan production services. And while they are primarily known for their rentals, they also have an extensive crew list. This crew list is likely in the production support sector, such as a production assistant or a production coordinator. They’ll help you get the production rentals you need and find a talented support team to make it happen! You might be asking, what is edutainment?
We hope this article gave you some insight on where to find San Francisco video production crew. Likely you’ll need to source many crew for your bay area production and it may just be easier to hire a local production company to handle it all. If you are looking for a talented a San Francisco Video production crew? We’ve got a large list of talent to help out. Contact us today!
Are you ready to start getting quotes for your video production? Perhaps you’ve just decided you’d like to make a video but don’t know where to start? Or maybe you are just trying to figure out how to budget your video marketing budget for the year? Whatever the case, learning how to write a great video production RFP is critical to ensuring you are getting quotes for the same video.
What exactly is an RFP and why do you need it? An RFP is defined as a request for a proposal. So essentially, by shooting several video production companies, the same document, they will all be able to give you a proposal based on the same information. Another benefit will also help save you much time instead of having to have the same conversation over and over. Most likely every video production company will ask you the same basic set of questions, with some perhaps even needing a lot more information to generate a quote. In this guide we’ll break down the essential information to put in as well as some extra info which can really help get an accurate quote.
Background
To be frank, over the years, we’ve received many different types of rfp’s. There really isn’t a standard format but there are definitely some red flags. The first being the person who asks for a lot but needs it done very quickly and doesn’t have much money in their budget. We like to think about the triangle of good fast and cheap.
When we receive RFP’s like this, it’s hard not to laugh to think about how difficult it would be to make this work. Many times, we’d actually be losing money on the job based on what they listed. We’ve found that after having honest conversations a few times, that person just simply isn’t aware of the labor, rentals, insurance, and editing costs that go into good video production.
The next type of RFP we receive one that just doesn’t have enough information. It’s missing something material and ultimately involves us needing to reach out to make sure we’re on the same page. You shouldn’t let this stop you from creating an RFP, but at a bare minimum ensure that you have a brief description of the deadline, type of project, any specific requirement as well as a target budget.
Deadline
This first section is important to ask because it tells us how many hours a day we’ll need to work to get the project done. Will we have to work nights and weekends? Will we be able to fit it in with our other production projects? If your deadline is flexible, it can also be helpful to let us know this. A deadline that isn’t flexible, is oftentimes tricky and involves other sacrifices outside of work! We’ve produced commercials in as little as two weeks. Depending on the type of project, different amounts of time will be necessary to complete the project. We recommend reaching out to video production companies as early as possible to ensure the deadline can be met.
Type of project
The next thing to consider when wondering how to write a great video production RFP is the type of project you are looking to create. Each one poses different challenges and would be approached differently. Our systematic approach ensures that we get through each project in a curated and professional manner. We produce many types of projects. From commercials, infomercials, documentaries and narrative work. If you know what type of video you’d like to make as well as show us some samples, that will go a long way. That said, if you know you don’t have a big budget and you send us an Apple commercial, most likely, you’ll be disappointed. Try to find work that fits the caliber of your budget and let us know why you like that video.
Additionally, what level of creative support will you require. Do you already have the concept and creative locked? Are you looking for us to script something? Do you need storyboards? Most times, if we receive an RFP from an agency for a creative shoot, they’ll provide boards. For direct to client work, it’s often that we create them. Whatever the case, letting us know how you’d like to work, would go a long way!
Specific Requirements
Perhaps you know that your video is going to need some 3d modeling or specific text laying out some features. Each of these things can guide us as we put together the proposal. It can also be helpful to let us know any specific locations, actors, or other elements that we wouldn’t be free to choose ourselves. This could involve shooting with a particular landmark in the background, or even shooting at a particular time of day. San Francisco video production can be much more costly than shooting in another country. Will we need to permit parking for our teams? Are there other logistical concerns to the production? If so, this means that your RFP should reflect these details!
In a recent shoot we did for Pact, the client requested a product explosion shot showing all the internal pieces of the product. This took our VFX team around 40 hours of work for the motion tracking, texturing, re-lighting and final color matching. Simpler VFX like screen replacement typically takes just a few hours so any VFX should be thoroughly thought out.
Target Budget
The last(and most controversial) item to put on the RFP is your target budget. Many clients argue that this isn’t necessary because they are trying to get bids. That’s fair… But on the other hand, you’ve got to know that video production can be done on MANY different levels. This means we could shoot with a skeleton crew and still get the job done, as well as shoot with a big production team. Either way, you’ll still get the end product, but the exact video production quality will vary.
If you are still wondering how to write a great video production RFP, let’s talk about how to leverage your budget. A great way to use your budget as leverage is to ask the production company, what level of quality(with a sample) they should expect to receive back for this budget. Also if there is a range of your budget that is good too. Something like 30-50k goes a long way. Typically we’d generate two bids as well as send multiple samples.
Conclusion
As you start to generate your RFP’s, keep in mind that the more information you provide, the more accurate of a quote the video production company can give back to you! Additionally if you let the company know what level of creative support you need, that can help as well. If you are looking for a San Francisco video production company, shoot over your RFP and we’ll get back to you ASAP!
As the budgets on your video production shoots increase, one of the top tips we have is to hire a 1st Assistant camera or 1st AC. These men and women play a huge role on set and their necessity cannot be overlooked. Sure, it’s more money out of the production companies pocket, but on big shoots when the margin for error is slim, it’s pretty crucial to minimize risks for error. For example, let’s say you’ve got a super packed day and don’t have time to build a camera the day of the shoot. Guess what, a first AC can solve that! Or perhaps your client can’t be directly on set because of social distancing protocols. The 1st AC will make sure the client monitor image is up and clear! In this article, we’ll break down why you need a 1st assistant camera for your video production.
Although assistant camera rates vary city by city, most will request a prep day as well as a few items to rent from the production. These could include a kit fee, a monitor rental fee or even a wireless follow focus rental fee(such as an Arri WCU-4. Give them the tools they need for success and they’ll help take your shoot to another level. Below we break down the key things that 1st AC’s are known for.
Save Time on Set
One of the biggest reasons to consider hiring a 1st AC is to save time on set. This comes about in multiple ways. First off, you can hire the 1st AC to prep your camera gear. This means that they can go pick up the gear from the rental houses. They can also put the camera and accessories together the day before the shoot and troubleshoot any potential issues. Does the wireless follow focus signal not working properly? Better to figure that out the day before the shoot than on the shoot! Is the lens not mounting properly on the camera? Once again, probably better to determine this before the shoot instead of on the shoot.
Having sufficient time to build the camera on set can often be stressful as there are so many shots to get taken care of. And imagine having an issue with the camera before you even start. By hiring a 1st AC to prep the camera before the shoot, you are eliminating many potential issues that would be extremely costly on set. Additionally because you are only paying one person the day before the shoot, you can save that hour or more at the beginning of the shoot day to discuss lighting and get it set up asap.
After hiring a 1st AC you’ll also find that they are extremely knowledgeable about the camera and accessories. Maybe you as the Director of photography could figure out what was wrong with the camera, but likely the AC could do it in half the time!
Ensure camera focus is sharp
The next reason why you need a 1st assistant camera is to keep the image sharp. This is what 1st AC’s are most known for. Whether you are shooting wide open on a tight focal length that has a razor-thin depth of field(DOF) for a walk and talk or a locked-off shot with a wide-angle lens with deep focus. They are responsible to make sure the image is sharp. That said, they are humans, and often times it can take multiple takes to nail the focus if you are shooting a very challenging scene. As a crew, it’s important to make them feel confident in their job, so avoid saying things derogatory things that add more pressure than necessary.
There are multiple tools to help them keep the image sharp. Sure you might be able to save a little bit of money on a cheap follow focus rig. But more often than not, having a better tool is going to make their job a bit easier, and therefore give you a better rate of nailing focus on your takes. If you as the director of photography, sense that they are having trouble nailing focus. You can try stopping down the lens or ensure that they have marks on their follow focus and the actors are very aware of their marks as well!
Keep your client monitor connected
Another reason why you need a 1st assistant camera is to ensure that your client monitor is up and running! While this often falls to the 2nd AC, if there is budget, it can get left to the 1st AC as well. If you’ve paid a 1st to build the camera the day before, then they should have sufficient time to set up another monitor for the client to be sure that they have an image for the day. Sometimes, this might mean adding on and syncing another wireless receiver from the camera with the monitor and ensuring that the glare on the screen is minimized. After all, they are the ones paying the bills, so treat them well!
Troubleshoot camera
Even though you might have had your 1st AC build the camera the day before, you still might run into camera issues on the day of the shoot. A myriad of issues could cause this, but it likely can be troubleshot relatively simply by your 1st AC. Perhaps it’s just a simple battery swap? Or maybe the lens contacts got dirty? The more you have them do, the more chances they may make a mistake. Are they comfortable with the tasks they are given, or do they need more help from a 2nd AC? You can train a production assistant to make a great camera PA!
Once you’ve troubleshot the issue, try to move forward with ease. Although the issue may have been a direct result of something the 1st AC did, be sure to keep your cool. You never know who is watching! If it’s an issue that can’t be fixed, consider alternatives. Are you out of recording media? Do you need more batteries? Regardless of the problem, remember that they are human! Help them solve the issue and get back to shooting.
Manage media cards
Last but certainly not least, AC’s can help manage cards. On a smaller/ slower set, they may also be able to help you offload them. But be sure to ask them before the shoot if they are okay with this! If the media on the shoot gets corrupted or erased accidentally, this could be extremely costly. Would your client hire you again? Help yourself stay in business! Talk with your 1st AC before the shoot to be sure you have enough cards.
1st AC’s will write reel numbers on pieces of tape. These pieces of tape will be pulled off throughout the day and attached to memory cards as they get full! If you have more than one camera, they will usually put little tags on that camera as well. So for example, it might be A01 and B01 if you had two cameras. If you had 3 cameras, they’d just start with C01 etc etc.
There are countless software programs to help you offload your media. One of the more well-known ones is called Shotput Pro. Some AC’s may also use the finder to offload cards. Be sure to double and triple-check before formatting any cards. In an ideal world, you wouldn’t format any cards until the day was over. However, this is not always the case. Be sure to have enough media and hard drives to finish your shoot. Bring backups to the shoot as well. The 1st AC’s can manage them!
Wrap up
In this article, we discussed several reasons why you need a 1st Assistant camera. They will help make your productions look professional and take your image to another level. Sure you can get away without one. But why risk it? Your images will be tack sharp! If you want to know more about how 1st AC’s can help your set run smoother, reach out to us. We are a San Francisco video production company looking to make the best films possible.
You just booked a video production job out of town and are wondering how to travel with your video production equipment? Travelling can be unsettling and comes along with its fair share of issues. Video shooting excursions may require you to carry most of your shooting gear, if not all. Depending on your client’s needs, you may want to really think about what items are necessary to get the video produced. In this article, we got insights to offer how best you should pack your bags if you got film shooting equipment to carry around.
1. Figure out what you need to Carry
To avoid unnecessary luggage, you only want to carry along equipment that you 100% need for the job. Of course, the fear most shooters have is missing out on their profit while out there because of missing gear. To get started on the right foot, you may want to check with your potential client what the video shooting project will entail.
With such information at hand, you will avoid over-packing or carrying extra stuff that could make your travel a pain in the butt. You are better off carrying shooting gear that is only useful to you. Carrying equipment that you only need for the job saves you the trouble of having to worry about losing your valuable shooting gear. Also, you will cut the cost of added fees due to extra weight on your luggage. The type of filming equipment you are going to carry is also worth checking; for instance, taking LED lights is advisable for the simple reason that they don’t break easily and are lightweight. Can you imagine carrying with several big incandescent light bulbs!
2. Stay Punctual
Traveling with production equipment can give you butterflies if you run short of time. Making mad dashes out of your house or to the airport is never the best situation. To have a stress-free journey, especially if carrying your equipment around, start your day as early as possible; I need not mention this, especially if you are rushing to the airport. You will need to give yourself no less than two hours because of the typical procedures; check in lines, checkpoint lines with overflowing security. It will be hard rushing through this while carrying heavy shooting equipment around. Always start packing your bags two days before your travel so you can figure out things.
3. Make use of Hard Shell Cases
Have you heard of pelican cases? If not, you better find out about them because they are what you need for your expensive camera equipment when traveling. What you want to avoid is a busted camera that will make you appear unprepared for your job. Pelican cases are small and portable, allowing you to carry your audio gear and accessories with fewer worries. When packing your equipment in hardshell cases, pay attention to your grip, lighting, and sound gear. Proper packing with padding will insure everything arrives in one piece.
4. Pack your camera bag as a carry-on item
Our next tip when learning how to travel with video production equipment is to bring your valuables on board with you. No one wants to incur the cost of damaging their video production equipment. For that matter, you are better off having your camera bag around as a carry-on item. No broken lenses with a carry-on-size camera bag to store your miscellaneous accessories. You never know how the baggage crew is handling your luggage so do your due diligence to make sure it’s all loaded properly!
5. You need to get Insured
Risks sometimes do turn into accidents even as much as we try to mitigate them. Anything could happen on the road. For example, while at the airport, multiple airline staff who are not conversant with your gear could mishandle them. It would be safe to say that risks are not unavoidable when in transit. Should your accessories or equipment get damaged without insurance, you will have no one to blame but you. You want to get all your gear insured just before you travel. Check your current insurance policy to ensure it fully covers the damages on your equipment should they get damaged.
6. Pack Lithium Batteries in a Carry-on bag
There is no way you will travel without spare batteries, especially if your video shooting project will take you much time. You may want to pack these lithium-ion batteries in the same case with the other luggage. However, we don’t advise this since you run the risk of your batteries shorting out in mid-flight. You also risk paying a fine since it’s illegal to store lithium-ion batteries with other cargo. Your best way out is to pack these lithium-ion batteries in a carry-on bag to avoid any trouble on the road. This is a big tip for how to travel with video production equipment
7. Get Cleared with Customs
Cross-border travels will require that you get cleared with customs. For example, if leaving the U.S. for a shoot-out in Europe, pre-clearance with the Customs department is vital to ensure that you are not falling short of the law. If you are a filmmaker and a resident of the U.S. traveling, you will pass through customs on both exits a return journey. Depending on which country you are traveling to, there is a good chance you’ll need to get a carnet to avoid exorbitant taxes. That means they will check your equipment to determine whether you purchased them in the U.S. or overseas. If you have bought your equipment overseas, a tax will apply upon entry into your country. To make sure you are not falling into trouble with the law, it would be best to reach out to Customs or the border clearance teams with details about your travel and what equipment you will need to carry for the journey. Different country’s handle this differently, and getting the right information before you travel is of the essence.
8. Have TSA Locks for your Equipment Cases
It’s highly unlikely that someone will break into your case while traveling, but you are also better off not taking any chances. Cases of traveler’s luggage being damaged have happened in the past, and you don’t want to be next in line. Get yourself TSA locks for your equipment. You will not prevent a crook from carting your case away, but you can secure your valuable items inside the case.
Wrap up
Traveling with video production equipment is pretty easy if you follow the tips mentioned above. Save yourself the cost and stress of daunting travels by beginning your preparation early. Know what to carry so that you don’t overpack. Check into the airport as early as possible. You also want to get the right casing and carry-on bags for your equipment. Enjoy your travel next time.
Video production insurance is one of those things that you don’t need until you really do. Then you wish you had it all along. While we’ve never had a major incident on set, it’s better safe than sorry. As your crew and rental budget increases, it’s likely that you’ll need to get video production insurance at some point. Whether for rented autos, gear, crew injuries, stunts, drones, or other issues, it’s always a good idea to have production insurance. In this article, we’ll cover why you need video production insurance.
The first thing to consider is whether or not you need yearly, monthly, or per job production insurance. Likely depending on the requirements of most of your jobs, you’ll consider getting a yearly policy. Then, perhaps a per job policy if it’s a big job! If you don’t have production insurance, and an issue arises, there’s a great chance that you could face both civil and criminal court cases. It’s also great to take care of your video production crew. They do a lot for you, so why not give back to them and be sure they are insured.
What is video production insurance?
Production insurance covers the production company from any liability should anything happen on set. Every policy is a little bit different but there are always commonalities as to what categories of insurance exist. The primary purpose of production insurance is to ensure repercussions caused by injury or damage onset. The rates you receive in your quote will vary drastically depending on the specifics of your shoot. For example, it’s different if you are shooting a stunt scene of a car jumping off a bridge. Versus a CEO giving an interview in their office.
The cost of the insurance policy will vary greatly. On the surface, the shoots are drastically different but at the core, they both protect the production company as well as the producer if anything goes wrong with the shoot. More or less a film production insurance policy is kind of like building a house. You can choose what coverages you have, much like the materials being using in the house. You can also choose how many windows you have, just like you can choose how many categories of specialty insurance you would need.
Who does video production insurance cover?
Every film production insurance policy is different. The core coverages will generally cover injuries on set, equipment damage or theft, copyright claims, or any rented vehicles. This could vary from a grip truck to a PA using their own vehicle to go get the crew lunch.
But that’s just the basics! Skies the limit as to what other policies you can add on. The other thing to consider is the levels of limitation that the policy includes. Most general liability policies start at 1 million and often include a 2 million aggregate. This can be raised or lowered as needed. Every insurance broker is slightly different. Whether you are shooting a small interview in a friend’s backyard or a Hollywood big-budget movie with celebrities, the costs will be wildly different!
All this to say, when you are filling out forms to get quotes, answer honestly. you’ll need to pay close attention to any exclusions in the policy! You’d be surprised the horror stories we’ve heard in the past! From PA’s backing into celebrities luxury cars to AC’s dropping cameras, problems can vary easily arise.
In the film production industry industry there are many stories about A list celebrities who are almost uninsurable!
Who needs to purchase video production insurance?
While everyone who owns gear should likely have production insurance the type of insurance necessary will vary greatly on the type of gear they are using. If you are a crew member bringing equipment to set, you’ll likely need inland marine insurance coverage. This will cover your equipment at your home or office location as well as as you transport it to set as well as on set. It’s a funny name, but essentially just means that you can take the gear out of your primary location and still have coverage for it!
Outside of simple inland marine coverage, the owner of a video production company or the executive producer would be the one who purchases the video production insurance policy. However, you’ll want to put several people’s names on the policy to ensure that they can get COI’s or certificates of insurance for locations and rental houses.
What are the standard coverages?
The standard coverages include damage to a location, damage to property, damage to borrowed items, and loss or theft. Sometimes, certain locations will also request umbrella insurance to raise the amount of coverage you have. The thing about these high requirements is that we’ve found them to be flexible depending on the type of production. Sure a building may have a 5 million dollar requirement, but when you explain to them that its a simple three-man shoot, they will likely waive that extra requirement.
The one thing to keep in mind is that production insurance can get very expensive quickly. At the beginning of a job, it’s always important to budget in about 5% of the total budget for production insurance. Sure, maybe you don’t need to spend that money, but if the locations or rentals insurance requirements end up being more than you expected, you’ll be set. Once again, it’s important to always have a base coverage policy for general liability and owned equipment, but you can scale up that insurance on a per-job basis if the requirements are more stringent.
What is a COI?
The last thing we’ll cover is what is a COI? According to Hartford: “A Certificate of insurance (COI) is a document from an insurer to show you havebusiness insurance. With a COI, your clients can make sure you have the right insurance before they start working with you.” While you can always add on insurance down the line, it cost be costly on a per job basis!
Wrap Up
All in all, video production insurance is just one of those things that will ensure you don’t run into costly issues down the line. People are human and accidents do occur!
When starting in the video production business, the best way to get experience is to be a production assistant. Production assistants or PA’s for short are one of the critical positions to make any job go smoothly! These jobs, although at the bottom of the totem pole, are some of the easiest jobs to get early in a film career. Whether it’s simply picking up lunch or making sure the talent finds the set, their role can play a big difference in a successful video production shoot. In this article, we’ll share a few tips to be an awesome production assistant.
What exactly does a production assistant do? Good question. First, it’s important to note that there are three different types of production assistants. 1. Set PA, 2. Office PA, and 3. Post Production PA. The names should summarize pretty well, but the most common type of PA is the set PA. In short, an office PA, generally stays in the office, making copies, printing schedules, helping with talent releases, and generally setting the pre-production up for success. A production PA generally helps organize media, keeps editing bays neat and tidy, and ensures editors have what they need. For more, check out, Duties of a PA. Below are our top tips on how to be an awesome production assistant.
Ask Questions
When you first get hired to be a production assistant, you might be a little nervous about exactly what you should be doing on set. That’s normal! And while production assistants typically have a fairly standard set of job duties, the list can be quite lengthy. It’s a good idea to check in with the producer BEFORE the job to ask them specifically what they’d like you to do. Perhaps you’ll be helping to get the cast parked and directed to set. Or you’ll be watching a production vehicle and keeping strangers off the set. Some of the tasks can be quite specific. Check in with your producer or production coordinator, depending on the job size will definitely set you up for success.
In many cases, you’ll be working independently, and so you’ll want to make sure to be on the right page before the shoot begins. The last thing you’d want is for the production to get hung up because of something you missed! Lastly, if it’s appropriate, offering water to the crew to keep them hydrated can go a long way! If you are wondering why you should be a production assistant, read this article for some insights.
Communicate
We touched on this above, but communication is one of the biggest tips to be an awesome production assistant. Producers have a lot on their plate, so just checking in periodically to see if they need anything or if they have any jobs for you will really help. Obviously, you don’t want to be annoying during a stressful time, but just letting the producer know that you are ready and available to help, can go a long way to reduce their stress level. This also goes for other departments as well. Let them know if you have any questions or if you need something from them.
Video production relies on collaboration between many individuals. Each of them has particular skills, so if you can help them operate seamlessly together, it would go a long way. Maybe the camera department needs a monitor stand from the grip and electric department. Perhaps you could help make that transaction happen. This way, the camera department can keep working on building cameras and they don’t physically have to go over to the grip truck and ask for a stand. Just saying hi and smiling can go a long way! Sure, some people might be grumpy, but that doesn’t mean you can’t be a positive light!
Be Curious
For most people, being a production assistant isn’t seen as their end goal, but moreover a great starting place into the industry. This is the time, where the pressure is pretty minimal and you are just there to help out where you can. That said, you’ll be exposed to listening to different departments on video production and how they operate. Whether that’s the Grip and electric department setting up lights or the camera team changing lenses, there is a lot to observe. That said, know your job and don’t bug the other departments, but you should try to let the departments know, that if they need anything at all, you are the person to call! Some insights from a production assistant. These moments not only show the other crew members that you care but are also great networking opportunities should you ever wish to try roles in those departments.
Think Ahead
One of the best ways to get hired again on video production is to think ahead. This means anticipating others’ needs and letting them know that you are there to help them. This could be as simple as reminding the producer of what he/she asked to be reminded about, or seeing that someone looks dehydrated. Maybe you see someone drop something and they need help picking it back up. Perhaps an actor looks confused about where to go on set. You are a critical resource to helping make the production go smoothly. More tips on how to become a production assistant.
Be Attentive
Lastly, you’ll want to be attentive. This means, stay off your phone. Don’t bug someone in another department and make sure to be respectful and mature at all times. There is often a lot riding on a video production set, so showing others that you are professional and attentive will be a great way to get yourself hired again. How to be a production assistant. This also means looking out for safety issues. See something, say something. It will never hurt to speak up about safety! It’s too often that people risk their own safety for the job and it doesn’t need to happen unnecessarily.
Be Positive
Last but not least, be positive! Video production can be stressful at times, but there are also many times that it can be a blast! The camaraderie is unbeatable! Coming together to make a shoot happen bonds people together quickly and it’s during these times that you’ll network the best. Thank people for their hard work and tell them that you’re looking forward to working with them next time! You never know if they might refer you! Maybe you could be a camera PA on the next job. Having a great attitude will be a sure way people want to be around you!
As new video production equipment seems to come out almost weekly, there is always something desired to be bought. Whether it’s more light output from a smaller light or a camera with better image resolution, the choices never stop! However, even though there is a plethora of new equipment, it does not always make sense to purchase it. You’ll need to take an honest look at the size of your production company and how often you really would use that piece of equipment. In this article, we’ll break down whether you should buy or rent camera gear.
Is it a big value item?
As you start to evaluate whether you should buy or rent camera gear, the first thing to consider is how much the piece of equipment costs. Whether it’s a $300 gimbal or a $40,000 light, each item brings about a whole different range of considerations. If it’s a small price item, do you have the cash on hand to purchase it? Conversely, if it’s a very expensive piece of camera equipment such as an Arri M40 light, do you have the cash on hand. For items more than five to ten thousand dollars, there are real considerations of cash flow and how to finance them. You might consider just using a credit card or you may have to finance it through a business loan.
Either way, you have got to have a plan on how it will be paid off, to avoid going into big debt. You definitely need equipment to make professional video production happen, but at the end of the day, it’s not worth going into debt. Another great option to look into, when evaluating if you have the resources to purchase the item is the BHPhoto Payboo card. But only if your state would be charged Sales tax. For many states, this is simply not the case. The downside of this card is the very high interest rate if you don’t pay it off in time. While it’s nice to avoid sales tax, paying, even more, to finance the item through a credit card does not make sense!
Will it be used once or on every shoot?
The next question to ask yourself when deciding whether you should buy or rent camera gear is how often the piece of gear would be used. Perhaps you are really excited about an upcoming shoot, and see a reason to buy this piece of gear. Or perhaps you think you might be able to start freelancing as an AC and want to buy a high-end follow focus? Would you be using this piece of gear at least once a month for a more expensive item or at least twice a month for an item that is of less cost? Another question to ask yourself is, how often would I have to rent out this piece of equipment before it was paid off? Does that seem realistic?
There was a time awhile back when we were first starting doing professional video production in San Francisco, and we decided to purchase a Ronin 2. We felt we could use it for our car-to-bike tracking shots as well as our handheld work. However, in reality, this just did not happen. We only had two shoots with car-to-bike shots that next year. And, we found the Ronin 2 to be too heavy when built with a camera to be comfortably handheld. That said, we did get a few rentals out of it and saved ourselves the headache of picking it up. At the end of the year, though, we decided to cut our losses and sell the Ronin 2. Therefore, for us, that piece of equipment just wasn’t used enough to justify owning it.
Convenience Factor
The next item to consider for if you should buy or rent gear is the convenience factor. What I mean by that is, how much easier will owning the piece of gear make your life. Instead of having to order, insure and pick up gear, from a rental house such as borrow lenses, you’d have the gear sitting in your office or gear area. This means you’d save time and energy before the shoot to actually focus on the production. And while you can usually hire a production assistant to pick up the gear, it’s likely that this is going to cost you. Now multiply that number times every shoot you’d be renting at, and it starts to add up quickly!
The other convenience factor to consider is having to change the settings every time you rent it. This means, button shortcuts for your cameras. Audio level changes for microphones. Light intensity changes for your lights. Each time you rent the piece of equipment, you’ll need to change the settings to best optimally use the gear. This can get time consuming and be frustrating!
Is your DP an owner/operator?
Maybe you’ve made a new relationship with a DP, but have been having him use your old equipment. Have you asked him or her what pieces of equipment that they own? Maybe they already own a full set of gear that you could combine with their labor rate or get a slight discount on? It would keep them excited to rent their gear, they would be comfortable with it, and perhaps you could get a slight discount? It’s worth an ask!
What are the insurance requirements?
If you already own the piece of equipment, it’s likely that you already have it insured. But adding rental items to your insurance plan can be tricky. Whether it’s a very costly temporary insurance plan just to cover the piece of equipment or a hassle to add it on to your own policy. Are you 100% sure that any piece of equipment you will bring onset is insured.
Get the item insured with your insurance
Get it insured through the rental insurance company
Consider adding on a separate insurance policy that protects against theft
Make sure you are covered against any damage, even if it wasn’t you
Are there possible sub-rentals?
The last item to consider when evaluating if you should buy or rent camera gear is if you could easily rent it out. Some items, like new cameras or lenses, are in high demand, whereas other older bulkier items are not. This means that you could potentially make some extra cash towards that big item you purchased. However, this could also be potentially dangerous thinking. If you are basing your purchasing decision solely on renting it out and not using it much, what happens if there is a recession or another pandemic? Would you be able to sell it and not lose much? Be sure to thoroughly think through the decision as you go along. Renting your camera gear out to others is a very viable option!
Wrap Up
As you can see in this article, it’s not always an easy decision to buy or rent a piece of camera gear. Sure maybe you’ve got a little extra cash from a big job, but does it really make sense to buy a piece of equipment? Would you really be using it that much? How would you insure it? Do you have your questions answered and are now ready to push buy on that new piece of gear? Or perhaps you now have a little more peace of mind knowing you really don’t need that newest item.
Corporate video production is becoming more and more important each year. Video has quickly become one of the main ways consumers get their information and is growing faster by the year. Creating a high-quality corporate video is one of the best ways you can reach your target audience and introduce them to your company. It also allows you to set the tone and atmosphere one can expect when working with your company. Overall, a great video can break the ice with the customer and get them excited to work with your company or purchase your products. With that in mind let’s look at 10 tips for corporate video production.
Have a clear goal or purpose in mind
Of course, the first step is to define a clear purpose for making this video. It could be introducing clients to your business and the people behind it or convincing customers you are a great company to purchase from.
Without a clearly defined goal, you end up making a video about nothing, that won’t convince people of anything. You need to create a north star for your video that all the rest of the work can be centered around.
Keep this goal in mind while you are writing the script, filming, editing, and everything in between. This will ensure you have a cohesive, to-the-point video that accomplishes a clear objective.
Think about your target audience
You can’t make a video for everyone, just like you can’t make a product for everyone. Your video needs to have a clear target audience. Decide on this from the beginning as it will influence all of the rest of your creative decisions.
This will also set the tone and style of the video. A video should look very different if targeted towards young students compared to being targeted to middle age business professionals. Being clear on this from the beginning will help you decide how professional your video should be and how to make it the most relevant to your viewers.
Start with a plan
Before you start filming or writing you need to create a plan for the video. Start with a general list of things you want to cover, as well as the tone, style, and target audience you want to make it for.
Once you have covered the basics, move on to making a storyboard. Layout the most important shots and what they should convey to the audience. This will make it much easier to have an efficient and high-quality recording process once you get started, as well as keep the project on track throughout the entire production process.
Production Value Matters
When making a video to represent your company do not cut corners on production value. A high-quality video shows the audience you are a professional company. Make sure you use high-quality cameras as well as leveraging professional cameramen and video editors if necessary.
The final product should look as if it was made by a professional video studio, not just thrown together in a few days. This is often the first impression you give to your audience so make sure they know you mean business!
Be authentic
You want to come across as authentic, nobody likes a cheesy corporate-looking video. The video should give off the feeling you want customers to get as soon as they enter your building.
This relates to the target audience you want to reach. Maybe you want to make the video casual and laid back, or strictly business professional. Keep this top of mind while recording each shot, and don’t be afraid to do plenty of takes to make sure you get it just right!
Relax and speak as you would to a new customer, that is who you’re making the video for after all.
Use great B-Roll
B-roll is a great way to add high-quality footage to your video, as well as make it seem more natural and professional. Fill some of the gaps in your footage with B roll footage to catch the audience’s eye and keep them engaged. This is also a great time to do a voiceover or place some text and graphics on the screen.
B-roll helps the video avoid being comprised of nothing but people talking to the camera. It makes the video flow better and gives viewers something nice to look at as a break from nonstop talking at the camera.
Put the best 5 seconds first
One of our next tips for corporate video production is to hook the viewer!sThe first 5 seconds of your video are what decides whether the viewer stays for the whole video or clicks away from it. Make sure you grab the attention of the viewer right away. You can do this by saying something hard-hitting or very relatable to your target audience.
Put yourself in their shoes and ask, what would make me watch the rest of this video?
Choose the right length
Choosing the length of your video is incredibly important. Too short and you may not get your point across, too long and you risk boring the viewer. Finding the sweet spot is tricky but critical.
When in doubt, go shorter. The last thing you want is to drag on and leave your viewer bored or wanting to click away. You want most of your viewers to watch the full length and be left curious enough to browse through your website or products.
One of our biggest tips for corporate video production is don’t feel like you need to cover every question possible in one video. Leave the nuances for them to find out on their own, cover the general attention-grabbing topics in the video, and don’t overstay your welcome.
Ensure high-quality sound & voice
Nobody will watch a video that sounds bad. Make sure you have high-quality microphones and recording software. The last thing you want is someone turning off your video immediately because the sound is below par.
Make sure you listen back to each recording you make as you are filming to ensure it sounds natural and high quality. Nothing is worse than finishing recording just to realize the audio is awful.
Edit and cut liberally
Learning how to edit your videos is critical to the quality of your final product. Not every part you record can be amazing, that is just the nature of creative work. Don’t let it get you down. Instead, you need to be willing to cut out any parts that aren’t high quality.
It is far better to have a shorter video of nothing but high-quality shots than it is to extend the length of the video to include shots that are just average.
If a shot doesn’t serve the goal you set for the video, or feel relatable to your target audience, it’s likely not worth keeping. Only keep the parts you think are genuinely impressive.
Conclusion
Creating a great corporate video can be challenging. Hopefully, these tips for corporate video production helped you.You need to make a video with high-quality production and a great message that speaks to your target audience. It should also be attention-grabbing and show the overall attitude of your company as a whole. Most importantly, it should impress and intrigue potential customers.
The tips listed in this article should help guide you on your path to a great corporate video. The best way to improve is to work at it consistently. Start planning and shooting your next corporate video now and you will start learning and improving in major ways as you go along.