The Blog


San Francisco creative commercial video production
San Francisco brand video production – Four day shoot for Cepton

We just finished our biggest project yet! Cepton makes LiDAR for several sectors but their primary focus is automotive. We have done several small video productions for them in the past, but now that they are officially listed on the NASDAQ they felt it was time to step it up a notch. They came to us looking to make a high end brand video on a tight timeline. Our concept was ambitious. Three storylines plus an arm car day shot over four days. The goal of this video was to not only educate users about their lidar technology but to inspire viewers to understand the larger goal of the company. To bring Lidar to the masses. In this article we’ll break down how we accomplished this San Francisco brand video production. Take a look at the video below and then read on to see our process.

Approach

Our approach for this San Francisco brand video production started with a treatment. In this treatment we presented two potential storylines to the company as well as the look and feel we would be creating. It turned out that the client actually wanted to blend the lines between both of our storylines. Not a problem. We tweaked and then started with our script creation. At this point, we brought in our script writer and got to work hashing out all the details of the story. We knew that because there would be such a large lift with the pre-production in order to capture the content necessary, we wanted to be 100% locked with the script before moving on!

Our script ended up being approximately six pages. It was our guide going into pre-production!
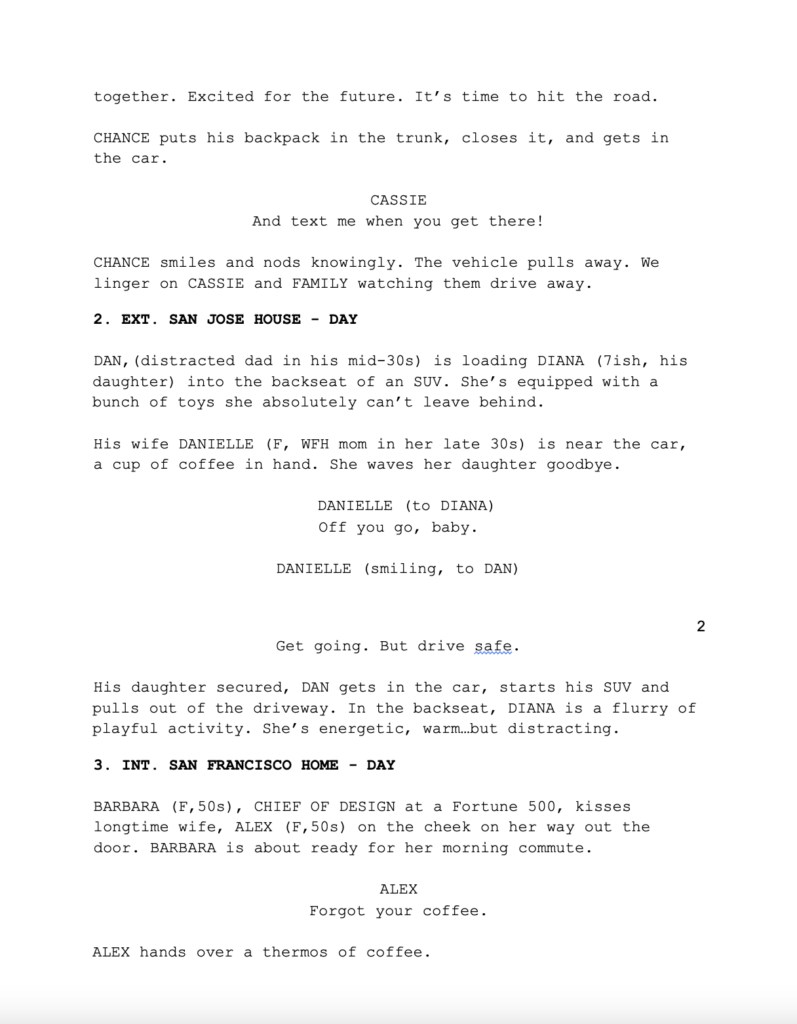
Once the script was ready, we presented it to the client for final story sign off. We tweaked and tweaked some more and then we locked the script. At this point, the base narrative was locked and we were able to start with the pre production. The first thing we did was break down the script into a shot list. Then our producer did a full script breakdown. At this point, we knew this was going to be tricky. Four days for this concept was very ambitious! Guess we just love a good challenge.

Pre Production

The first thing we did during pre-production was location scouting. This would be where we picked the houses and main locations for our shoot. The client loved that we were looking for distinctly different locations. They also loved the idea of shooting in San Francisco; however, this presents many logistical and security concerns. We’ve shot here many a time, but exteriors in San Francisco definitely pose a challenge. After scouting, we also decided that shooting on the highway between Muir beach and Stinson beach would be our best opportunity for some epic coastal footage. At this point, we brought on a locations manager. They helped us file appropriate permits with the city of San Francisco, state of California as well as the State Parks. This was a first for us working with so many jurisdictions.

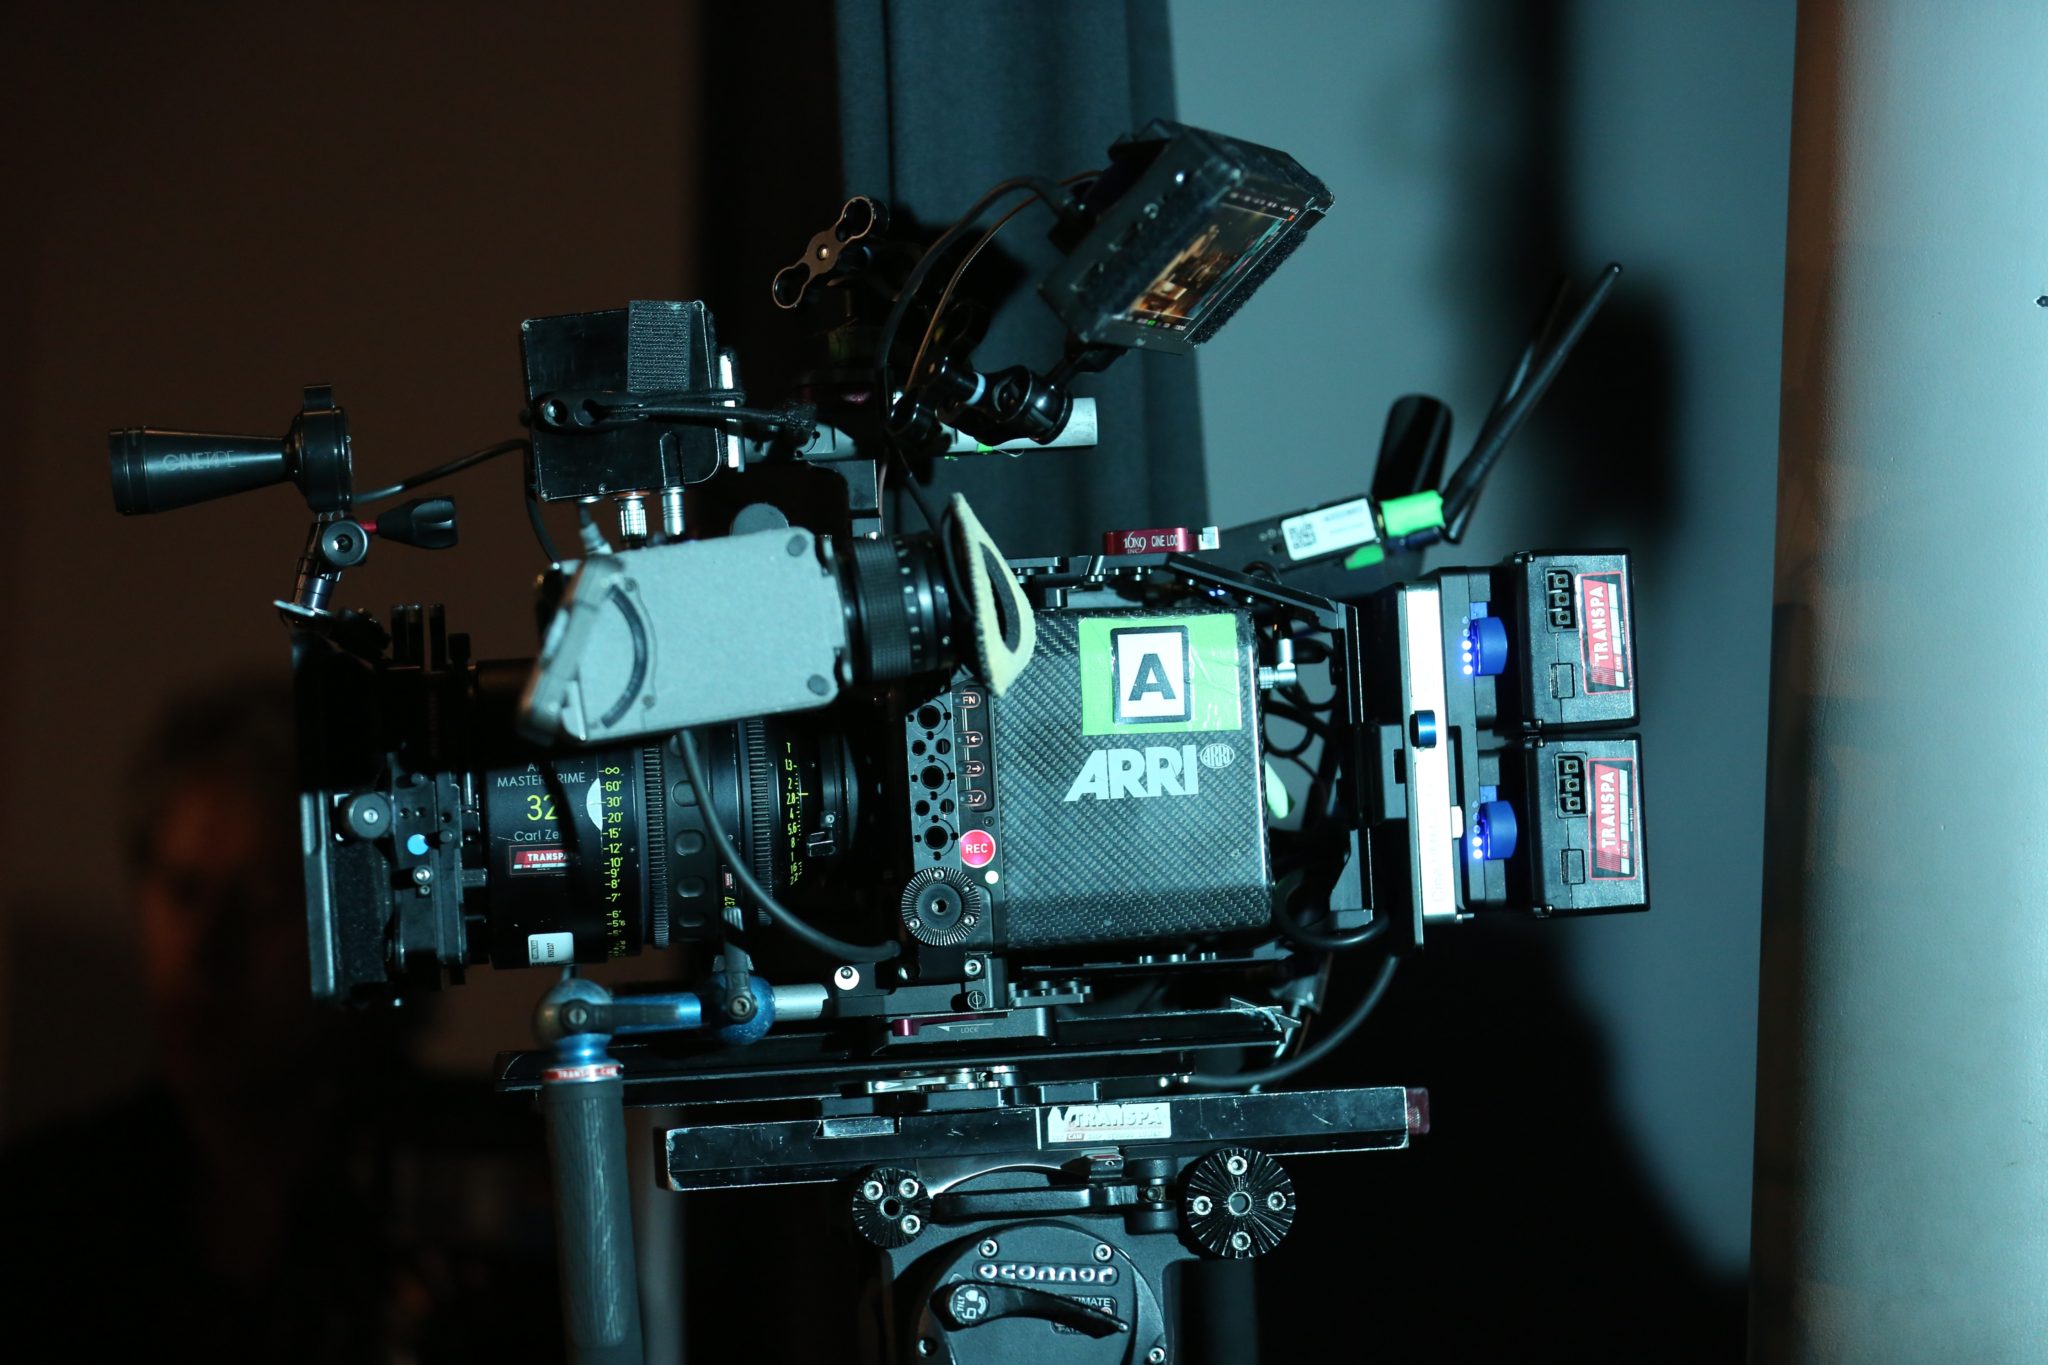
During pre-production we also began casting for our actors and picking our picture vehicles. This posed another challenge as their self driving technology wasn’t actually in any of the cars we were shooting with! The vehicles also had to be newer than 2021. After finding our vehicles we began to lock our department heads. We chose to work with a Director of photography who had experience working with cars and had completed a successful project with in the past. We also knew that a limiting factor of the production would be the availability of our arm car team. At this point, we had the core team assembled and decided to lock shoot dates.

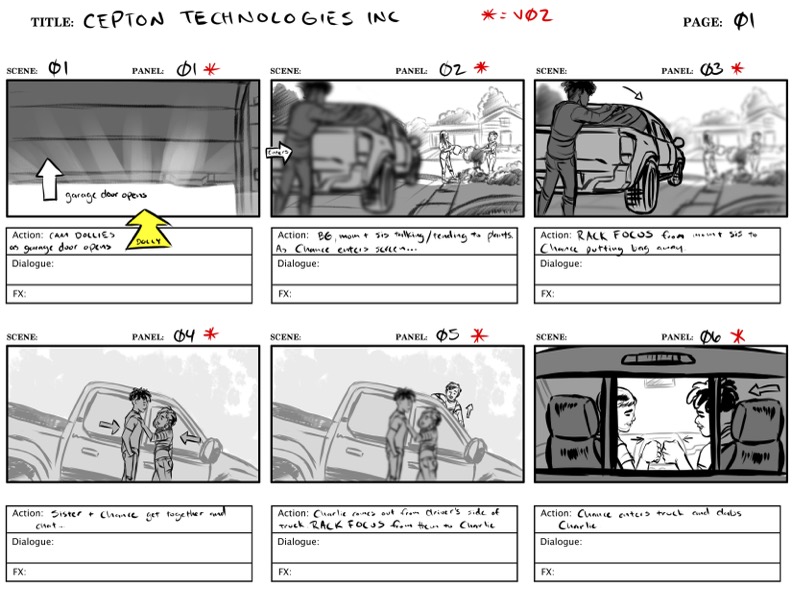
As pre-production continued, we began to storyboard. This part of the process is awesome! Everything starts to get visual and we now have a tangible communication tool with the client and all of our collaborators. Once those were locked we did our final tech scout with the crew and got ready to shoot.
Production

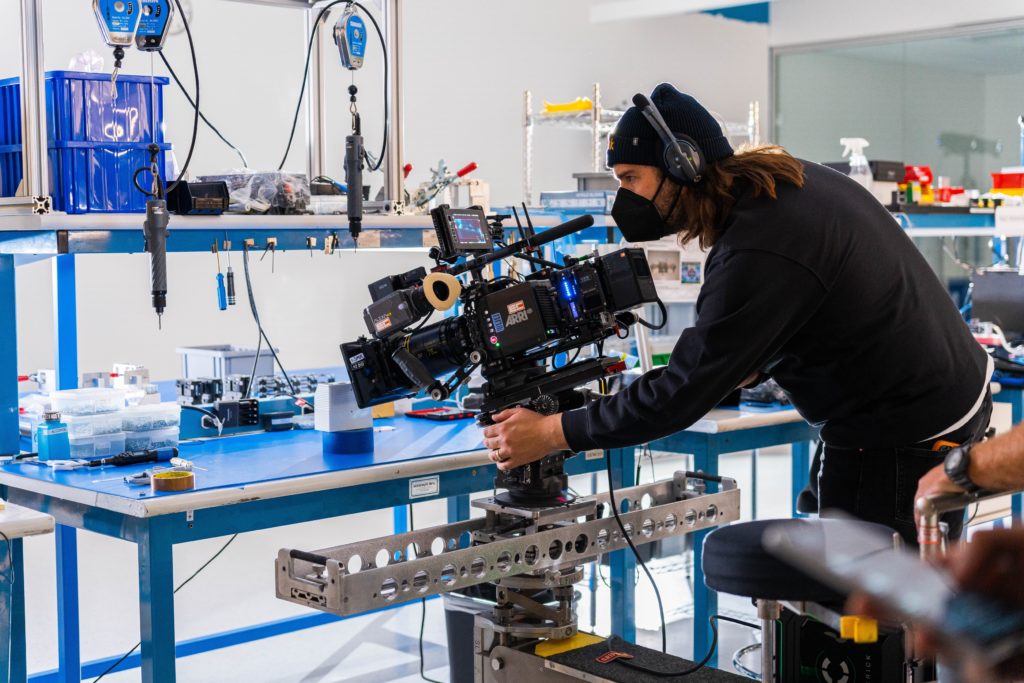
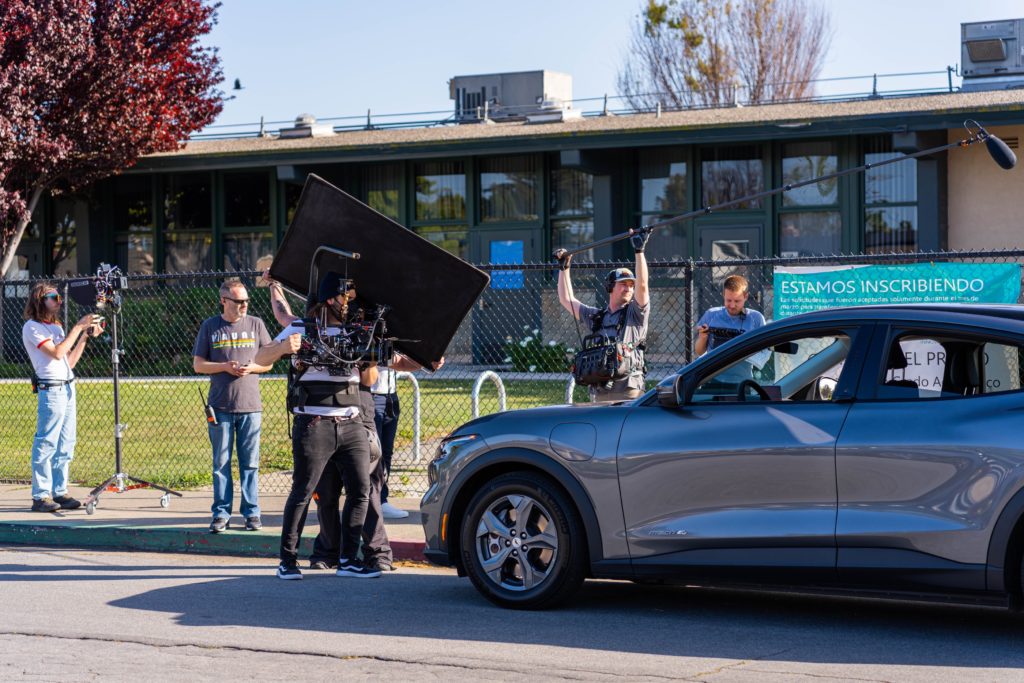
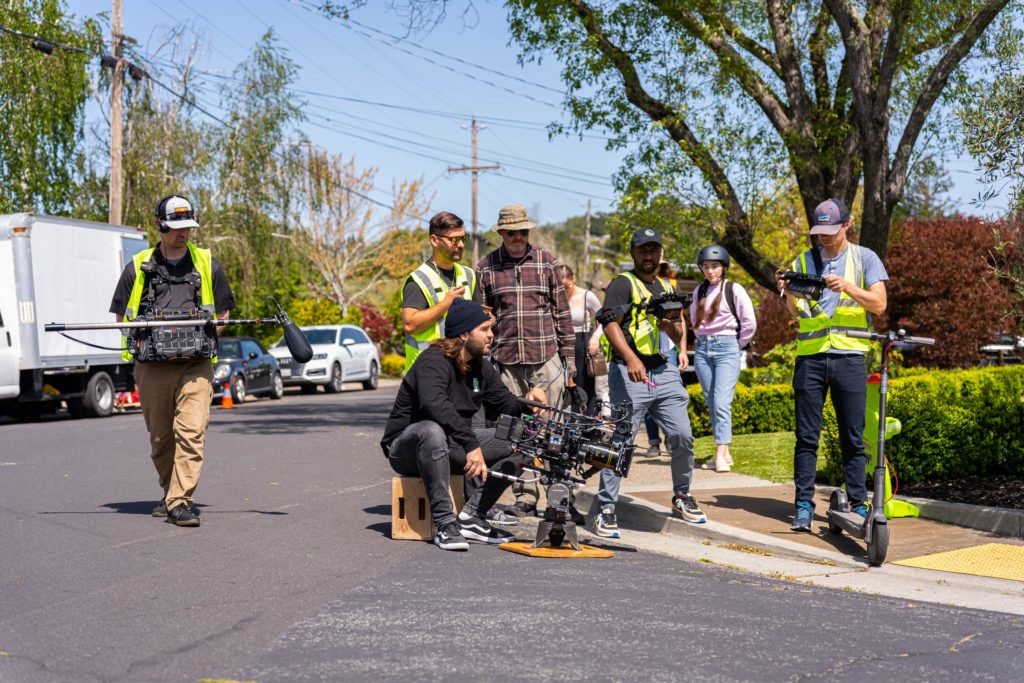
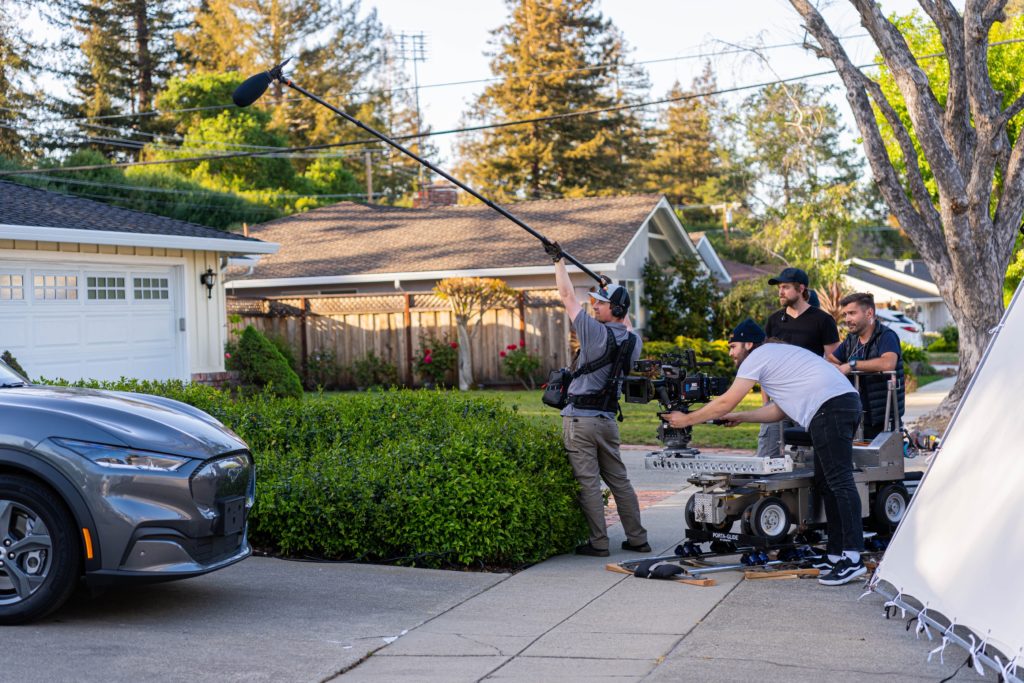
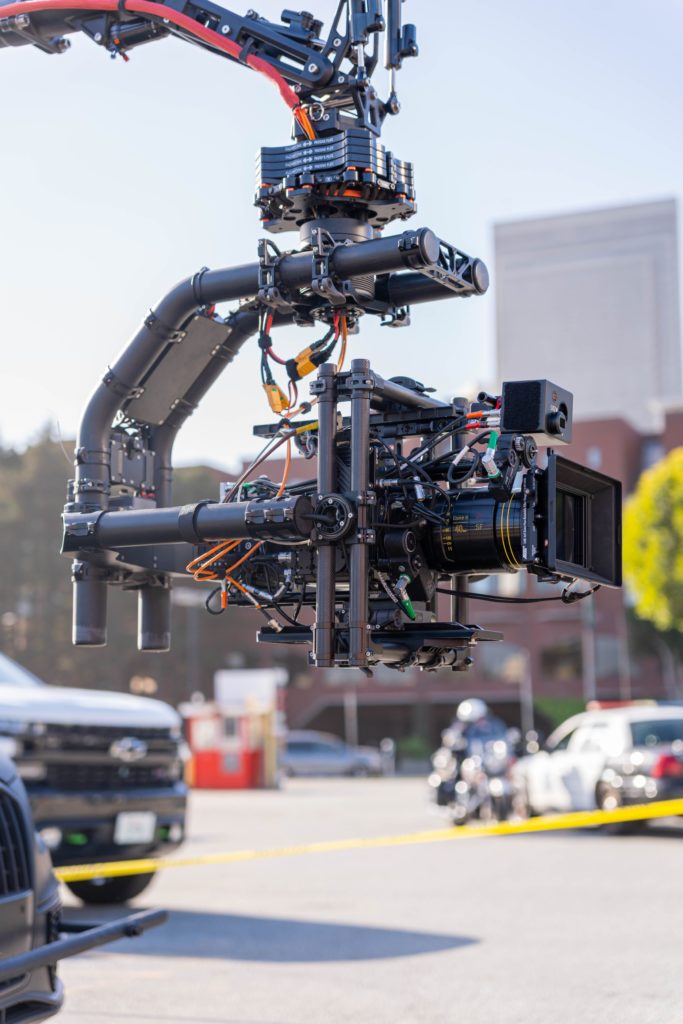
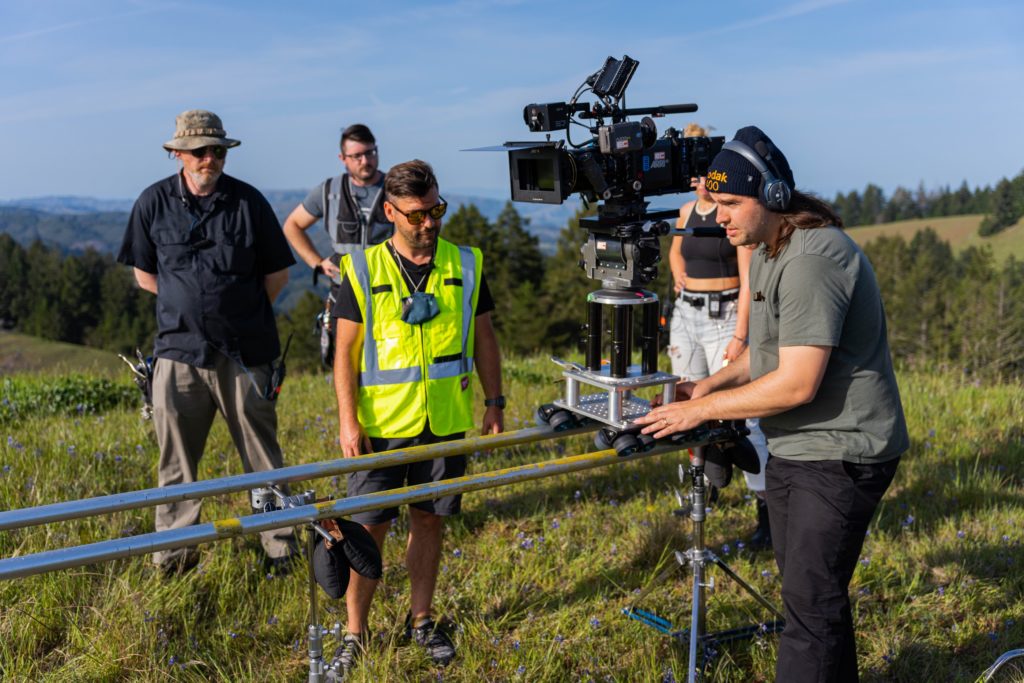
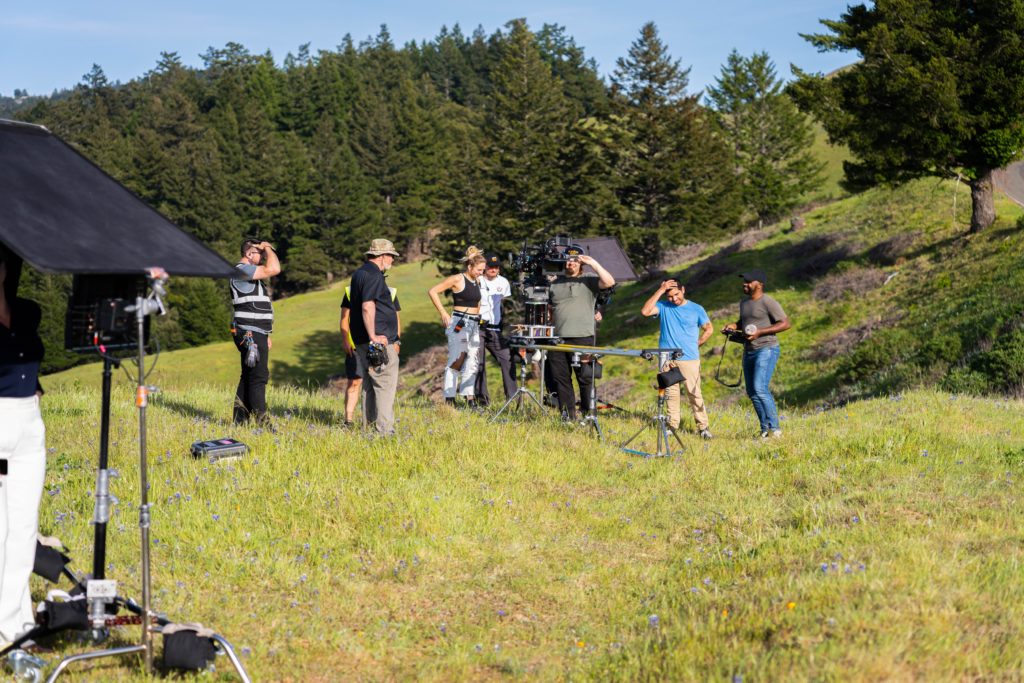
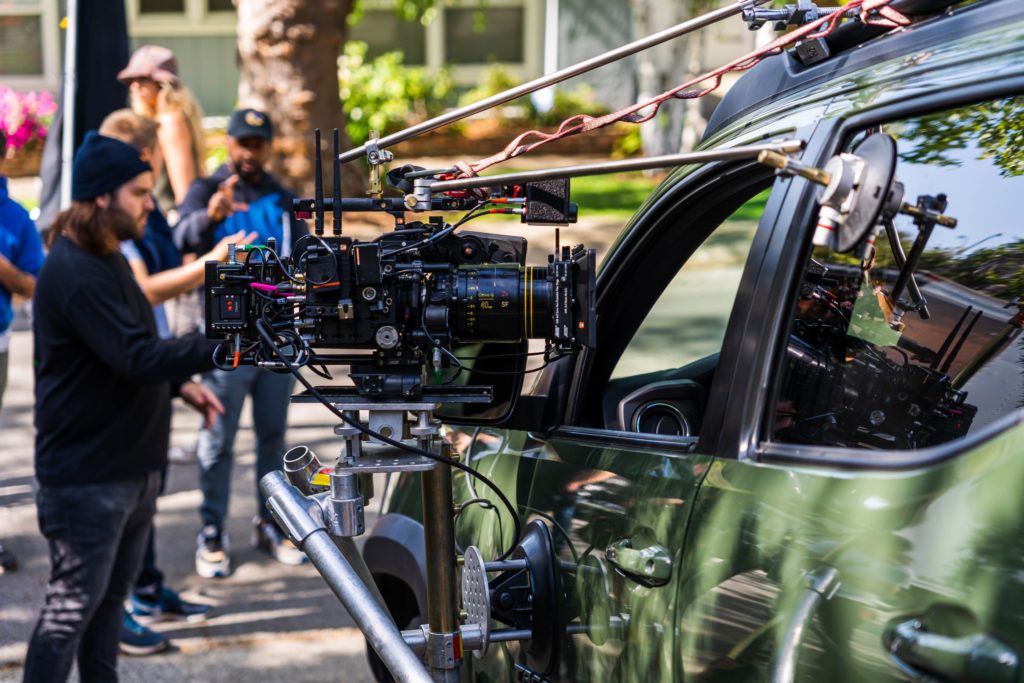
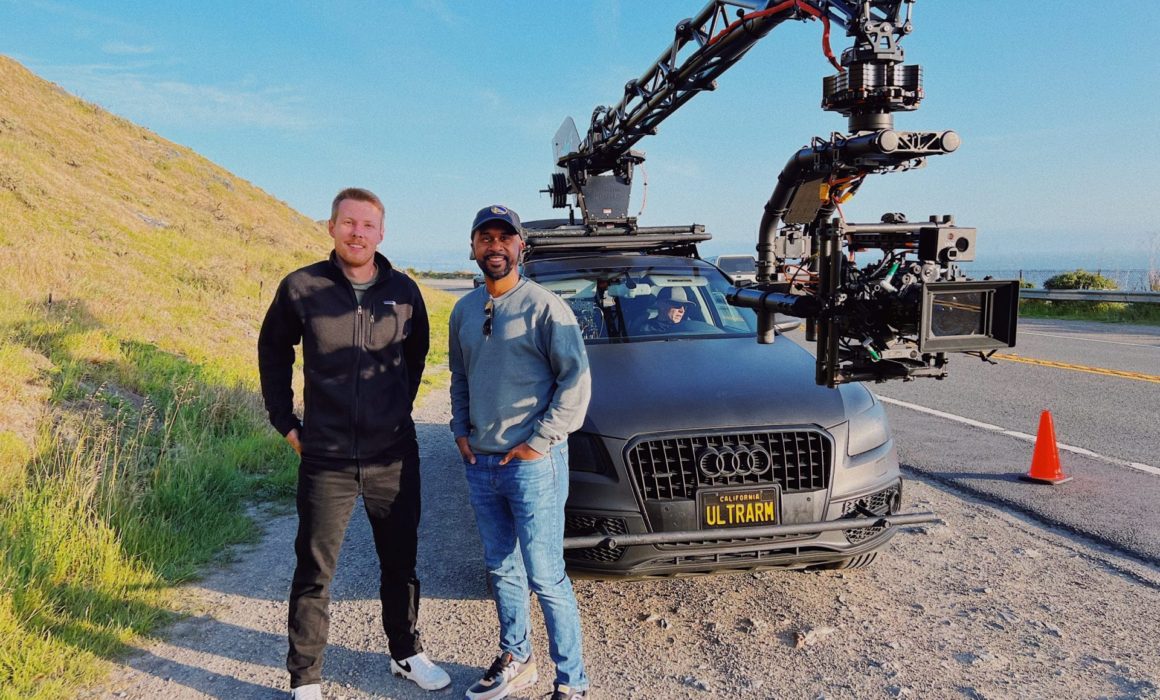
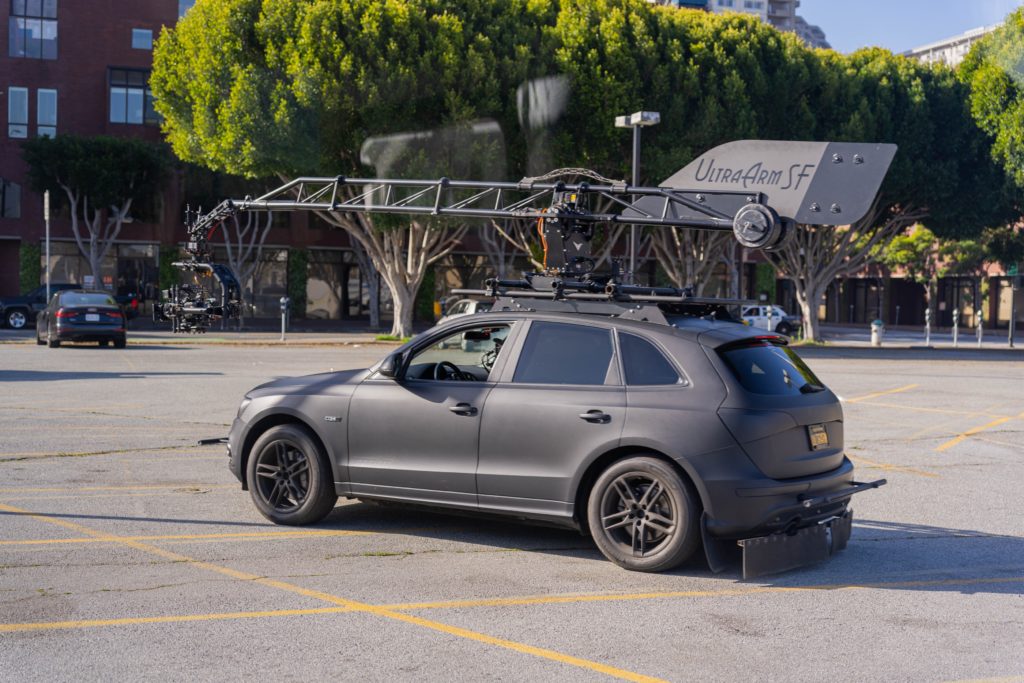
Once we completed the pre-production phase it was time for some fun! The four shoot days involved approximately twenty crew and each one of them was necessary to make sure we are able to not only get the cinematic shots that would represent their brand well, but would also keep us safe on the road. For day one, the russian arm day, where we were doing all of our shots on the road, we hired the local arm car company as well as San Francisco police and California highway patrol(CHP). This meant we would have full access to the road! It also helped that our locations manager was good friends with the SF film commission.

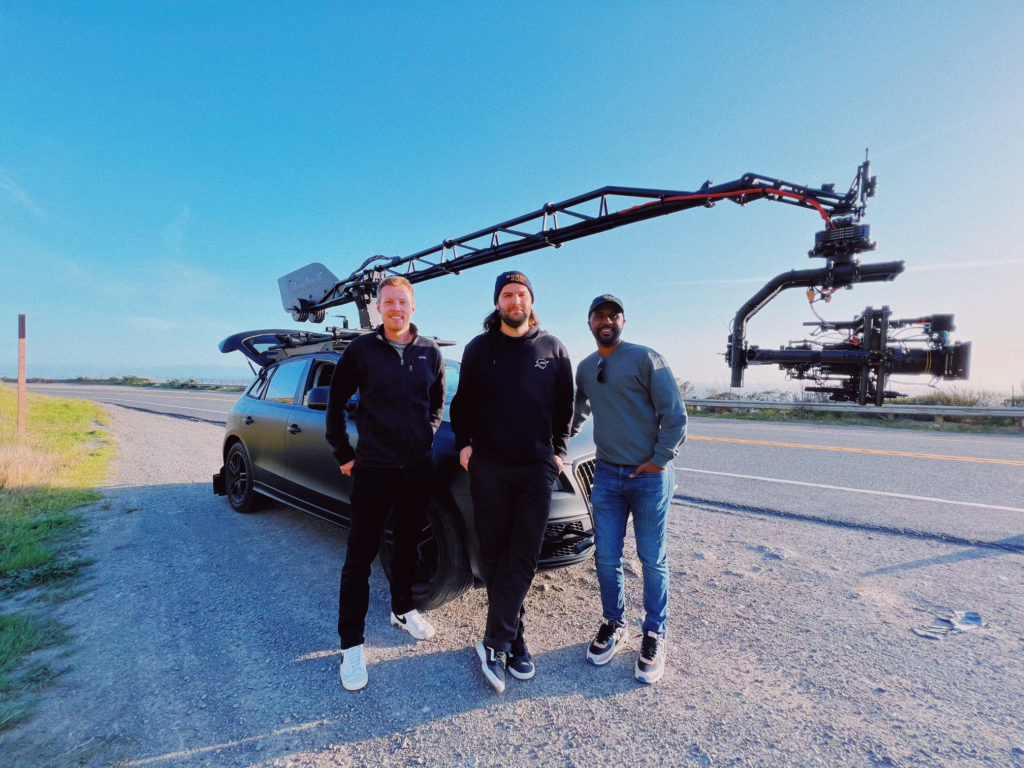
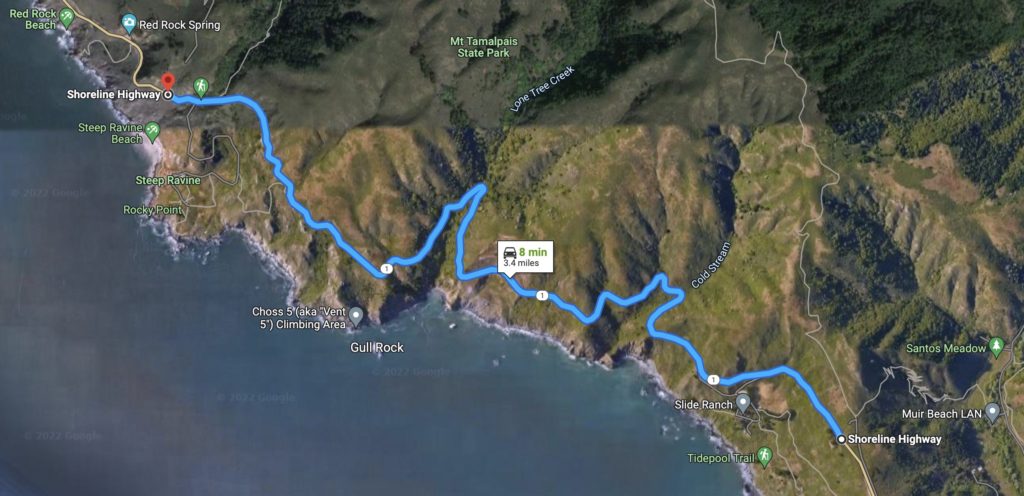
It was our first time being able to completely stop traffic and it was quite exhilarating. In the morning, we shot in downtown San Francisco by the Embarcadero as well as in the financial district. In the afternoon we went over the Marin and did our neighborhood driving shots as well as the coastal shots. This part of the day involved the CHP shutting down highway one between for a stretch of road between Muir beach and Stinson beach.

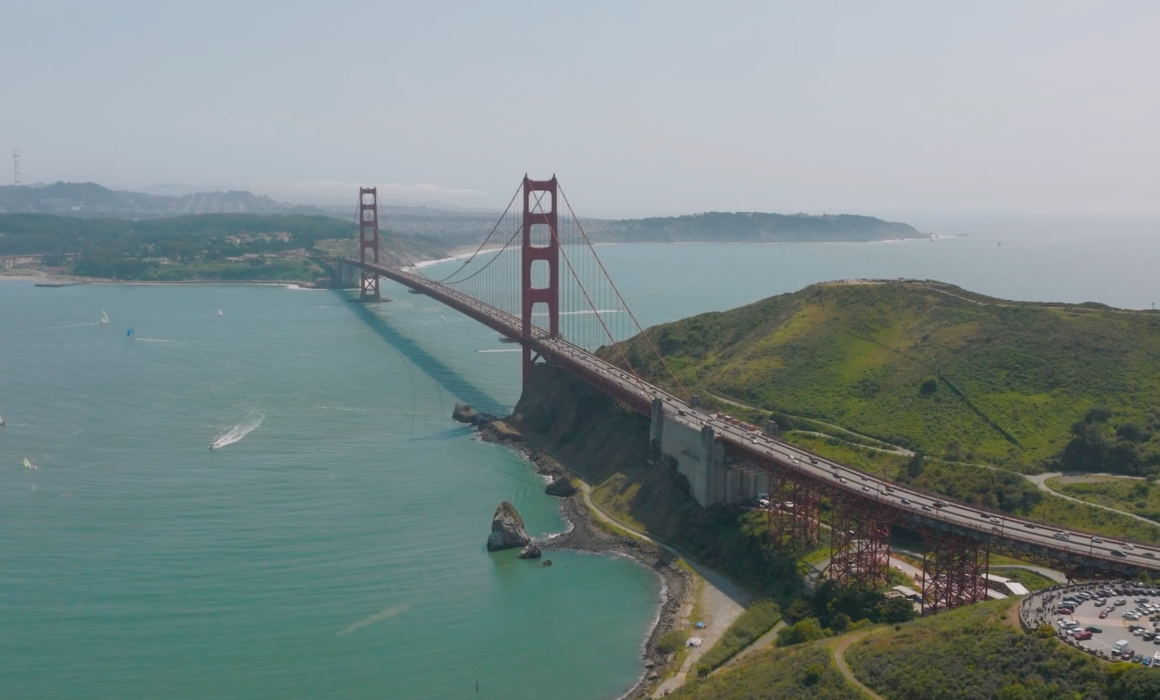
The image below shows the stretch of road on highway where the CHP shut down the road so we could film safely.
After we finished day one, we knew the shoot was going to be relatively smooth sailing. Day two involved our team shooting in the South Bay for the R&D scenes at their headquarters in San Jose. In the afternoon, we shot at a nearby house and school to get the daughter departure scene as well as the arrival. Because it was mandatory that we filmed at their headquarters in the South Bay, it only made sense that we shot the house and school in the South Bay as well.

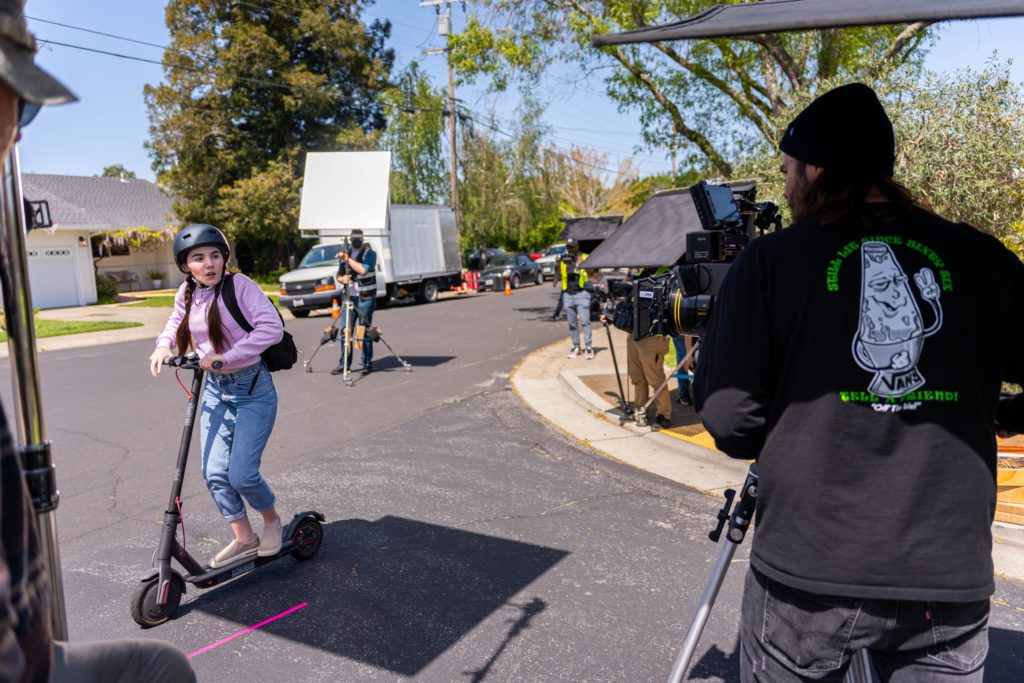
On day three we were in Marin for the kids departure scene as well as the near accident scene and the coastal driving in car shots. These location moves were tricky, with trying to move so many crew but we got it done!

For day four we were in San Francisco for the couple departure scene as well as the in car city shots and the business woman arrival. We finished up the shots up at Mount Tamalpais for the kids arrival scene. We definitely scored on the weather!

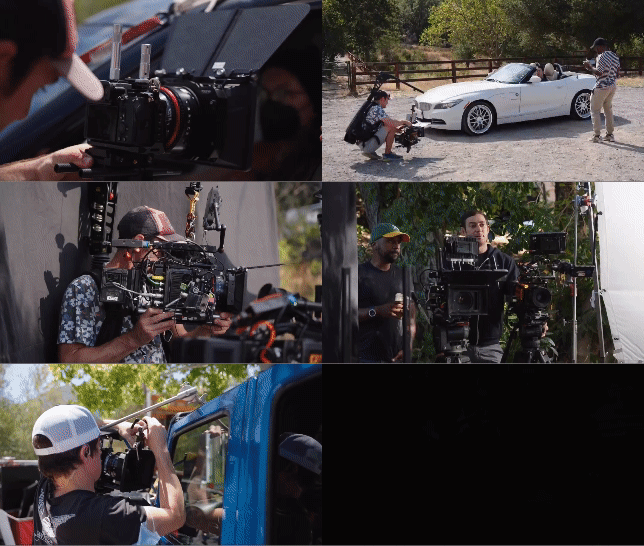
Quick behind the scenes video from the shoot.

Post Production

Once we captured all the footage from the shoot, it was just a matter of assembling things to get post production started! Our editor put together an assembly cut within a week and we were loving what we were seeing. Because their technology is inherently visual with how it uses lasers to map out the world around it, we knew VFX was going to take some time. We began sharing the plates of the scenes that would need visual effects integration with our VFX team. With regards to the GIF below, we took the drone shot of the truck on the road and then sent this to our VFX artist who then recreated the real world in a virtual setting by using a model of the same truck and animating it to show the distance that their lidar technology could detect.
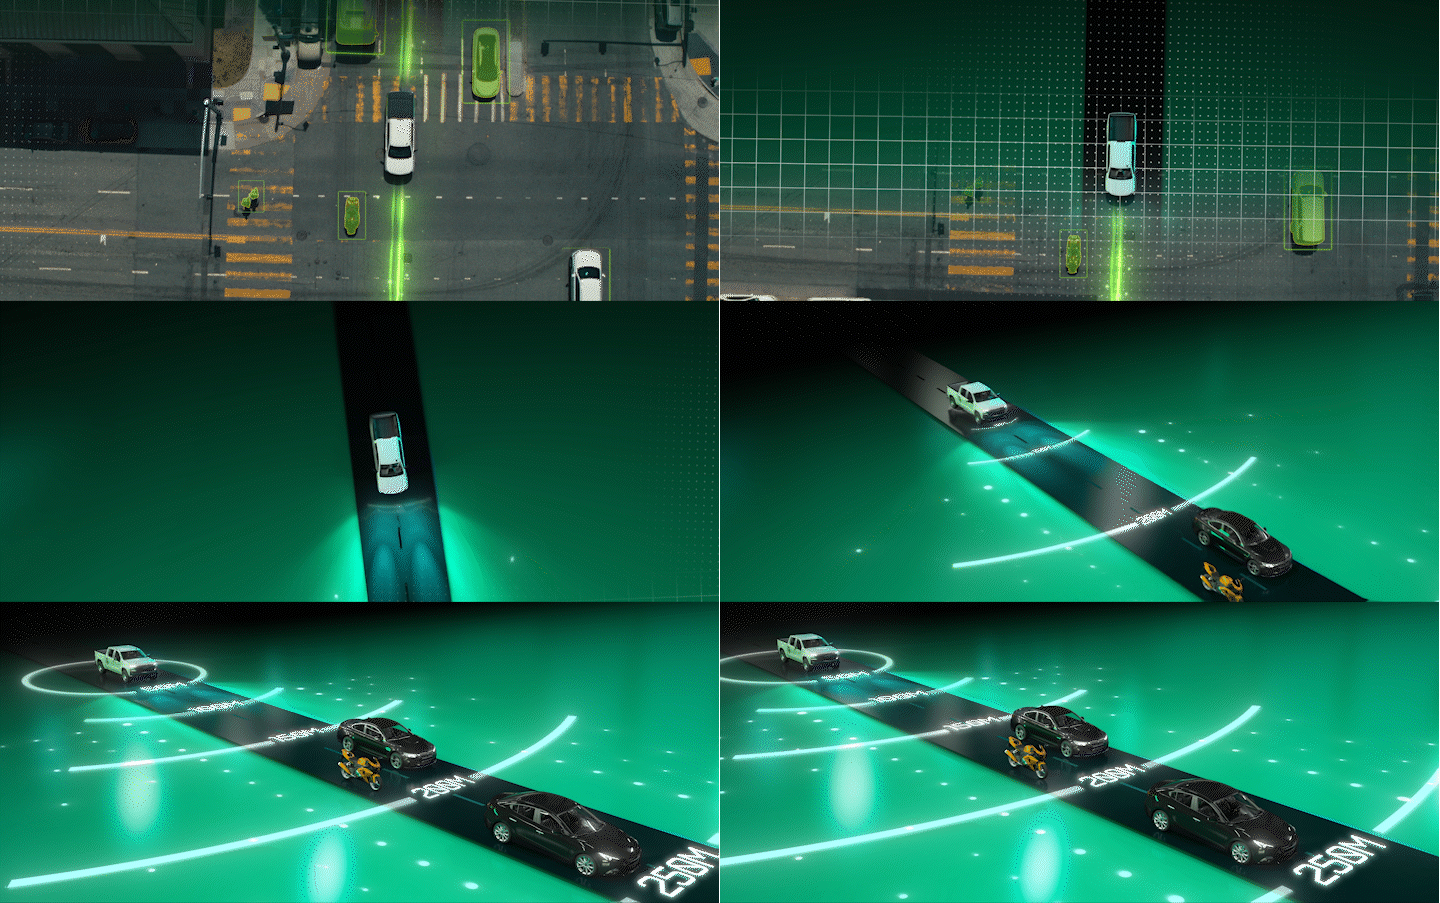
San Francisco vfx

The client was particular about how their technology was portrayed on screen so we spent extra time making sure their lidar technology was portrayed correctly on screen.
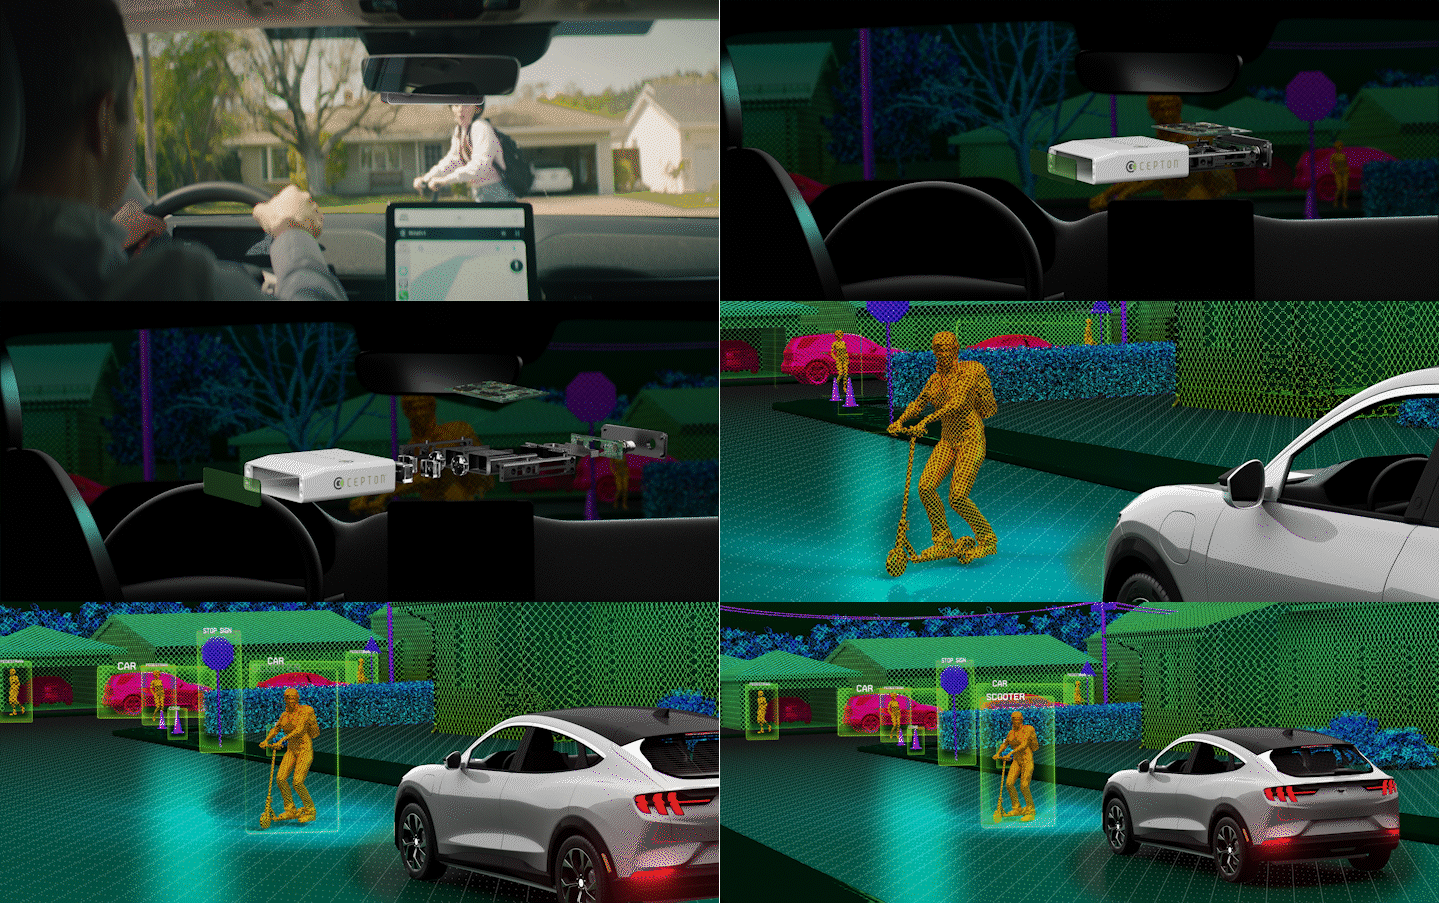
Once the client had signed off on the VFX, we were able to picture lock the video. At this stage, we moved on to color correction and sound design to put the finishing touches on the video.

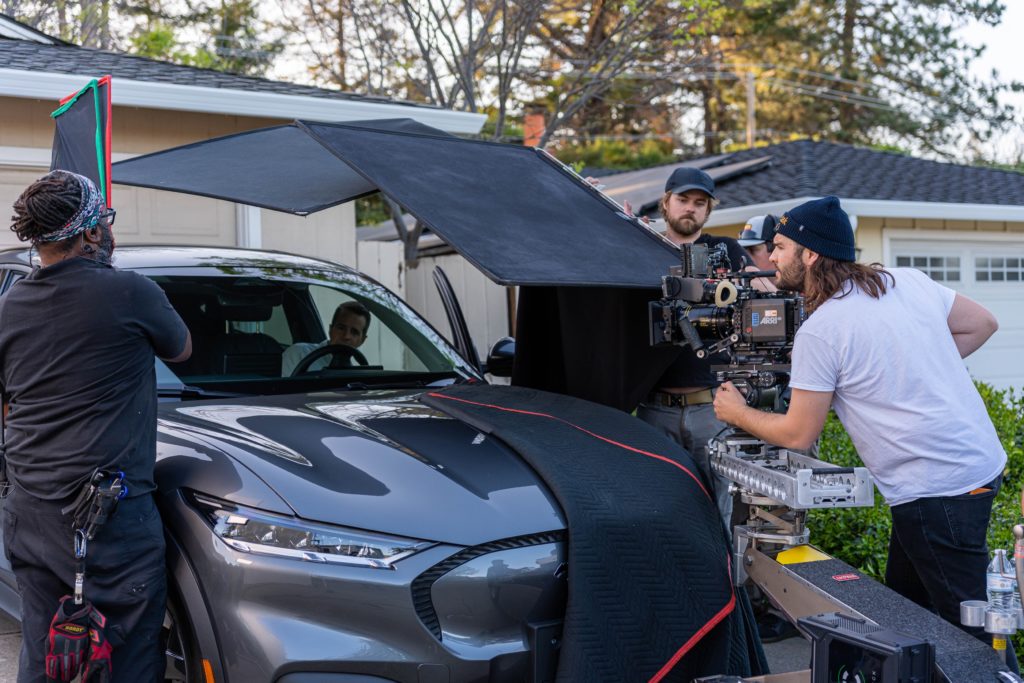
BTS Photos

Conclusion

We had a ton of fun on this production. It was our largest San Francisco brand video production so far. And it was also the project that our team put the most amount of hours into. As we continue to evolve as a company, it’s this type of work that we’d like to continue getting the opportunity to create! If you or your company are looking for a cinematic professional brand video, contract us today!


Luma Creative a San Francisco production company highlights important steps in livestream videograph
How to setup a professional livestream in San Francisco

In our digital era, live-streaming has emerged as a powerful medium for connecting with audiences in real-time. Whether broadcasting a pitch session, webinar, corporate event, or company gathering, the success of a livestream relies on the coordination of a dedicated videography crew. In this comprehensive guide, we explore the core crew roles within live-streaming videography, the equipment needed to execute the stream, and all the necessary planning and precautions to make your live stream a success. In this article, we’ll show you how to setup a professional livestream in San Francisco.

Creating a plan for live-streaming success

Since Live streams are inherently live, there is little room for error once the show gets started. As we continue learning how to setup a professional livestream in San Francisco there are a few things to consider. That is why it is important to have detailed plans, schedules, backups in case something goes wrong, and a prepared crew. There are many things to consider when preparing your live stream but this checklist is a useful starting point before the event gets rolling. 

Step 1: Technical Rehearsal

A rehearsal is a good place to start to make sure everyone is on the same page and there is nothing missing before the event. It allows the crew to iron out any wrinkles and check that all equipment is working properly. Here are some important things to go through during the technical rehearsal:

Equipment Testing: Test all cameras, microphones, lighting equipment, and streaming hardware/software to ensure they function properly.

Connection Checks: Verify the stability and speed of the internet connection at the venue. Test the streaming platform to ensure compatibility and reliability.

Run-throughs: Practice the entire live stream from start to finish, including transitions, graphics integration, and audience engagement elements.

Step 2: Create Backup Plans:

An extremely important step in pre-production for live streaming is understanding where problems may arise and having a plan in place. These are important backup plans to consider:

Backup Equipment: Have spare cameras, microphones, cables, and other essential equipment on standby in case of malfunctions or failures. Ensure that backup equipment is tested and ready to use if needed.

Luma Creative a San Francisco production company highlights important steps in livestream videograph
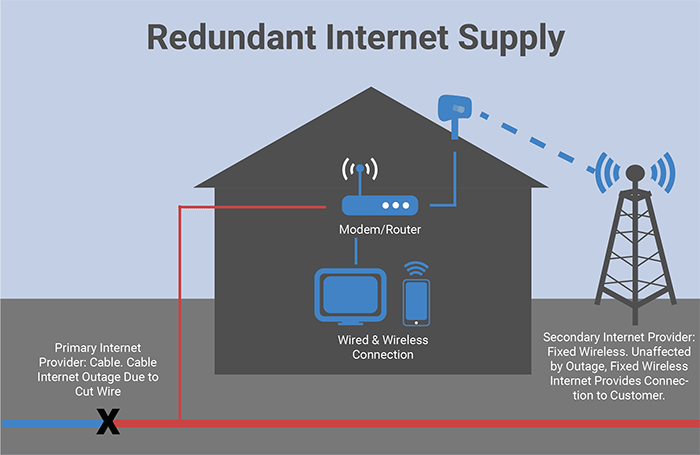
Redundant Internet Connections: Set up redundant Internet connections, such as multiple ISPs or mobile hotspots, to ensure uninterrupted streaming in case of internet outages or slowdowns.

Alternative Streaming Platforms: Have backup streaming platforms or services ready to switch to in case the primary platform experiences technical issues or downtime.

Step 3: Determine whether you are providing or being provided an audio feed

Situation # 1 – You may need to provide an audio feed:

Remote or Outdoor Events: In situations where the event takes place in a remote location or outdoor venue, you may need to provide your own audio setup. This typically involves using wireless, shotgun, or lavalier microphones to capture clear and high-quality audio from presenters, performers, or participants.

SInterviews or Panel Discussions: For events featuring interviews or panel discussions, it’s essential to have dedicated microphones for each participant to ensure clear audio capture.

Situation #2 – You may be provided with audio feed:

Professional Venues or Studios: In professional venues or studios equipped for live productions, audio feeds may be provided by the venue’s audio team or production crew. This could include a mix of ambient sound, microphone feeds, and instrument feeds, depending on the event requirements.

Conferences or Corporate Events: In corporate events or conferences held in well-equipped venues, audio feeds may be available from the venue’s sound system or audio setup. This can include microphone feeds from podiums, wireless microphones for presenters, and audio feeds from multimedia presentations.

Professional Broadcasting Setups: In professional setups, audio feeds may be integrated into the production workflow, with audio engineers responsible for managing audio mixing.

The decision to provide audio for livestream event videography or to be provided with an audio feed depends on the event’s specific requirements, the available resources, and the desired production quality. Additionally, ensuring clear, high-quality audio is essential for delivering a professional and engaging livestream experience. It is important to discuss with your client what will be available before the technical rehearsal.

Step 4: Create a detailed run-of-show

A run-of-show guides the crew through the sequence of events, camera shots, and technical cues. These are some things to consider in your run-of-show:

Sequence of Events: Outline the order of segments, presentations, performances, or discussions planned for the live stream.

Camera Shots: Specify the camera angles, framing, and movements for each shot to ensure dynamic and engaging visuals.

Layouts: Design or acquire a layout of the venue space so you can plan your camera angles and coordinate your equipment setup. 

Technical Cues: Include cues for graphics integration, transitions, audio cues, and any other technical elements.

Step 5: Have a plan for backup power:

While not likely, power outages can completely upend a live stream production, so it’s crucial to have backup power sources available. Here’s how to ensure access to backup power:

Generators: Have generators on standby to provide backup power in case of electrical outages or failures.

Uninterruptible Power Supplies (UPS): Install UPS units for critical equipment to provide temporary power during brief outages.

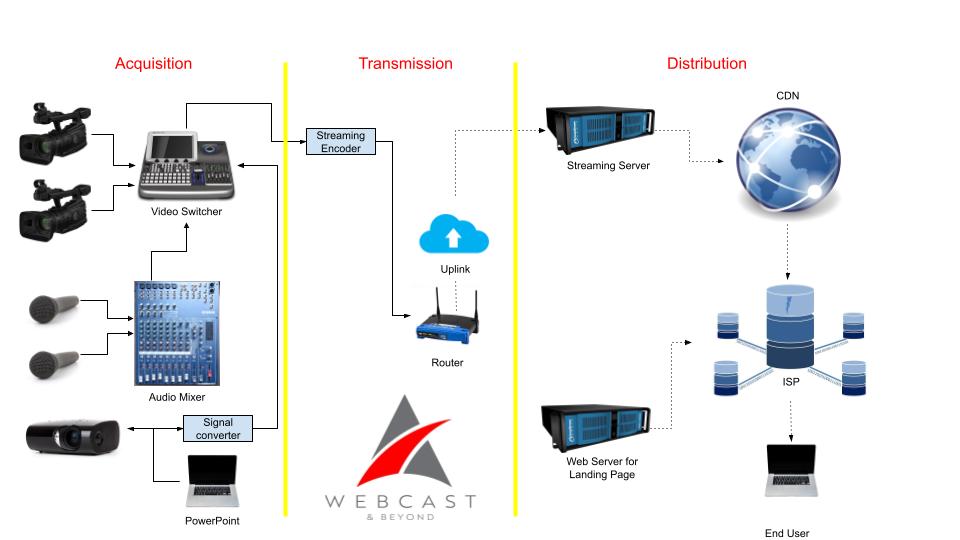
Step 6: Understand signal flow for livestream videography

Signal flow refers to the path that audio and video signals take from their source (such as a camera, microphone, or computer) to their destination (such as a streaming platform or recording device).

Here’s a basic overview of signal flow in livestream videography:

  1. Source Devices: These are the devices where the audio and video signals originate. Common sources include cameras, microphones, computers, and video playback devices.
  2. Input Connections: The signals from the source devices are typically fed into a central hub or switcher. This could be a physical hardware switcher or a software-based solution on a computer.
  3. Switcher/Mixer: The switcher or mixer allows the operator to select which audio and video sources are being used for the livestream. It may also include features for mixing audio levels, applying effects, and transitioning between different camera angles.
  4. Output Connections: Once the audio and video signals have been mixed and processed, they are sent to the streaming device. This could be a dedicated hardware encoder, a computer running streaming software, or a cloud-based streaming service.
  5. Streaming Device: The streaming device encodes the audio and video signals into a format suitable for online streaming. It also handles tasks such as compression, bitrate management, and network connectivity.
  6. Streaming Platform/CDN: The streaming platform or CDN distributes the livestream to viewers around the world. This could be a platform like YouTube, Twitch, Facebook Live, or a custom CDN configured for a specific event or organization.

Crew for Livestream Videography 

Live streams come in all shapes and sizes. However, it is important to be aware of all the possible crew needed to execute a dynamic livestream. Here is a breakdown of crew members to consider for your livestream and what their responsibilities are: 

Crew Roles

Producer: The producer serves as the project manager, overseeing all aspects of the live stream from conception to execution. They coordinate with clients, manage budgets, and ensure that the production stays on schedule and within scope.

Show Caller: The show caller and producer roles often get confused or combined. However, while a producer is primarily concerned with pre-production and organizing the event, the show caller is the on-the-day specialist who provides direction and oversees the live event. 

Technical Director: The technical director oversees the technical aspects of the live stream, including video switching, graphics integration, and live encoding. They work closely with the director and camera operators to execute smooth transitions and integrate graphics or pre-recorded content seamlessly.

Camera Operators: Camera operators are tasked with capturing the visuals during the live stream. They operate cameras, adjust framing and focus, and anticipate the action to ensure smooth transitions between shots.

Audio Engineer: The audio engineer is responsible for capturing high-quality sound during the live stream. They set up microphones, monitor audio levels, and troubleshoot any issues that may arise to ensure clear and consistent audio throughout the broadcast.

Graphics Operator: The graphics operator is responsible for creating and integrating on-screen graphics, lower thirds, and other visual elements during the live stream. They work in coordination with the technical director.

Stream Engineer: Manages the live streaming platform and encoding settings. Monitors streaming quality and bandwidth usage. Troubleshoots streaming issues and adjusts settings as needed. Coordinates with the technical director and IT support for network infrastructure. 

Production Assistant: Production assistants perform tasks such as equipment setup, cable management, and running errands. They assist with logistics and troubleshooting, ensuring that the production runs smoothly behind the scenes.

Not every live stream event will require the attendance of each crew position. However, it is important to understand the crew roles and where they fit in depending on what is needed to execute the livestream.

Equipment needed for livestream videography:

Live streaming videography differs from all other videography pre-production. One of the most important pieces of how to setup a professional livestream in San Francisco is to make a list of the various equipment needed to execute, budget, and plan for the event. While different crews may differ on the exact equipment they bring, this checklist is a good starting point for what may be needed for a technical rehearsal, and shoot day. 

Cameras:

Professional video cameras

DSLR or mirrorless cameras with clean HDMI output

Tripods or camera stabilizers for steady shots

Audio Equipment:

Lavalier microphones

Shotgun microphones

Audio mixers

Headphones

Lighting Equipment:

LED panel lights

Softbox lights

Light stands and modifiers

Streaming Hardware/Software:

Live streaming encoders/software

Capture cards/interfaces

Internet connection: High-speed wired internet connection or mobile hotspot with sufficient bandwidth for streaming.

Video Switcher: A video switcher enables the director or technical director to switch between different video sources in real time, such as multiple cameras, pre-recorded content, computer screens, or graphics overlays.

Computer Setup:

High-performance computer

External monitors

Power Management:

Uninterruptible Power Supplies (UPS)

Power strips and surge protectors

Cabling and Accessories:

HDMI, SDI, and XLR cables

Cable organizers

Adapters, converters, and splitters

Graphics and Overlays:

Software: Adobe Photoshop, Adobe Illustrator, and Canva for creating custom graphics and overlays.

Integration hardware/software: Hardware solutions like Blackmagic Design ATEM Mini Pro or software solutions like NewBlueFX Titler Live.

Monitoring and Recording:

Video monitors

Video playback devices

Importance of prepared livestream videography

Understanding all the necessary steps to have a fully prepared livestream event is important. Hopefully, this article taught you how to set up a professional livestream in San Francisco. Additionally, once the event gets underway, you do not have the ability to yell “cut,” therefore making it crucial nothing goes wrong once the cameras are rolling. However, if you understand the necessary crew, equipment, and precautions needed for a livestream event then it is more than possible to execute! Not all two livestream events are the same. However, having knowledge of all the moving parts of livestream videography and all the questions to ask any potential client will ensure the event goes live without a hiccup.

If you are looking for a professional live-streaming company in San Francisco, contact us today!

how to find a film fixer in San Francisco Bay Area
What does a film fixer do in video production?

There are a lot of people involved in any given video production. We have all heard of Producers, Directors, Actors, Directors of Photography, etc. However, there is a crucial behind the scenes role most people have not heard of called a film fixer. Film fixers are the unsung heroes who ensure everything runs smoothly throughout the filming process. So, what exactly does a film fixer do?

Responsibilities of a film fixer

A film fixer is a key figure in film production, overseeing everything from pre-production logistics to editing and marketing efforts. They ensure smooth coordination across all stages of the filmmaking process. Not everyone will refer to this position as a “film fixer”, other terms you may have heard are local producer, production coordinator, and local fixer. Fixers are crucial, especially in new places. They use their developed connections and experience to help productions find the services they need within different budgets. This allows non-local productions to start filming smoothly without worrying about local logistical problems, saving time and money.

Locations

Firstly, a film fixer is responsible for scouting and securing locations for shooting. This involves finding the perfect spots that match the director’s vision and obtaining the necessary permits and permissions to film there. There are very specific steps involved in location scouting, and every location is different. A film fixer helps non-local producers whether it’s scouting a bustling city street, like Market street in San Francisco, or permitting a national landmark like the Golden Gate Bridge. This important role makes sure everything is in place and in accordance with local regulations.

In this article Luma Creative, a video production company and film fixer explains the importance of a local film fixer
For our commercial with Sitpack we were able to use our local Bay Area location knowledge to find the perfect secluded beach!

Film fixers are logistics specialists

Once the locations are locked in, your hired fixer moves on to logistics. They coordinate transportation for the cast and crew, arrange accommodation if needed, and ensure that everyone and everything arrives at the right place at the right time. Sometimes we travel with gear for an out of town shoot; a film fixer can help you understand what you should bring and how you can source equipment at the shoot location. This requires excellent organizational skills and the foresight to understand local accommodations. For turo our crew went to Austin, Maui, New Orleans, and Vancouver. In Vancouver we hired a fixer to help us with logistics, locations, crew hiring, etc. While we are experts in producing video shoots from start to finish in San Francisco, it benefited us to bring in an expert while traveling to Canada.

In this article Luma Creative, a video production company and film fixer explains the importance of a local film fixer
For our shoot with Turo we shot in many different locations. Bringing in a local film fixer helped us navigate logistical challenges

Film fixers are local liaisons

Furthermore, a film fixer serves as a liaison between the production team and the local community. They foster positive relationships with residents and businesses in the filming area, addressing any concerns and ensuring minimal disruption during shooting. For example, for a San Francisco based shoot we would hire crew members that we know are compatible with each other. Further, we have vetted local locations and know what will draw negative attention in the community. 

Case Study: Local Fixer in Bali

There are many reasons to pick a shooting location including feasibility, story, and budget. However, picking a location in a foreign country can create new options for creative visual imagery. Film and media hubs such as Los Angeles, New York, Paris, etc can only offer a fraction of the diverse locations the world has to offer. With just a quick google search you can find film fixers in virtually any location on the globe. Want crystal clear water and island topography? Look no further than Bali. There are film fixers there who will help you with pre-production, location scouting, visa application, legal documentation, local crew, and more. In addition, the visa application process in Bali is famously rigorous, and this local company can help you breeze through customs. The scope of these local companies is endless, they can take potentially draining logistical challenges off of a producer’s hands.

Luma creative a San Francisco video production company discusses film fixers in other locations
Example of the local scenery available in the island province of Bali. There, you can hire local film fixers to source everything from visas to transportation for your film crew

Local Connections

In addition to their logistical duties a film fixer also assists with providing their network of local connections. They will have plenty of contacts within the industry such as talent agencies, prop houses, drone operators, gear rental companies, etc. Further, this can ease a foreign producer’s workload but can provide better rates and responsiveness from the providers. 

Considering using a film fixer

Overall, the role of a film fixer is multifaceted and dynamic. They provide a combination of organizational skills, and “on the ground” knowledge that is impossible for outside productions to have. Without their behind-the-scenes efforts, many video productions would never get off the ground. So, the next time you consider planning a production in a place you are not an expert in, consider the services of a film fixer.


luma creative is an sf video production
When to Use a Helicopter for Video Production

Recently, Luma Creative was brought on to a video production project that did not quite fit the parameters of any previous work. Our client was building out the logistics of a television commercial, and the specifics of that posed a few challenges. In order to get the desired results and stick to our budget, we decided to use helicopter video production. Our San Francisco video production crew does a lot of drone work but helicopter use was something new for our team.

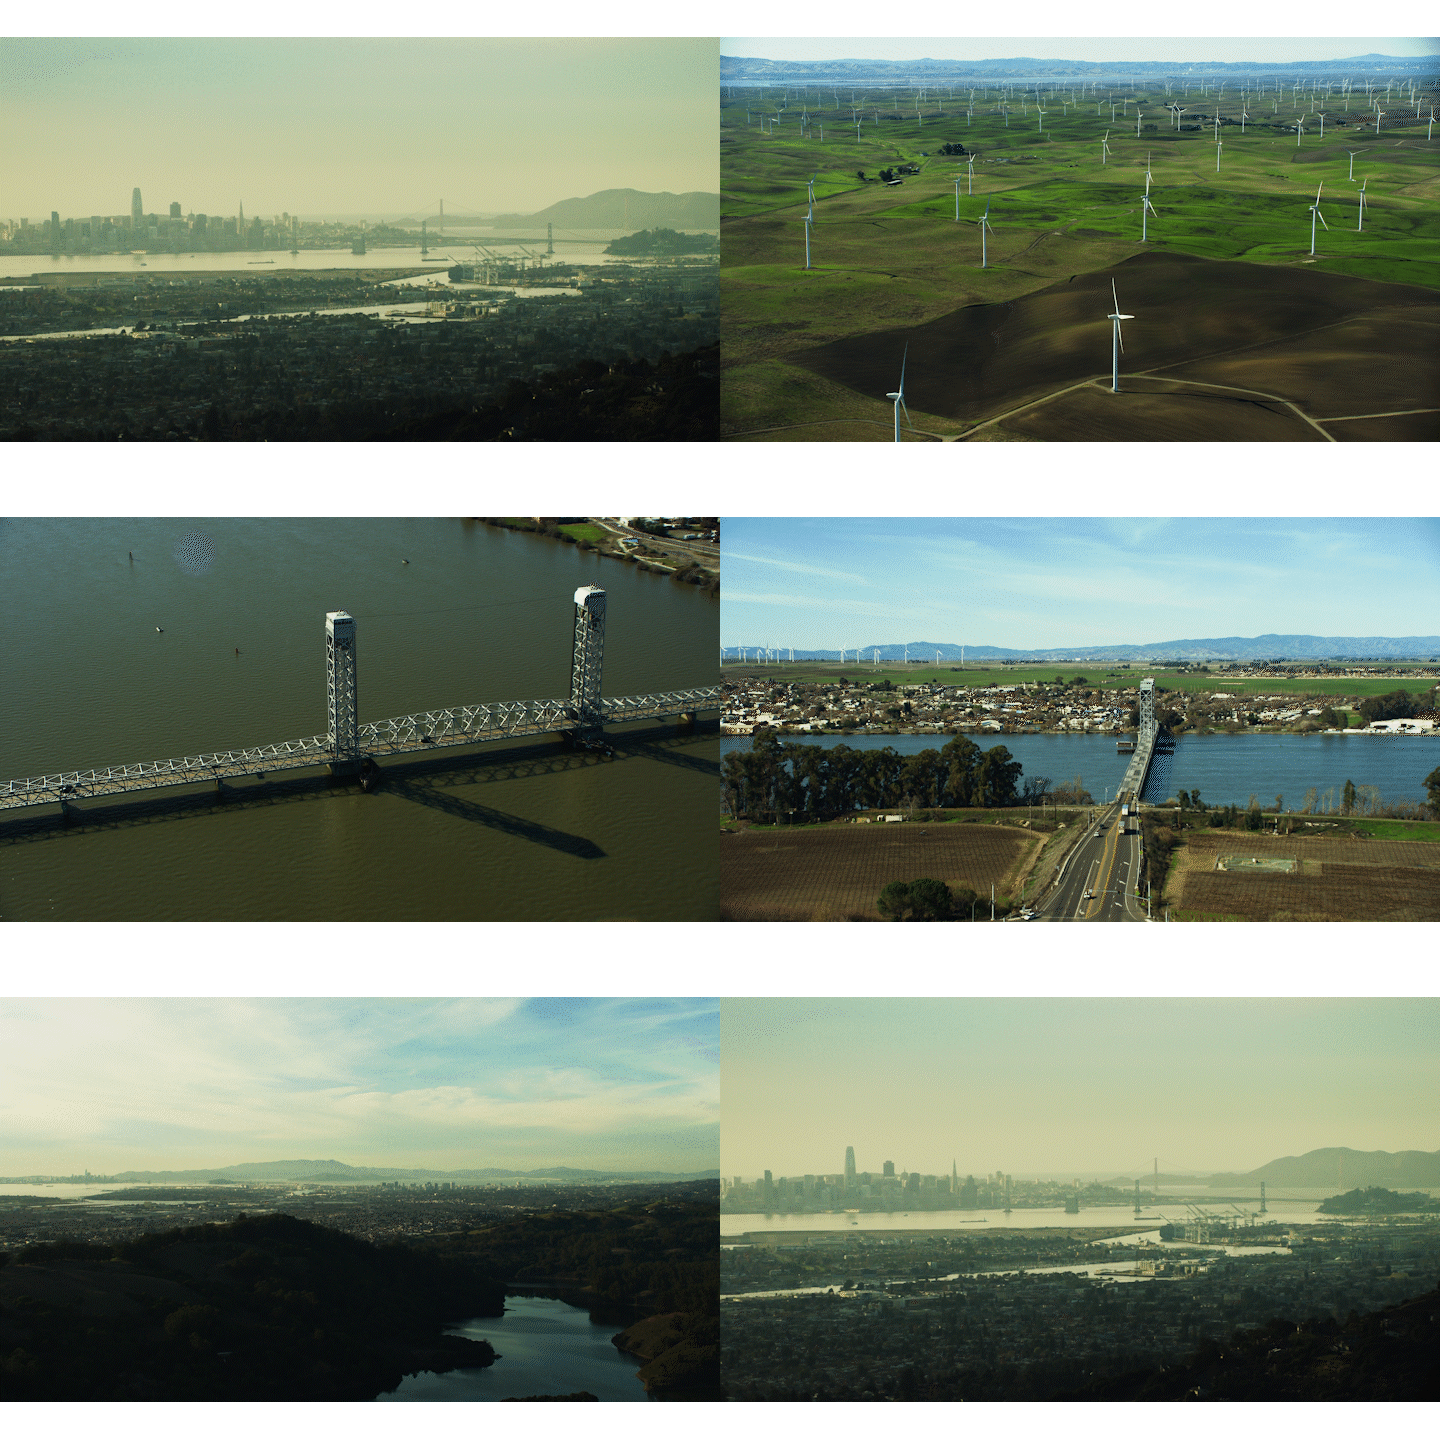
Let’s paint a picture: Our client is building a massive land development and needs to not only highlight where this land development is, but how far it is from other local municipalities. To do this they came up with a simple solution. They wanted a continuous shot that went from nearby cities and followed major highways to their new land development. The idea was then to speed ramp the shot. This would allow us to give the viewer a general idea of this new land development and fit it all into potential 15, 30, and 60 second television spots. Our client knew exactly what they wanted, and while that can be invaluable in pre production, they also had no idea how to achieve this shot. That’s when we decided to get creative and take to the skies for helicopter video production.

Current Information on Helicopter Video Production

There is not a ton of information out there on when to use a helicopter for video production. First off, helicopter video production is expensive and therefore makes it inaccessible to most filmmaker’s budgets. Secondly, helicopter videography is not well advertised. It took our production team days of researching and contacting different companies to put together a sound team capable of executing the job. Sure, if you are in a big market, like Los Angeles, you will have more options. However, our project was operating out of San Francisco and we needed to come up with a unique plan in order to deliver for our clients. If you are interested in how to put together a helicopter videography production then read on to hear about our company’s experience!

Options for Aerial Videography

Drone Videography

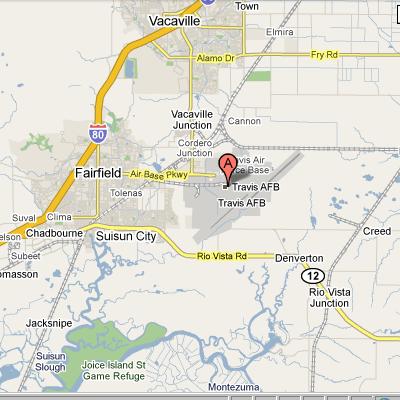
The first option we sought out to execute our clients’ vision was drone videography. Luma Creative is no stranger to drone videography and we have utilized drones for many different types of shoots. Drone videography offers several advantages over traditional ground-based filming techniques. First off drones offer versatility and maneuverability. Secondly, they are cost-effective. They require small crews to operate, and are budget friendly to rent. For all these reasons and more, drones have become the go to aerial videography device of choice and we are no stranger to their effectiveness. However, no two shoots are the same and in this case our client’s shot went directly over “The Gateway to the Pacific”, also known as Travis Air Force Base. Drones are strictly prohibited over American airforce bases and thus we were forced to pivot to option 2. 

Map of aerial videography

Travis Air Force Base was directly in the way of our desired flight path. This ruled out drone videography for our aerial footage.

VFX

While the task of achieving this shot for our client seemed daunting using live action videography, we pivoted to the world of VFX and Motion graphics to answer the call. Some main advantages of VFX include unlimited creativity. This allows us filmmakers to bring visions to life in ways that were previously impossible or prohibitively expensive. Furthermore, VFX provides Realism and Immersion. Our goal was to blend the real world utilizing programs like google earth and unreal engine. Finally, VFX offers safety and control. You do not need to compromise your vision while making sure your drone isn’t shot down by air force control. We deliberated this option extensively with our in-house VFX team. However, due to a quick two week turnaround we pivoted to our third and final option.

Helicopter Video Production

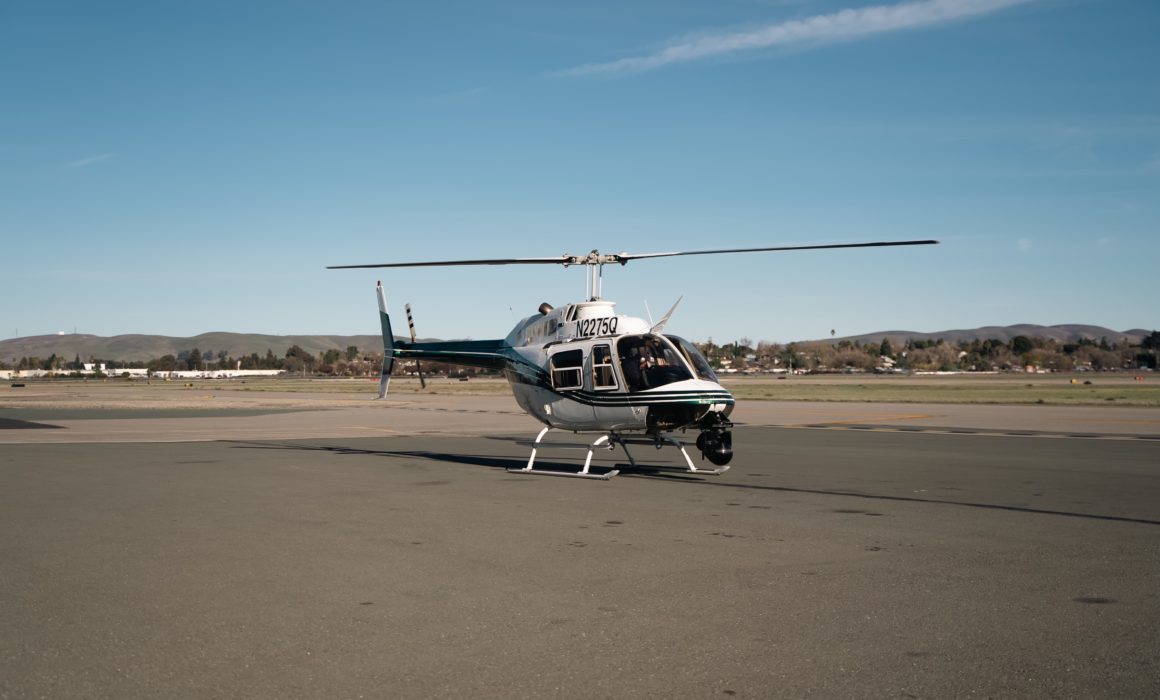
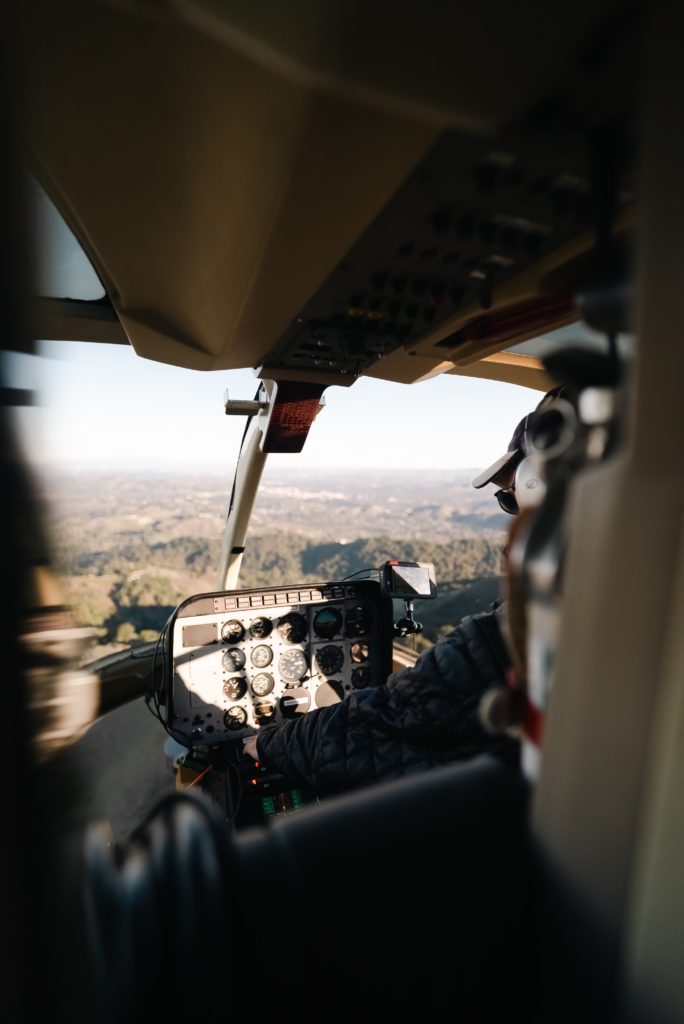
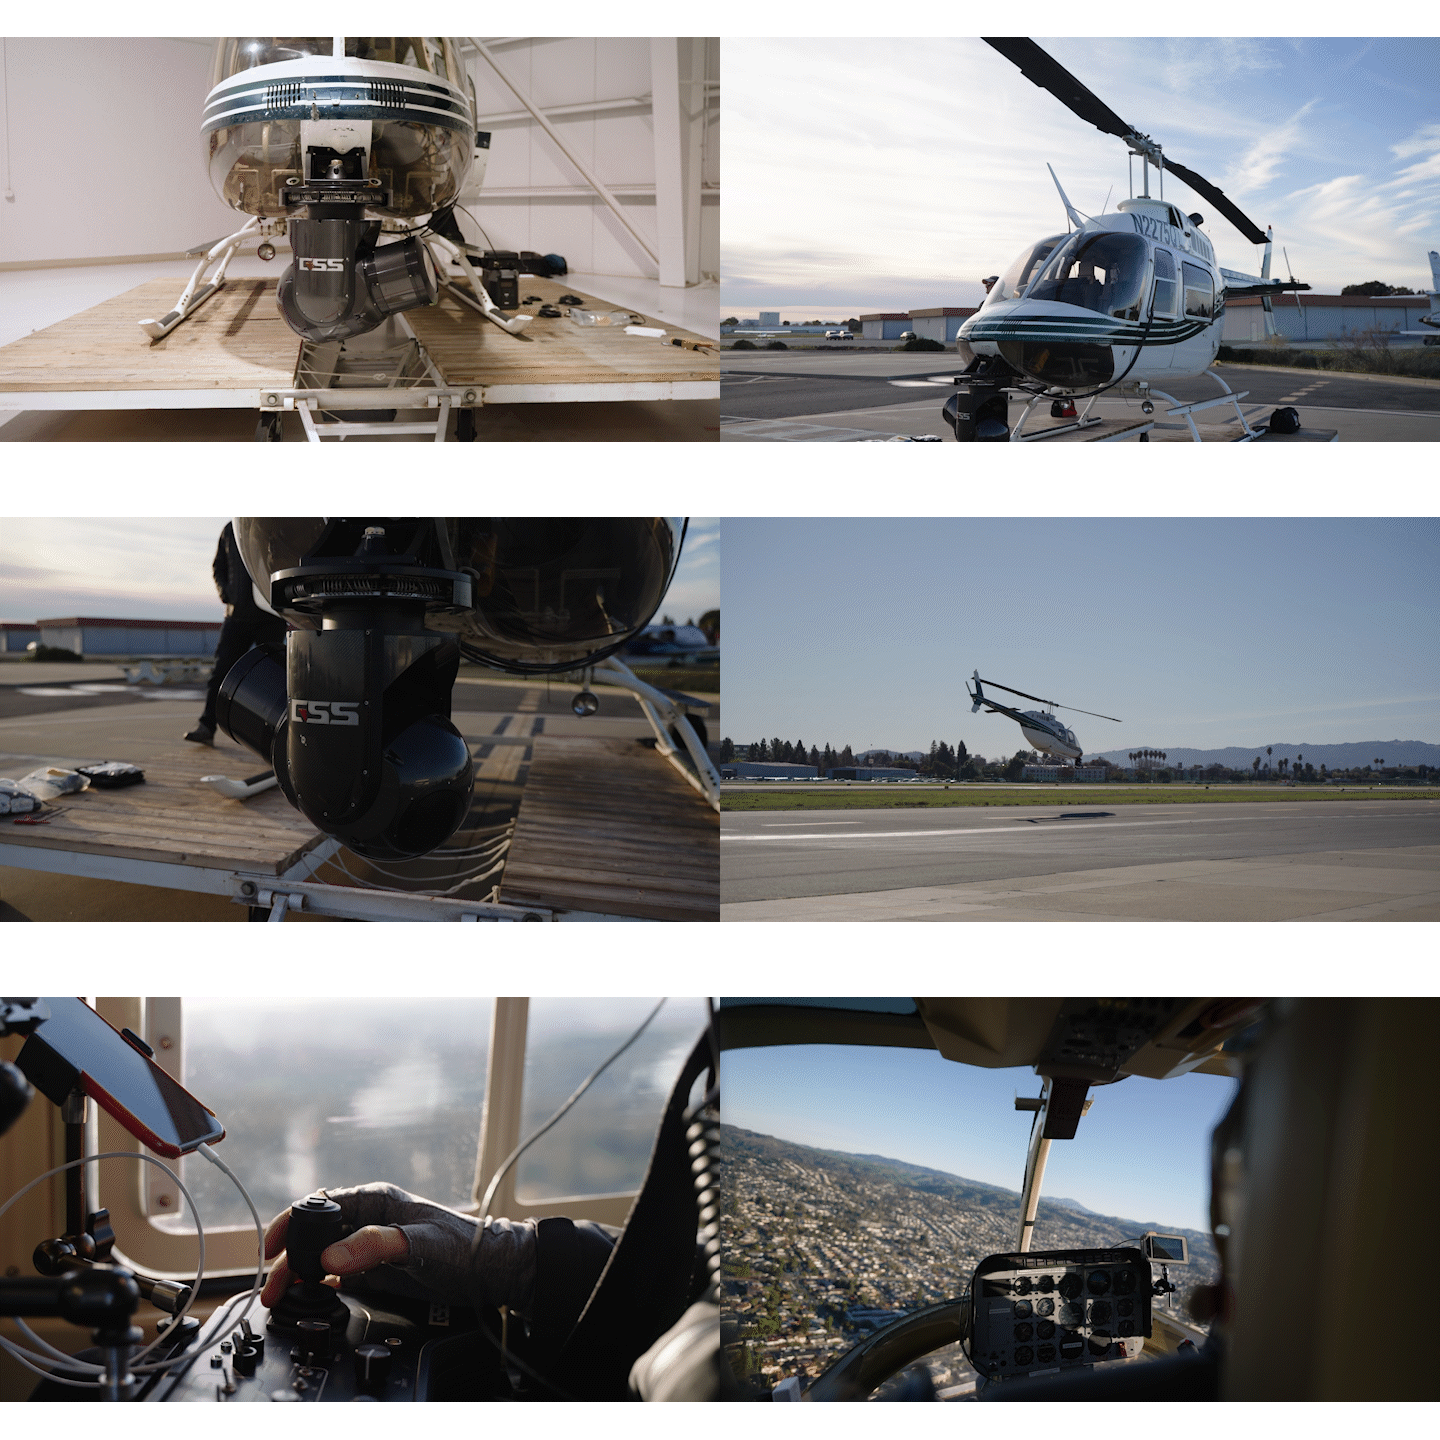
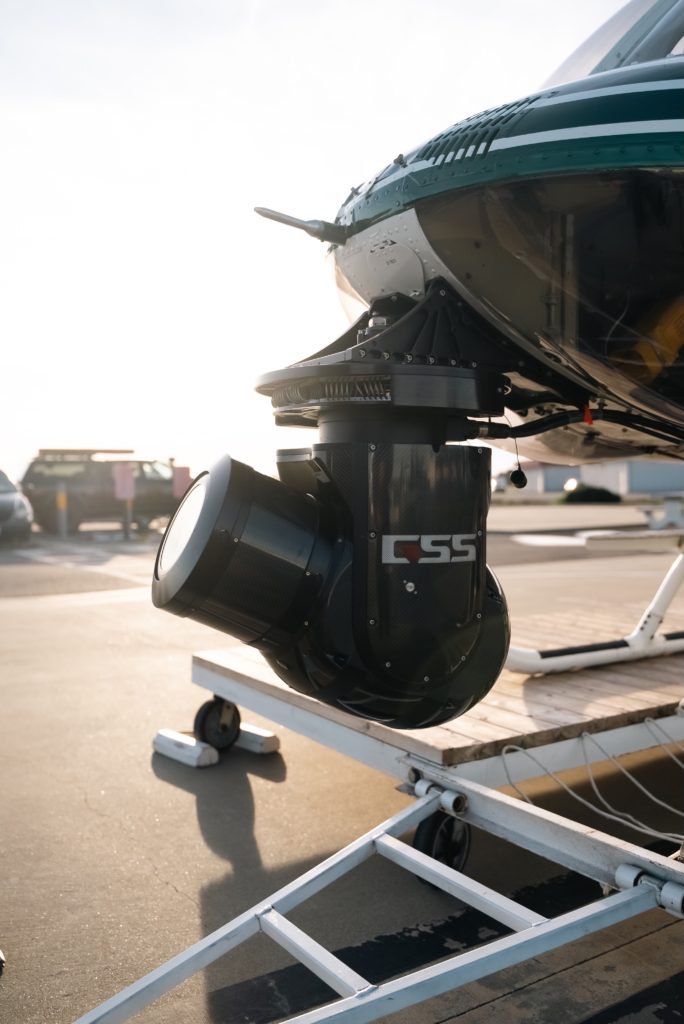
Most producers, myself included, never dream of enlisting helicopters for lower budget shoots. That’s the stuff of Michael Bay and Chistopher Nolan. However, we were able to hire a local pilot and charter his Bell 206 5 seat Helicopter. From there, we brought on a seasoned helicopter Director of Photography who brought in his own Stablized Helicopter Gimbal. This allowed us to pair together two professionals while keeping costs down as opposed to a traditional hollywood helicopter company. The results were incredible. Furthermore, our client was able to ride along and direct for the exact shots they envisioned. This allowed us to utilize the local nature of our shoot to bring the budget down on a helicopter charter, and include our local clientle. This was of huge benefit to our client and a big positive in hiring a local production team.

luma creative explains when you should use helicopter video production

Adding Value to Client’s Portfolio Through Helicopter Video Production

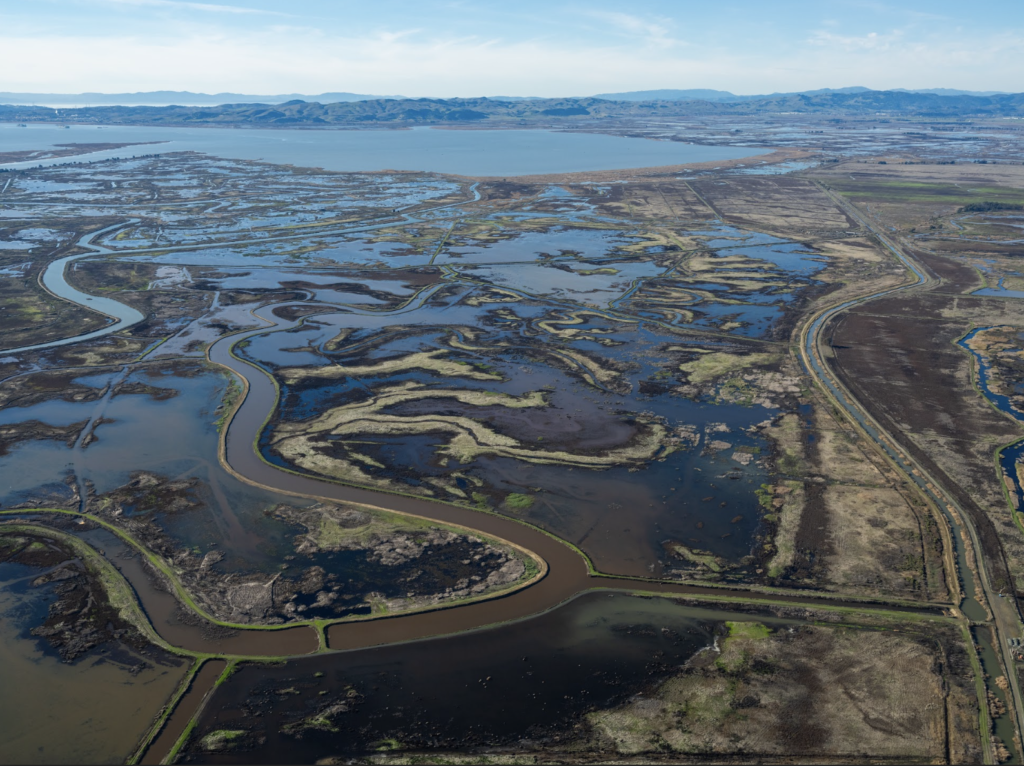
Before we took to the skies for our helicopter shoot, we sat down with our crew and clients to talk about the creative pre production for the shoot day. We set out to capture the aerial shot needed, and locked in an appropriate schedule to make sure we had ample time to capture everything needed. However, our client now was looking for photo resources to complement the TV spot for website and promotional material. As a company who also specializes in corporate photography we were able to easily add in this component. This saved our client more than $15,000 needed to schedule a whole new day of aerial photo production. We are always looking for places to add value to a budget. In this case, we were able to dramatically increase production value without raising the budget. Here are some of the final results: 

Our team was able to capture a variety of images in a short time frame using the speed and versatility of helicopter video production

Helicopter Video Production

Takeaways From Using Helicopter Videography/ Photography

In conclusion, this recent project exemplifies the power of being adaptable in the world of production. Faced with the challenge of creating a television spot that showcased a massive land development, we leveraged helicopter videography. While drones and VFX initially seemed like viable options, the unique constraints of the project demanded a different approach. By chartering a local helicopter and enlisting a seasoned Director of Photography we achieved the continuous shot our client desired. We also also provided them with the opportunity to direct the footage firsthand. This collaboration ensured the realization of our client’s vision. Moreover, it fostered a sense of partnership and local involvement, a testament to the benefits of hiring a local production team.

Moreover, our commitment to adding value to our client’s portfolio didn’t stop at videography. We incorporated aerial photography into the project at minimal additional cost. This allowed us to fulfill our client’s needs and save them a significant amount of money. This strategic decision underscores our dedication to maximizing production value while adhering to budgetary constraints. Sometimes pushing the envelope of production will break your budget. However, there is always value in thinking outside the box, or in this case, up in the clouds. 

Looking for San Francisco aerial helicopter video production? Contact us today!

Making corporate training videos
How to Make Impactful Training Videos

In the digital age, where attention spans are short and information overload is everywhere, videography has been shown to be a great method for brands to communicate their message effectively. Although there are various mediums available, training videos stand out as a powerful tool not only for educating but also for strengthening brand identity and engagement. In order to craft impactful training videos, you need to leverage the art of visual storytelling in these videos to create a lasting impact. However, you want to always be mindful of ways to reinforce your brand’s values and identity. Here we will share tips on how to create strong, impactful training videos. We will also show how our San Francisco video production company helped our client, Turo, leverage video storytelling to help their typical user base.

How to utilize visual storytelling to create impactful training videos

1. Captivate with compelling narratives

At the heart of every memorable training video lies a compelling story. Stories evoke emotions, capture attention, and make complex information more digestible. Whether it’s showcasing real-life scenarios, customer testimonials, or employee success stories, weaving narratives into your training videos helps create an emotional connection with your audience, making your brand more relatable and human. You want your story to be engaging but not overly complicated. The more complicated your story becomes, the less likely people are to follow it and connect with it. The goal is to solve a problem. So begin with the end in mind, and look for the story in the solution your brand is providing.

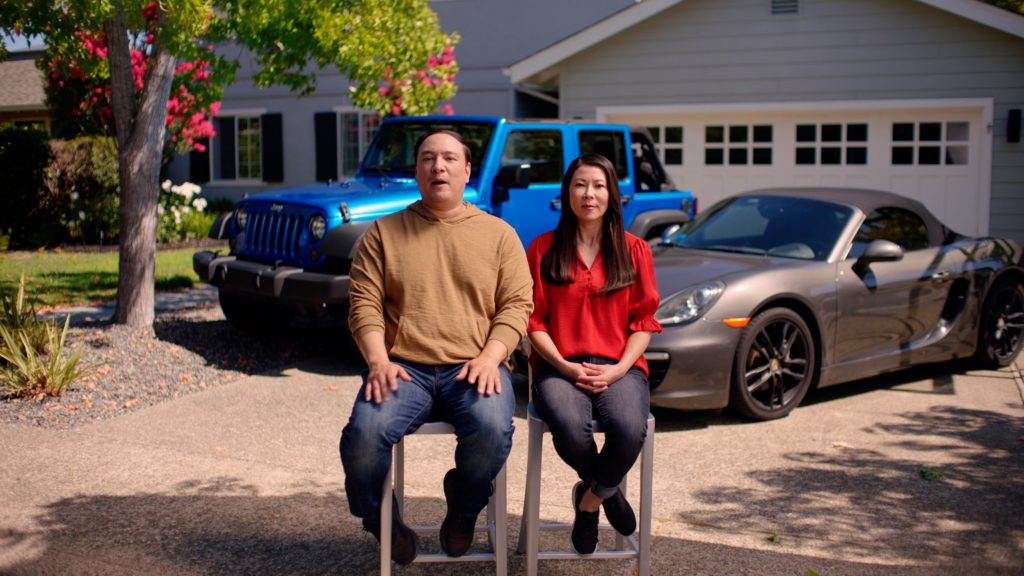
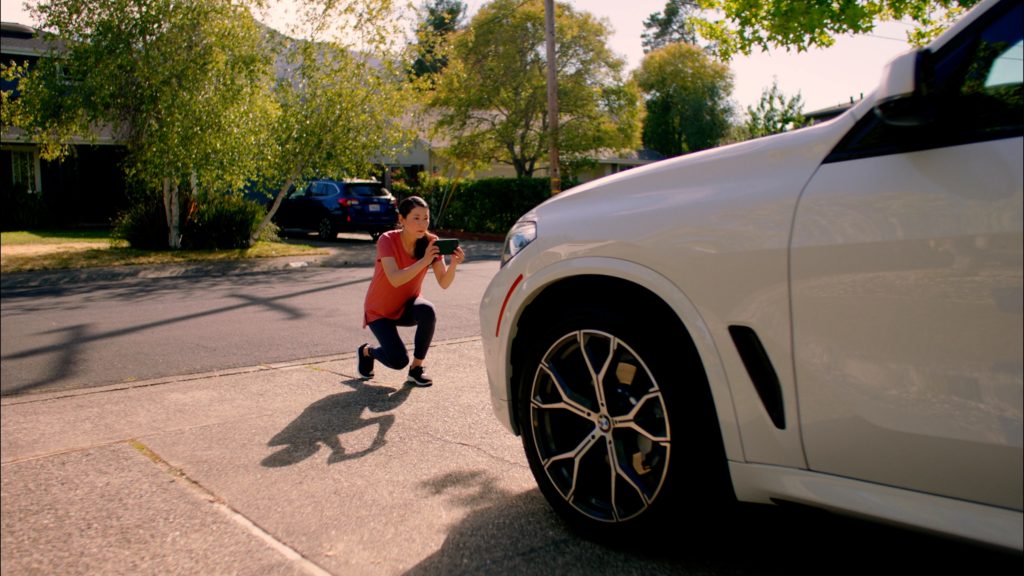
For the San Francisco based car sharing app Turo, we utilized the local nature of the shoot. Additionally, we brought in real Turo hosts with their personal Vehicles. This helped breed relatability and infused real life stories and scenarios into the training videos. The following still frame shows a real user demonstrating how to use the app.

Making corporate training videos

2. Align visuals with brand identity will help make impactful training videos

Visual consistency is crucial for brand recognition. Integrate your brand’s color palette, logos, and messaging cohesively into your training videos. Consistent visual identity reinforces brand recall and strengthens the association between your content and your brand. From the fonts you choose to the overall aesthetic, everything should scream your brand! It’s not just about slapping on a logo; it’s about creating a visual story that speaks volumes about your brand values. Think of your video as an extension of your brand—each visual cue should reinforce brand recognition and familiarity. By infusing your brand’s personality into your training videos, you’re not just educating; you’re also reinforcing your brand’s presence and building a stronger connection with your audience.

For Turo, we wanted to highlight automotive imagery that showcases the brand. Additionally, We made sure to set up our shots in a way that was consistent with brand messaging. In doing so we were able to successfully make our training videos more impactful and familiar to our brand’s audience.

Making corporate training videos

3. Engage through quality production

High-quality production values are essential in delivering a professional and engaging viewing experience. Invest in clear visuals, crisp audio, and graphics or animations that add depth to your content. Crafting high-quality training videos hinges on various elements that collectively enhance production standards and audience engagement. Make sure to optimize lighting conditions to create a visually appealing environment that keeps viewers focused. Additionally, script your content thoughtfully and plan your outcomes in pre production so you can execute and avoid any re-shoots. Moreover, utilizing professional narration or employing speakers with clear articulation can enhance learning experience. Pay attention to the overall aesthetics from color schemes to branding elements for a polished look. By focusing on a high quality production you not only elevate the look of the video, but also reflect positively on your brand’s professionalism .

Focus on a high quality production that will reflect positively on your brand.

4. Educate and empower viewers

Beyond storytelling, the primary goal of training videos is to educate. Ensure your content provides value, addressing your audience’s pain points or challenges. By offering actionable insights or practical knowledge, your brand positions itself as an authority in the field, creating trust and credibility among viewers. Break down complex concepts into digestible chunks, using visuals, examples, and real-world scenarios to enhance understanding. Don’t just tell—show! The goal is to inspire your audience to take action, so focus on making your training videos a catalyst for further education on your brand or subject.

For Turo, we set up a series of graphics with corresponding footage to show a step by step process in using their car sharing app. Also, this detailed system was designed to alleviate customer pain points and help customers visually process the system.

Making corporate training videos

Creating graphics is a great way to solve customer pain points in training videos.

Making corporate training videos

5. Optimize for accessibility and distribution to make impactful training videos

Optimize your videos for various platforms and devices to maximize reach and engagement across different channels. Firstly, consider incorporating text or subtitles to accommodate viewers with hearing impairments or non-native language speakers. Additionally, graphics alongside videos can enhance accessibility for individuals with hearing impairments or those who access the content in a muted format. Moreover, using inclusive design practices such as clear visuals, contrasting colors, and simple fonts can benefit a wide range of viewers.

Conclusion

Visual storytelling in training videos is more than just transmission of information; it’s a tool that aims to leave lasting impact on the audience. When creating narratives through these videos, you’re not just relaying facts but creating an immersive story that resonates with the target audience. Incorporating storytelling techniques, aligning visuals with your brand, and producing high quality content can transform your training videos into powerful tools. These tools not only educate viewers on essential information but also envelop them in a narrative that promotes action. The goal is to create a genuine connection with your audience, strengthening their bond with your brand. As a result, these videos become more than just educational tools; they evolve into vehicles that elevate your brand’s online presence. They establish your brand as an authority on the given subject. Furthermore, they foster trust and loyalty among the target audience, and help your brand establish themselves in the digital landscape.


Should you build a raid for video production?
Should You Build a RAID for Video Production? A Complete Guide

Should You Build a RAID for Video Production? A Complete Guide

Introduction

The world of video production is evolving rapidly, with technological advancements pushing the boundaries of what’s possible. Among these advancements, RAID (Redundant Array of Independent Disks) systems play a pivotal role in enhancing data storage capabilities. With Dropbox elminating their “unlimited” plans, many video production companies are looking to alternatives. This guide explores the benefits and considerations of building a RAID for video production. Should you build a raid for video production? Let’s find out!

Chapter 1: Understanding RAID

Section 1.1: What is RAID?

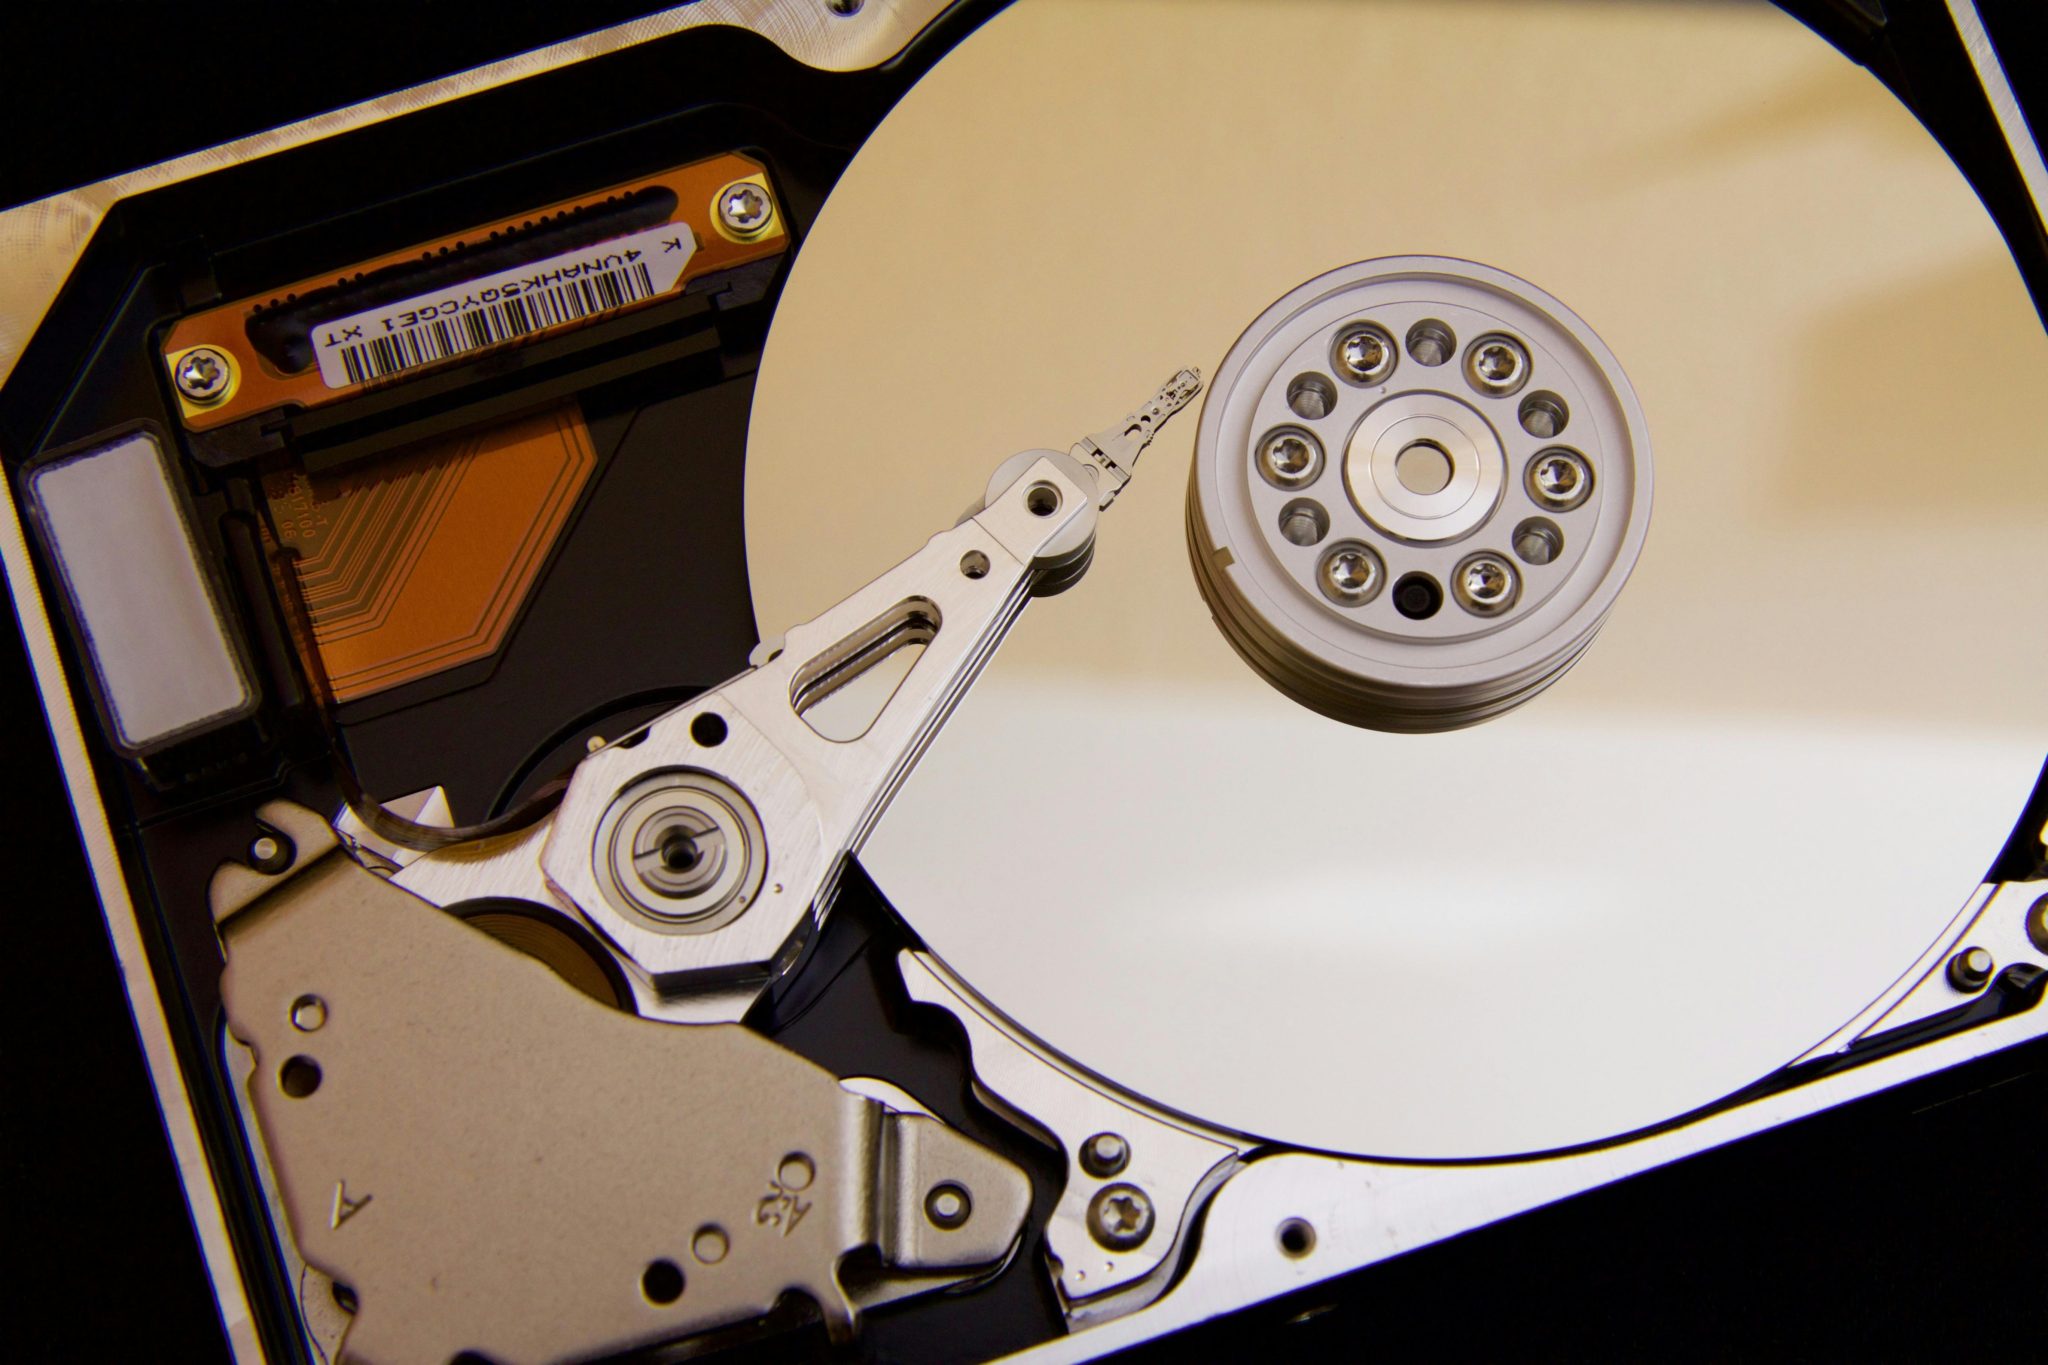
RAID stands for Redundant Array of Independent Disks, a technology that combines multiple physical disk drives into a single unit for the purposes of data redundancy, performance improvement, or both. Developed in the late 1980s, RAID has evolved to become a cornerstone of data storage strategies, offering solutions that can significantly enhance the reliability and speed of data access, particularly in environments where data integrity and performance are critical.

The Basics of RAID
  • Purpose: The primary goal of RAID is to increase data reliability and/or performance compared to single drives. This is achieved by employing various strategies to distribute and replicate data across multiple drives.
  • How It Works: RAID combines multiple physical disks into one or more logical units. Depending on the RAID level, the data is either split across disks (striping), copied onto multiple disks (mirroring), or a combination of both along with parity checks for error detection and correction.
  • Components: A RAID setup typically involves the disks themselves and a RAID controller, which manages the array and handles the distribution of data according to the specific RAID level’s algorithms.
Key Concepts
  • Striping (RAID 0): This technique splits data into blocks and spreads them evenly across two or more disks, without redundancy. It improves performance by allowing multiple disks to read and write data simultaneously, but if one disk fails, all data in the array is lost.
  • Mirroring (RAID 1): Mirroring duplicates data across two or more disks. It provides redundancy, as the data remains accessible as long as one mirrored disk is operational. While mirroring doesn’t improve read/write speed to the same extent as striping, it offers a high level of data protection.
  • Parity (RAID 5, RAID 6): Parity involves spreading data across multiple disks and adding parity information, which can be used to reconstruct data in the event of a disk failure. RAID 5 uses one disk’s worth of parity data for the entire array, allowing it to withstand a single disk failure. RAID 6 extends this by using two disks’ worth of parity data, offering protection against two simultaneous disk failures.
  • Hybrid RAID Levels (RAID 10, RAID 50, RAID 60): These configurations combine the features of basic RAID levels to achieve a balance of performance, redundancy, and storage efficiency. For example, RAID 10 combines the striping of RAID 0 with the mirroring of RAID 1 to provide fast data access and high fault tolerance.
Benefits of RAID in Video Production

In the context of video production, RAID can offer several benefits:

  • Enhanced Performance: RAID, especially levels that employ striping, can significantly speed up data access times, which is crucial for editing and rendering large video files.
  • Increased Data Reliability: Mirroring and parity provide redundancy, ensuring that video projects are not lost in the event of a disk failure.
  • Scalability: RAID arrays can be expanded by adding more disks, offering a flexible solution that grows with storage needs.

Understanding the fundamentals of RAID is essential for anyone considering its implementation in a video production environment. By leveraging RAID’s capabilities, video professionals can ensure their workflows are supported by fast, reliable, and efficient data storage solutions.

Section 1.2: Types of RAID Configurations

RAID configurations vary widely, each offering a different balance of performance, data protection, and storage capacity. Understanding the nuances of these configurations is crucial for selecting the most appropriate RAID setup for video production needs. Below is an overview of the most commonly used RAID levels and their respective advantages and disadvantages.

RAID 0 (Striping)
  • Description: RAID 0 splits data evenly across two or more disks without redundancy, improving performance by enhancing read/write speeds.
  • Advantages: Maximizes speed and disk space, as no capacity is lost to redundancy. Ideal for tasks requiring high performance, such as editing multiple video streams simultaneously.
  • Disadvantages: Offers no data protection; the failure of a single disk results in total data loss. Not recommended for storing irreplaceable video footage without a separate backup solution.
RAID 1 (Mirroring)
  • Description: RAID 1 duplicates data across two or more disks, providing redundancy and increasing data security.
  • Advantages: Protects against data loss by mirroring data on two or more drives. If one drive fails, the data remains accessible from the other drive(s).
  • Disadvantages: Effective storage capacity is halved, as each piece of data is stored twice. Offers improved read speeds but does not enhance write speeds.
RAID 5 (Striping with Parity)
  • Description: RAID 5 distributes data and parity information across three or more disks. It offers a balance of performance, storage efficiency, and data protection.
  • Advantages: Provides data redundancy to survive a single disk failure without losing data. Improves read speeds and offers more efficient storage utilization than RAID 1.
  • Disadvantages: Write speeds can be slower due to the overhead of calculating and writing parity information. Rebuilding the array after a disk failure can be time-consuming, especially with large disks.
RAID 6 (Striping with Double Parity)
  • Description: Similar to RAID 5 but with an additional layer of parity, allowing it to withstand the failure of two disks.
  • Advantages: Offers enhanced data protection, suitable for systems where data loss cannot be tolerated. Provides good read speeds and more redundancy than RAID 5.
  • Disadvantages: Loses more storage capacity to parity than RAID 5, reducing the effective storage space. Like RAID 5, it also experiences slower write speeds and long rebuild times.
RAID 10 (Mirrored Sets in a Striped Set)
  • Description: Combines the features of RAID 1 and RAID 0, mirroring data for redundancy and then striping across the mirrored sets for performance.
  • Advantages: Offers a strong combination of speed, redundancy, and data protection. Can survive multiple disk failures as long as no two failed disks are part of the same mirrored pair.
  • Disadvantages: Requires at least four disks and sacrifices half of the total disk space to mirroring, making it more costly in terms of storage efficiency.

Choosing the Right RAID Configuration for Video Production

When selecting a RAID level for video production, consider the following factors:

  • Performance Needs: If speed is the primary concern, RAID 0 or RAID 10 configurations may be most appropriate. RAID 0 offers the highest speed but no data protection, making RAID 10 a better choice for those also needing redundancy.
  • Data Protection: For projects where data loss is unacceptable, RAID 1, RAID 5, or RAID 6 provide varying levels of redundancy and data security. RAID 6 offers the most protection with its double parity feature.
  • Storage Efficiency: When maximizing storage capacity is vital, RAID 5 or RAID 6 configurations offer a good balance between redundancy and efficient use of disk space.
  • Budget Constraints: The cost of the RAID setup, including the number and type of disks required, should align with budgetary limitations. RAID 1 and RAID 10 tend to be less storage-efficient, potentially leading to higher costs for the needed capacity.

Understanding these RAID levels and their implications for video production can guide the selection of a storage solution that optimally supports the workflow, budget, and data security requirements of any project.

Section 1.3: RAID Controllers

In a RAID setup, the RAID controller is a critical component that manages how data is distributed across the disks in the array. It can be a physical hardware device or software-driven, each with its own set of features, performance levels, and use cases. Understanding the differences between hardware and software RAID controllers, as well as how to choose the right controller for your needs, is essential for optimizing your video production workflow.

Hardware RAID Controllers
  • Description: A hardware RAID controller is a dedicated processor that manages the RAID array independently of the host system’s CPU. It usually comes in the form of a PCI or PCIe card installed in the server or workstation.
  • Advantages:
    • Performance: Because it operates independently of the host’s CPU, a hardware RAID controller can offer superior performance, especially in configurations that require complex calculations, such as RAID 5 or RAID 6.
    • Features: Hardware RAID controllers often come with built-in features such as battery-backed cache, which can protect data in transit in case of a power failure.
    • Reliability: Being a dedicated solution, hardware RAID is generally considered more reliable and less prone to software conflicts or operating system crashes.
  • Disadvantages:
    • Cost: Hardware RAID solutions are typically more expensive than software RAID options, both in terms of initial investment and maintenance.
    • Compatibility: There may be compatibility issues with certain types or brands of drives, and upgrading the system can sometimes require purchasing a new RAID controller.
Software RAID Controllers
  • Description: Software RAID manages the array through the host system’s operating system, using its CPU to perform RAID-related calculations.
  • Advantages:
    • Flexibility: Software RAID is often more flexible in terms of hardware compatibility and can be easier to configure and manage through the operating system.
    • Cost: There is typically no additional hardware cost for software RAID, as it uses the existing system resources.
    • Ease of Upgrade: Upgrading a software RAID setup can be as simple as adding new drives and adjusting the configuration settings in the operating system.
  • Disadvantages:
    • Performance: Depending on the RAID level and workload, using the host CPU for RAID operations can impact overall system performance, particularly for CPU-intensive video production tasks.
    • Reliability: Software RAID might be more susceptible to issues related to software bugs, operating system crashes, or improper configuration.

Choosing the Right RAID Controller for Video Production

When selecting a RAID controller for video production, consider the following factors:

  • Performance Requirements: For high-resolution video editing and rendering that demand maximum performance, a hardware RAID controller might be the best choice. The dedicated processing and cache can significantly reduce latency and improve read/write speeds.
  • Budget: If cost is a major concern, software RAID offers a viable and cost-effective solution, especially for smaller projects or studios just starting out.
  • Scalability and Flexibility: Software RAID typically offers more flexibility for future expansion. If you anticipate needing to scale your storage solution as your projects grow, software RAID might be more accommodating.
  • Reliability and Data Protection Needs: For environments where data integrity is paramount, hardware RAID’s additional features like battery-backed cache can offer an extra layer of protection against data loss.

In summary, the choice between hardware and software RAID controllers depends on a balance of performance needs, budget constraints, and the specific requirements of your video production workflow. Hardware RAID provides superior performance and reliability, ideal for high-end, professional video production environments. In contrast, software RAID offers a flexible and cost-effective solution for smaller projects or studios. Understanding these distinctions and evaluating your specific needs will help you select the most appropriate RAID controller.

Chapter 2: RAID and Video Production

Section 2.1: Why Consider RAID for Video Production?

In the realm of video production, managing vast amounts of data efficiently is not just an advantage; it’s a necessity. High-definition, 4K, and even 8K content creation demand more from storage solutions than ever before. RAID configurations stand out as a compelling solution for several reasons:

  • Speed: RAID can dramatically increase the speed of data access and writing. For video editors and producers, this means shorter loading times for video files and faster rendering speeds. RAID 0, known for striping data across multiple drives, offers significant speed boosts, allowing real-time editing of high-resolution footage without lag.
  • Data Redundancy: Video production projects are valuable and often irreplaceable. RAID configurations like RAID 1, 5, and 6 provide varying levels of data redundancy, automatically duplicating data across multiple drives. This redundancy ensures that in the event of a single (or even multiple, depending on the setup) drive failure, no data is lost, and operations can continue with minimal downtime.
  • Large File Handling: Modern video files, especially those in 4K or 8K

Section 2.2: RAID in Workflow

Incorporating RAID into a video production workflow can significantly enhance efficiency and reliability at various stages—from editing to rendering and archiving. Understanding how RAID impacts each of these stages can help you design a system that meets your specific needs.

Editing

During the editing process, speed and responsiveness are crucial. Editors often work with multiple streams of high-resolution video, requiring quick read/write speeds to prevent lag. RAID 0 is particularly beneficial here, as it stripes data across several drives, allowing faster access to the files. However, because RAID 0 lacks redundancy, it’s often used in combination with other RAID configurations (such as RAID 1 or RAID 10) to add a layer of data protection.

For projects where data loss is not an option, RAID 5 or RAID 6 can provide a good balance of speed and redundancy. These configurations allow for one or two drives to fail without data loss, respectively.

Rendering

Rendering video, especially in high resolutions or with complex effects, can be time-consuming and resource-intensive. RAID setups can reduce render times by enabling faster data processing. The parity in RAID 5 or RAID 6 configurations, while providing redundancy, also allows for relatively fast write speeds, which can be advantageous during the rendering process. Moreover, the ability to access data across multiple drives simultaneously can lead to more efficient use of the video editing software’s capabilities.

For environments where rendering is a continuous necessity, such as in animation or visual effects studios, RAID 10 might offer the best mix of speed and redundancy. It combines the mirroring of RAID 1 with the striping of RAID 0, providing fast data access and tolerance for drive failures.

Archiving

Once a project is completed, it’s essential to archive the data safely. RAID isn’t typically the first choice for long-term storage due to its higher cost and operational requirements, but it can play a role in a comprehensive archiving strategy. RAID 1, 5, or 6 configurations can be used for short to medium-term archival purposes where quick access to archived projects is necessary, and data integrity is paramount.

For long-term archival, combining RAID with other storage solutions, such as Network-Attached Storage (NAS) systems or cloud storage, can provide both the redundancy needed for data protection and the scalability to accommodate growing archives. A NAS configured with RAID can serve as an accessible, centralized archive for finished projects, while cloud storage can offer off-site redundancy and disaster recovery options.

Considerations for RAID in Video Production Workflow

  • Performance vs. Redundancy: Balancing the need for high performance with the necessity for data redundancy is key. Choose a RAID level that offers the right mix for your specific workflow requirements.
  • Upgrade Path: Consider future scalability. As project sizes and resolutions increase, you’ll need a RAID setup that can grow with your demands, either by adding more drives or by supporting larger-capacity drives.
  • Cost: Higher levels of redundancy and performance come at a cost, both in terms of the initial investment in drives and RAID controllers, and in ongoing maintenance. Budget accordingly and consider the value of the data and time saved against the cost of the RAID configuration.
  • Backup Strategy: RAID is not a substitute for a comprehensive backup strategy. Always maintain regular backups of important data off-site or in the cloud, in addition to any RAID redundancy, to safeguard against all forms of data loss.

Incorporating RAID into your video production workflow can significantly enhance your ability to manage large video files efficiently, speed up your editing and rendering processes, and provide a safety net against data loss. By carefully considering your needs at each stage of production and selecting the appropriate RAID configuration, you can create a more robust, efficient, and reliable video production environment.

Section 2.3: Case Studies

Examining real-world applications of RAID in video production environments provides valuable insights into its benefits, challenges, and implementation strategies. These case studies span small independent studios to large-scale operations, highlighting how RAID configurations can be tailored to meet diverse workflow needs.

Small Independent Studio: Embracing RAID 5 for Balance

Background: A small independent film studio specializing in documentary filmmaking found themselves struggling with data management and protection. Their projects often involved weeks of footage from remote locations, making each byte of data incredibly valuable.

Challenge: The studio needed a cost-effective solution that offered both speed for editing 4K footage and redundancy to protect against data loss, without requiring a significant investment in hardware.

Solution: The studio implemented a RAID 5 setup using four 4TB SSDs. This configuration provided the balance they needed: it offered redundancy to protect against a single drive failure and improved read speeds beneficial for editing. The parity data in RAID 5 added a slight overhead but was a worthy trade-off for the data protection it provided.

Outcome: The RAID 5 setup significantly improved the studio’s workflow, allowing for smoother editing of 4K footage and providing peace of mind with its redundancy features. The studio was able to complete projects faster, with less downtime due to technical issues, and without the fear of losing irreplaceable footage.

Mid-Sized Production Company: Leveraging RAID 10 for High Performance

Background: A mid-sized production company, like ourselves, producing high-end commercial and corporate videos, faced challenges with their growing need for faster data access speeds and more reliable data storage.

Challenge: With the move to 8K video production, file sizes exploded, and the existing storage solution became a bottleneck, slowing down editing and rendering processes. Additionally, the company sought to minimize the risk of data loss which could derail tight production schedules.

Solution: The company upgraded to a RAID 10 (1+0) configuration, combining the speed of RAID 0 with the redundancy of RAID 1. This setup involved eight high-performance SSDs, offering both the high data transfer rates required for editing 8K footage and redundancy to protect against drive failures.

Outcome: The RAID 10 setup dramatically increased the efficiency of the company’s video production workflow. Editors experienced no lag when working with 8K footage, and the company enjoyed a newfound confidence in the reliability of their data storage. The balance of speed and redundancy perfectly suited their needs, making RAID 10 an essential component of their production process.

Large Broadcast Network: Utilizing RAID 6 for Maximum Redundancy

Background: A large broadcast network with a vast archive of digital video content needed to overhaul their storage infrastructure to support 24/7 operations and ensure the highest level of data availability and integrity.

Challenge: The network required a solution that could not only handle the high volume of data but also offer robust protection against multiple simultaneous drive failures, considering the critical nature of their archival footage and live broadcast content.

Solution: The network opted for a RAID 6 configuration, employing a large array of high-capacity HDDs. RAID 6 was chosen for its ability to withstand the failure of up to two drives simultaneously, offering an extra layer of security over RAID 5. This setup was implemented across multiple storage arrays to manage and archive content efficiently, from raw footage to finished broadcasts.

Outcome: Implementing RAID 6 provided the network with a highly reliable storage solution, ensuring continuous access to their valuable video archives and live content. The additional redundancy was instrumental in maintaining operations during drive failures, with no loss of data or on-air time. This setup underscored the importance of RAID 6 in environments where data integrity is paramount.

Chapter 3: SSDs vs. HDDs in RAID Configurations

Section 3.1: Understanding SSDs and HDDs

Before delving into how Solid State Drives (SSDs) and Hard Disk Drives (HDDs) fit into RAID configurations for video production, it’s essential to understand the fundamental differences between these two types of storage technologies. Each has its unique advantages and limitations, which can significantly impact their performance, reliability, and cost-effectiveness in a RAID setup.

Technology Overview
  • HDDs: Hard Disk Drives have been the standard storage technology for decades. They store data on magnetic disks (platters) read by a moving read/write head. The technology’s main advantages are its cost-effectiveness for high storage capacities and its proven reliability over time. However, HDDs are mechanical devices; they’re susceptible to physical wear and tear, and their moving parts can make them vulnerable to shock and damage. Additionally, the mechanical nature of HDDs limits their read/write speeds compared to SSDs.
  • SSDs: Solid State Drives store data on flash memory chips and have no moving parts. This difference results in faster data access times, making SSDs significantly quicker in read/write operations than HDDs. SSDs are also more durable and resistant to physical shock, quieter, and consume less power. However, these benefits come at a higher cost per gigabyte than HDDs, and SSDs have a limited number of write cycles, although this is generally not a concern for most video production applications due to modern SSDs’ longevity.
Performance Comparison
  • Speed: SSDs offer superior speed compared to HDDs. This is particularly noticeable in tasks requiring frequent read/write operations, such as video editing, where the faster data access times of SSDs can drastically reduce loading and rendering times.
  • Durability: SSDs are more resistant to physical shock and damage because they lack moving parts. This makes them a safer choice for video production environments where equipment may be frequently moved or subjected to less-than-ideal conditions.
  • Capacity and Cost: HDDs still hold an advantage in terms of cost per gigabyte and maximum capacity per drive. For large video archives or projects where budget constraints are a significant concern, HDDs may be the more economical choice.
  • Lifespan: SSDs have a limited number of write cycles, but modern SSDs can handle a large amount of data written over their lifetime, making them suitable for video production tasks. However, it’s essential to monitor SSD health over time, especially in high-write environments.
RAID Considerations
  • When configuring a RAID array for video production, the choice between SSDs and HDDs will largely depend on the specific needs of the workflow. SSD-based RAID arrays offer significant performance advantages, ideal for editing and rendering high-resolution video in real-time. On the other hand, HDD-based RAID arrays can provide large amounts of storage at a lower cost, suitable for archiving vast amounts of footage.
  • Hybrid configurations, which use both SSDs and HDDs, can also be an effective strategy. For example, an SSD RAID array could be used for current projects needing fast access speeds, while an HDD RAID array stores completed projects and raw footage not currently in use.

Understanding the differences between SSDs and HDDs is crucial for anyone considering a RAID setup for video production. The choice between SSDs and HDDs in a RAID configuration should be based on a careful assessment of the production’s specific needs. including performance requirements, budget constraints, and long-term storage considerations. Balancing these factors will help ensure that the selected RAID setup enhances the video production workflow’s efficiency, reliability, and overall success.

Section 3.2: Advantages of SSDs in RAID for Video Production

Solid State Drives (SSDs) have increasingly become a popular choice for RAID configurations in video production environments, thanks to their superior speed, reliability, and efficiency compared to Hard Disk Drives (HDDs). When SSDs are integrated into a RAID setup, these advantages are amplified, providing significant benefits for video editing, rendering, and storage workflows. Let’s explore the key advantages of using SSDs in RAID configurations for video production.

Enhanced Speed and Responsiveness
  • Fast Data Access: SSDs offer rapid data access times, drastically reducing the latency involved in reading and writing data. This is particularly beneficial for video production, where accessing, editing, and rendering large video files frequently can be time-consuming.
  • Improved Read/Write Speeds: RAID configurations, such as RAID 0, leverage the speed of multiple SSDs to increase throughput. For video editors, this means quicker file transfers, faster rendering times, and the ability to work with multiple high-resolution video streams in real-time without experiencing lag or delays.
Increased Reliability and Durability
  • No Moving Parts: Unlike HDDs, SSDs have no moving parts, reducing the risk of mechanical failures. This makes SSDs inherently more reliable, an essential factor for video production where the loss or corruption of data can be catastrophic.
  • Shock Resistance: SSDs are more resistant to shock and vibrations, making them suitable for on-location shoots and environments where equipment might be subjected to rough handling.
Energy Efficiency and Cooler Operation
  • Lower Power Consumption: SSDs consume less power than HDDs, contributing to lower energy costs and longer battery life for mobile workstations, an advantage during on-location shoots.
  • Cooler Operation: SSDs generate less heat than HDDs, reducing the need for cooling within the storage system. This can be especially beneficial in RAID configurations, where multiple drives are operating simultaneously, potentially generating a significant amount of heat.
Space and Weight Advantages
  • Compact Form Factor: SSDs are typically more compact than HDDs, allowing for more storage capacity in a smaller physical space. This is particularly useful for video production setups where space is at a premium, such as mobile editing suites or compact studio environments.
  • Lighter Weight: For mobile rigs and on-location shoots, the lighter weight of SSDs compared to HDDs can make a significant difference in the ease of transportation and setup.

Considerations

While the advantages of SSDs in RAID configurations for video production are significant, there are a few considerations to keep in mind:

  • Cost: SSDs are generally more expensive per gigabyte than HDDs. While prices have been decreasing, the initial investment in a high-capacity SSD RAID array can still be substantial.
  • Capacity Limitations: Although SSD capacities have been increasing, they typically offer less storage space than HDDs at a similar price point. This may require careful management of storage space or the use of hybrid systems that combine SSDs for performance-critical tasks and HDDs for archival storage.
  • Wear and Tear: SSDs have a limited number of write cycles, but this is becoming less of an issue with modern SSD technology. For most video production applications, the lifespan of an SSD will be adequate, though it’s still important to monitor drive health and plan for eventual replacement.

Integrating SSDs into a RAID configuration for video production offers a compelling mix of speed, reliability, and efficiency. These advantages can significantly enhance the workflow of video professionals, from faster editing and rendering to more reliable storage for precious footage. When planning a RAID setup, considering the balance between performance, capacity, and cost will ensure that the benefits of SSDs are fully leveraged to meet the unique needs of video production projects.

Section 3.3: Considerations

When contemplating the integration of SSDs in RAID configurations for video production, several critical considerations come into play. These factors can significantly influence the overall performance, cost-effectiveness, and longevity of the storage solution. Understanding these aspects is crucial for making informed decisions that align with the specific requirements and constraints of video production projects. You might be wondering why you should build a raid for video production if you have SSD’s?

Cost Analysis
  • Initial Investment: SSDs are generally more expensive per gigabyte than HDDs, making the initial setup of an SSD-based RAID array more costly. It’s essential to evaluate the budget and the return on investment, considering the performance benefits and the potential for increased productivity in video production workflows.
  • Long-term Savings: Despite the higher upfront cost, SSDs can offer savings over time due to their lower power consumption, reduced cooling needs, and potentially lower failure rates, which can translate to less downtime and maintenance.
Capacity Needs
  • Storage Requirements: Video production, especially in high resolutions like 4K or 8K, requires substantial storage capacity. While SSDs offer superior speed, their cost per gigabyte means that achieving the same storage capacity as HDDs can be significantly more expensive. Balancing the need for speed with storage requirements is a key consideration.
  • Scalability: Future-proofing the RAID configuration is another important factor. As video production demands evolve, ensuring that the RAID setup can be easily expanded or upgraded to accommodate larger storage capacities or higher speeds without a complete overhaul is essential.
Lifespan and Durability
  • Wear and Tear: SSDs have a finite number of write cycles, although advances in technology have extended their durability. In high-write environments, such as those involving frequent video editing and rendering, considering the lifespan of SSDs in the RAID array is important.
  • Maintenance and Monitoring: Implementing tools and practices to monitor the health and performance of SSDs can help in preemptively identifying issues before they lead to failure, thereby extending the lifespan of the RAID array.
Performance Requirements
  • Speed vs. Storage: The choice between SSDs and HDDs in a RAID configuration often comes down to a trade-off between speed and storage capacity. SSDs are unmatched in speed, making them ideal for tasks requiring fast data access, such as video editing and rendering. However, for long-term storage or projects with less intensive speed requirements, the higher capacity and lower cost of HDDs might be more appropriate.
  • RAID Level Selection: Different RAID levels offer varying balances of speed, redundancy, and storage efficiency. Selecting the right RAID level to match the performance requirements of video production tasks is crucial. For instance, RAID 0 offers the best performance but no redundancy, making it risky for critical data unless combined with other backup solutions.
Backup and Data Redundancy
  • RAID is Not a Backup: While RAID configurations can provide redundancy to protect against drive failures, it’s important to remember that RAID is not a substitute for a comprehensive backup strategy. Regular backups to separate media or cloud storage are essential for safeguarding video projects against all types of data loss.
Environmental Considerations
  • Power Consumption and Heat Generation: SSDs consume less power and generate less heat than HDDs, which can be beneficial in reducing energy costs and cooling requirements in video production environments. This aspect becomes increasingly relevant in larger RAID configurations or in settings with limited ventilation.

In conclusion, integrating SSDs into a RAID setup for video production involves a careful consideration of various factors, including cost, capacity, lifespan, performance requirements, and environmental impacts. By thoroughly evaluating these considerations, video production professionals can design a RAID system that optimally supports their workflow, ensuring fast, reliable, and efficient access to and management of video content.

Chapter 4: Building Your RAID System

Section 4.1: Planning Your RAID Setup

Planning the right RAID setup for video production involves a careful consideration of various factors. This section provides a comprehensive guide to help you assess your needs and make informed decisions about configuring your RAID array to support your video production workflow effectively.

Assessing Your Needs

Before diving into RAID configurations, it’s crucial to evaluate your specific requirements:

  • Performance: Determine the speed at which you need to access and write data. High-resolution video editing and rendering, for example, demand faster read/write speeds, which can be achieved with RAID 0 or RAID 10 configurations.
  • Data Redundancy: Consider how critical data redundancy is for your projects. If losing data could significantly impact your production schedule or costs, prioritize RAID configurations that offer redundancy, such as RAID 1, RAID 5, or RAID 6.
  • Storage Capacity: Estimate the amount of storage you’ll need for your current and upcoming projects. Remember, some RAID levels, like RAID 1 and RAID 10, reduce the available storage capacity due to mirroring.
  • Budget: Calculate how much you can invest in your RAID setup, keeping in mind both the initial costs and potential future expansions. Hardware RAID controllers and SSDs offer better performance but at a higher price.
RAID Configuration Options

Once you’ve assessed your needs, explore the RAID configuration options that best match your requirements:

  • For Maximum Performance: If speed is your top priority and you have a solid backup strategy, RAID 0 offers the fastest read/write speeds. However, for a balance of speed and redundancy, consider RAID 10.
  • For Essential Data Redundancy: RAID 1 is simple and offers a direct mirror of your data, but RAID 5 or RAID 6 provides redundancy with better storage efficiency and is suited for larger arrays.
  • For Large Storage Capacity with Redundancy: RAID 5 or RAID 6 are optimal choices, offering a good balance between storage capacity and data protection.
Budget Considerations
  • Cost-Effective Solutions: If budget constraints are significant, software RAID can be a cost-saving option, especially with RAID 1 or RAID 5 configurations that don’t require specialized hardware.
  • Investing in Hardware RAID: For professional video production environments where performance and reliability are non-negotiable, investing in a hardware RAID controller can be worthwhile.
Compatibility and Future-Proofing
  • Hardware and Software Compatibility: Ensure that your chosen RAID level and controller are compatible with your existing hardware and software, including your operating system and video editing software.
  • Scalability: Consider how easy it is to expand your RAID setup. As your storage needs grow, you should be able to add more disks or switch to higher-capacity drives without significant downtime or reconfiguration.
Implementing a Backup Strategy
  • RAID Is Not a Backup: Remember, RAID provides redundancy to protect against drive failure, but it is not a substitute for a comprehensive backup strategy. Regular backups to an external drive, NAS, or cloud storage are essential for safeguarding your projects against all types of data loss.

Planning your RAID setup for video production is a multifaceted process that requires balancing performance, redundancy, and budget considerations. By carefully assessing your needs and understanding the trade-offs between different RAID configurations, you can design a storage solution that supports your video production workflow efficiently and reliably.

Section 4.2: Step-by-Step Guide to Building a RAID

Building a RAID setup for video production involves several key steps, from selecting the right drives and RAID level to configuring and testing the array. This step-by-step guide will walk you through the process, helping ensure your RAID system supports your workflow effectively and reliably. Let’s face it, it’s not easy but is an important question when considering if you Should build a raid for video production!

Step 1: Selecting the Right Drives
  • Drive Type: Choose between HDDs and SSDs based on your budget, capacity needs, and performance requirements. SSDs are faster and more reliable but come at a higher cost per gigabyte.
  • Capacity and Speed: Determine the capacity and speed (RPM for HDDs and read/write speeds for SSDs) that best match your video production needs. Larger and faster drives offer better performance but at a higher price.
  • Uniformity: Ensure all drives in the RAID array are of the same model and capacity to prevent performance bottlenecks and compatibility issues.
Step 2: Choosing the RAID Level
  • Based on the assessment of your needs (Section 4.1), select the RAID level that offers the best balance of performance, redundancy, and storage efficiency for your video production workflow. Consider RAID 0 for speed, RAID 1 or RAID 10 for redundancy with performance, and RAID 5 or RAID 6 for an efficient mix of capacity and data protection.
Step 3: Acquiring the RAID Controller
  • Hardware vs. Software RAID: Decide between a hardware RAID controller and software RAID based on your performance needs and budget constraints. Hardware RAID offers better performance and features but at a higher cost.
  • Compatibility: Ensure the RAID controller is compatible with your system’s motherboard, the chosen RAID level, and the type of drives you’re using.
Step 4: Installing the Drives and RAID Controller
  • Physical Installation: Carefully install the drives in your system’s drive bays and connect them using the appropriate cables (SATA, SAS, etc.). If using a hardware RAID controller, install the card in the appropriate expansion slot on the motherboard.
  • Power and Data Cables: Connect each drive to the power supply and to the RAID controller (for hardware RAID) or directly to the motherboard (for software RAID).
Step 5: Configuring the RAID Array
  • Hardware RAID Setup: Access the RAID controller’s BIOS or management software during system startup to configure the RAID array. Select the desired RAID level and choose which drives to include in the array.
  • Software RAID Setup: Use the RAID management tools provided by your operating system or third-party software to create and configure the RAID array. This typically involves selecting the RAID level and adding the drives to the array through a graphical interface.
Step 6: Initializing and Formatting the Array
  • Once the RAID array is configured, you may need to initialize and format it before use. This process prepares the array for data storage, creating a file system that’s compatible with your operating system.
  • Warning: Initializing and formatting the RAID array will erase all data on the included drives. Ensure you have backups of any important data before proceeding.
Step 7: Testing the RAID Array
  • Performance Testing: Use disk benchmarking software to test the read/write speeds of the RAID array, ensuring it meets your expectations and requirements for video production.
  • Redundancy Testing: If your RAID level includes redundancy (e.g., RAID 1, RAID 5, RAID 6), consider testing the failure recovery process by temporarily removing or disconnecting a drive (if possible) and verifying that the array continues to function.
Step 8: Implementing a Backup Strategy
  • Remember, RAID is not a backup solution. Implement a comprehensive backup strategy that includes regular backups to external drives, NAS devices, or cloud storage to protect your video projects against all forms of data loss.

By following these steps, you can build a RAID setup tailored to your video production needs, enhancing your workflow’s performance, reliability, and data security.

Section 4.3: Maintenance and Monitoring

After successfully setting up a RAID array for your video production environment, ongoing maintenance and monitoring become crucial to ensuring its long-term reliability and performance. This section covers best practices for maintaining your RAID setup, tools for monitoring its health, and troubleshooting common issues.

Routine Maintenance Practices
  • Regular Checks: Schedule regular checks of the RAID array’s status, including drive health, array integrity, and any error logs provided by the RAID controller. This proactive approach can help catch and resolve issues before they lead to data loss or significant downtime.
  • Software and Firmware Updates: Keep the RAID controller’s firmware and any associated management software up to date. Software updates can address bugs, improve performance, and enhance security. Always back up your data before applying updates.
  • Drive Health Monitoring: Utilize tools that support S.M.A.R.T. (Self-Monitoring, Analysis, and Reporting Technology) to monitor the health of the drives in your RAID array. Look for signs of impending failure, such as reallocated sectors, read errors, or significantly slowed performance.
  • Environmental Considerations: Ensure that your RAID system operates in an environment with adequate cooling and minimal dust. Overheating and excessive dust can lead to hardware failure, including drives and RAID controllers.
Tools for Monitoring RAID Health
  • RAID Controller Software: Most hardware RAID controllers come with dedicated software for monitoring and managing the RAID array. This software can provide detailed information on the status of the array and individual drives.
  • Third-Party Monitoring Tools: There are numerous third-party tools available for monitoring RAID arrays, especially for software RAID configurations. These tools can offer more user-friendly interfaces and additional features compared to default operating system utilities.
  • Operating System Built-in Tools: Operating systems like Windows, macOS, and Linux distributions often have built-in tools for basic RAID monitoring and management. While not as feature-rich as dedicated software, they can provide a quick overview of your RAID status.
Troubleshooting Common Issues
  • Drive Failure: In the event of a drive failure, replace the failed drive as soon as possible to restore redundancy. Most RAID levels are designed to continue operating in a degraded mode until the failed drive is replaced and the array is rebuilt.
  • Performance Degradation: If you notice a significant drop in performance, check for failing drives, overheating issues, or bottlenecks in your system’s data transfer chain (such as an overloaded CPU or insufficient RAM).
  • RAID Array Rebuilds: Be aware that rebuilding a RAID array, especially for levels with parity like RAID 5 or RAID 6, can take a considerable amount of time and slightly degrade performance during the rebuild process. Avoid intensive data operations until the rebuild is complete.
Backup Strategy Reminder
  • Regular Backups: Emphasize the importance of a comprehensive backup strategy that goes beyond RAID redundancy. Regularly back up critical data to offsite locations or cloud storage to protect against all forms of data loss, including catastrophic events.

Maintaining and monitoring your RAID setup is an ongoing process that requires attention to detail and a proactive approach to data management. By adhering to these best practices, you can ensure that your RAID array remains a reliable foundation for your video production projects, safeguarding your data against hardware failures and optimizing your workflow for efficiency and performance.

Chapter 5: Alternatives to RAID

Section 5.1: Cloud Storage Solutions

In the context of video production, cloud storage solutions offer an alternative or complementary option to RAID for managing and safeguarding digital assets. While RAID setups provide localized storage with varying degrees of redundancy and performance, cloud storage brings distinct advantages, particularly in accessibility, scalability, and off-site data protection. This section explores the pros and cons of cloud storage solutions and provides insights into when they might be considered over, or alongside, RAID configurations. With Dropbox eliminating their non enterprise unlimited account this is what convinced us to build a raid! But let’s explore some of the Cloud Pros and cons.

Advantages of Cloud Storage Solutions
  • Accessibility: Cloud storage allows for the access of video content from any location with an internet connection, facilitating remote collaboration among video editors, producers, and other stakeholders. This can significantly enhance workflow flexibility and efficiency.
  • Scalability: One of the most significant advantages of cloud storage is its scalability. You can easily increase your storage capacity based on the demands of your projects without the need for physical hardware upgrades or additional investments in on-site infrastructure.
  • Off-site Data Protection: Cloud storage inherently provides off-site backup, protecting your data against local disasters such as fires, floods, or theft. This level of data protection is difficult to achieve with on-site RAID configurations alone.
  • Cost-Effectiveness: For small to medium-sized video production operations, cloud storage can be cost-effective, with subscription-based models that eliminate the need for large upfront investments in hardware. However, costs can scale with increased storage needs and data transfer volumes.
Disadvantages of Cloud Storage Solutions
  • Dependence on Internet Connectivity: Access to data stored in the cloud is contingent upon reliable internet connectivity. Slow or unstable connections can hinder the ability to stream or download large video files efficiently.
  • Ongoing Costs: While cloud storage can be cost-effective for smaller operations or short-term projects, the recurring subscription fees can become substantial over time, especially for operations with large volumes of data.
  • Data Security and Privacy Concerns: Storing sensitive or proprietary video content on external cloud servers introduces potential concerns regarding data security and privacy. It’s essential to select reputable cloud service providers with robust security measures and compliance with relevant data protection regulations.
  • Latency Issues: Depending on the geographical location of the cloud servers and the size of the files being accessed, users may experience latency when uploading or downloading content, which can impact the efficiency of video production workflows.

When to Consider Cloud Storage Over or Alongside RAID

  • As a Complementary Solution: Cloud storage can serve as an excellent complement to RAID, offering an off-site backup solution that enhances data protection strategies. This dual approach ensures that video projects are safeguarded against both hardware failures and site-specific disasters.
  • For Remote Collaboration: Projects involving remote teams can benefit significantly from cloud storage, as it enables seamless sharing and collaboration on video content from anywhere in the world.
  • For Scalable Storage Needs: If your video production projects vary significantly in size and storage requirements, cloud storage provides a flexible and scalable solution that can adjust to your needs without the need for physical infrastructure changes.
  • For Cost Considerations: Small operations or freelance video producers with limited budgets may find cloud storage to be a more viable initial option due to its lower upfront costs compared to setting up a RAID system.

In summary, while RAID configurations offer reliable, high-performance storage solutions for video production, cloud storage solutions present a flexible, scalable, and accessible alternative or complement. By carefully assessing the specific needs and constraints of your video production workflow, you can determine the most appropriate use of cloud storage solutions in conjunction with, or as an alternative to, traditional RAID setups.

Section 5.2: Direct-Attached Storage (DAS) and Network-Attached Storage (NAS)

In addition to RAID and cloud storage solutions, Direct-Attached Storage (DAS) and Network-Attached Storage (NAS) serve as critical components in a comprehensive data storage strategy for video production. Each offers unique benefits and considerations, making them suitable for different aspects of the video production process. Understanding their roles and how they compare can help you make informed decisions about integrating these technologies into your workflow.

Direct-Attached Storage (DAS)
  • Description: DAS is a digital storage system directly attached to a server or workstation without a network interface, using interfaces like USB, Thunderbolt, or eSATA. It’s recognized by the host system as a local drive, making it simple to set up and use.
  • Advantages:
    • Performance: DAS provides high data transfer rates, especially useful for video editing and rendering tasks that require fast access to large files.
    • Cost-Effective: Generally, DAS is more affordable than NAS, making it an attractive option for small studios or individual professionals.
    • Ease of Use: With its direct connection, DAS is straightforward to configure and manage, requiring minimal technical knowledge.
  • Disadvantages:
    • Scalability: Expanding storage capacity can be more challenging with DAS, as it often requires adding additional external drives or replacing existing ones with larger capacities.
    • Limited Accessibility: DAS can only be accessed by the connected system, making it less suitable for environments where multiple users need simultaneous access to the stored data.
Network-Attached Storage (NAS)
  • Description: NAS is a storage device connected to a network, allowing multiple users and client devices to retrieve data from centralized storage. It operates independently with its own IP address, managed through a web-based interface.
  • Advantages:
    • Accessibility: NAS allows multiple users to access and share files simultaneously over the network, facilitating collaborative video production workflows.
    • Scalability: It’s generally easier to expand storage capacity with NAS by adding more drives to the existing network or connecting additional NAS units.
    • Data Protection: Many NAS devices offer built-in RAID configurations, providing redundancy and data protection without requiring a separate RAID setup.
  • Disadvantages:
    • Cost: NAS systems can be more expensive than DAS, especially when considering higher-end models designed for business use with advanced features and scalability.
    • Performance: While NAS offers the convenience of network accessibility, the data transfer speeds can be limited by network bandwidth and may not match the performance of a directly connected DAS in high-demand video production tasks.

Use Cases in Video Production

  • DAS for High-Performance Needs: DAS is ideal for individual editors or colorists who require maximum performance and work primarily on a single workstation. It’s particularly well-suited for editing high-resolution video files where speed is crucial.
  • NAS for Collaboration and Accessibility: NAS shines in collaborative environments where multiple editors, producers, and other team members need to access and share files seamlessly. It supports a more distributed workflow, enabling efficient team-based projects.

Combining DAS and NAS

Integrating both DAS and NAS into your video production environment offers a balanced approach, combining the high performance of DAS for intensive editing tasks with the collaborative and scalable advantages of NAS. For example, a video editor might use DAS for real-time editing of 4K or 8K video while relying on NAS for shared access to raw footage, project files, and archives.

In conclusion, both DAS and NAS play vital roles in a comprehensive video production storage strategy, complementing RAID and cloud storage solutions. By carefully considering the specific needs of your video production workflow, including performance requirements, collaboration needs, and budget constraints, you can effectively leverage DAS and NAS to enhance productivity and safeguard your digital assets.

Chapter 6: Future Trends

Section 6.1: The Evolution of Storage Technology

The landscape of storage technology, especially within the realm of video production, is continually evolving. Advances in hardware, software, and networking have paved the way for more efficient, reliable, and scalable storage solutions. Understanding these trends is crucial for anyone involved in video production, as the choice of storage can significantly impact workflow. This section explores emerging trends in storage technology and their implications for the future of video production.

Advancements in Solid State Drive (SSD) Technology
  • Increased Capacities and Lower Costs: SSDs are rapidly increasing in capacity while their cost per gigabyte continues to decrease. This trend is making high-capacity SSDs more accessible for video production, enabling faster and more efficient workflows with large video files.
  • NVMe Technology: The adoption of NVMe (Non-Volatile Memory Express) technology has significantly improved the performance of SSDs, offering substantial increases in read/write speeds and lower latency compared to SATA SSDs. This is particularly beneficial for editing high-resolution video content, where speed is crucial.
Enhanced Network-Attached Storage (NAS) Capabilities
  • Higher Speed Networking: With the adoption of 10 GbE (Gigabit Ethernet) and even 40 GbE in NAS devices, the speed at which data can be transferred over a network has greatly increased. This development supports more efficient collaboration on video projects across different locations.
  • NAS with Hybrid Cloud Integrations: Modern NAS devices often come with built-in cloud integration, allowing seamless synchronization and backup of data to cloud services. This hybrid approach combines the accessibility and scalability of cloud storage with the speed and security of local NAS systems.
Developments in RAID Technology
  • Software-Defined Storage (SDS): SDS solutions are making RAID configurations more flexible and easier to manage. By abstracting the storage hardware from the management interface, SDS allows for more dynamic allocation of resources, improving efficiency and scalability.
  • Advanced RAID Levels: Newer RAID levels and algorithms are being developed to optimize for the specific characteristics of SSDs, such as RAID 5E, RAID 6E, and others designed to enhance performance and data durability in SSD arrays.
The Rise of Object Storage
  • Scalability and Accessibility: Object storage is gaining popularity for handling large volumes of unstructured data, such as video. It offers virtually unlimited scalability and is accessible through standard HTTP APIs, making it ideal for cloud-based video production workflows.
  • Cost-Effectiveness: With its flat namespace and metadata features, object storage can be more cost-effective for long-term archiving of video content, especially when integrated with cloud services.

Implications for the Future of Video Production

  • 4K, 8K, and Beyond: As video resolutions continue to increase, the demand for faster, higher-capacity storage solutions will grow. Emerging storage technologies will play a critical role in enabling the efficient editing and storage of ultra-high-definition video content.
  • Collaboration Across Distances: Advances in NAS and cloud integrations are breaking down geographical barriers, enabling video production teams to collaborate more effectively, no matter where they are located.
  • Data Security and Redundancy: With the increasing value of digital video content, the importance of data security and redundancy has never been higher. Future storage technologies will need to balance performance with robust data protection mechanisms.

In summary, the evolution of storage technology is poised to address the growing demands of video production. Staying informed about these trends will enable video production professionals to make strategic decisions.

Section 6.2: Adapting to Future Needs

As the video production industry continues to evolve, driven by technological advancements and changing viewer expectations, the need for adaptable, forward-looking storage solutions becomes increasingly critical. The future of video production is likely to be shaped by several key trends, including higher resolutions, immersive formats, and AI-driven workflows. Understanding how to prepare and adapt your storage strategy to meet these future needs is essential for maintaining efficiency, competitiveness, and creativity.

Embracing Scalability
  • Modular Storage Systems: Invest in storage solutions that offer modular scalability, allowing you to expand capacity and performance incrementally as your needs grow. This approach can prevent over-investment in technology that might become obsolete or insufficient to meet future demands.
  • Cloud and Hybrid Models: Leverage cloud storage for its virtually limitless scalability and flexibility. Hybrid models, which combine local (NAS, DAS) and cloud storage, can offer the best of both worlds, providing local performance where needed and cloud scalability for archiving and remote access.
Investing in High-Speed Connectivity
  • Faster Network Infrastructure: As file sizes grow with higher video resolutions and more complex data streams (e.g., 8K, VR content), the importance of high-speed network infrastructure, including 10 GbE or even 40 GbE, becomes paramount. This ensures that your storage can serve data quickly enough to keep up with intensive editing and rendering workflows.
  • Emerging Protocols and Interfaces: Stay informed about and ready to adopt emerging connectivity protocols and interfaces that offer higher speeds and efficiency, such as Thunderbolt 4 or future iterations of NVMe technology.
Leveraging AI and Automation
  • AI for Storage Management: Utilize AI-driven tools for storage management and optimization, including automated data tiering and predictive analytics for maintenance and capacity planning. These tools can help ensure that your storage resources are used efficiently and that potential issues are addressed before they impact your workflow.
  • Automated Archiving Solutions: Implement automated archiving solutions that seamlessly move older projects to more cost-effective storage tiers or cloud services, keeping your primary storage clear for current projects without manual intervention.
Ensuring Data Security and Redundancy
  • Advanced Data Protection Strategies: Beyond traditional RAID configurations, explore advanced data protection strategies that incorporate real-time replication, snapshotting, and encryption to safeguard against data loss, corruption, and security breaches.
  • Regular Review and Testing of Backup and Recovery Plans: Establish a schedule for regular review and testing of your backup and recovery plans to ensure they remain effective against current threats and capable of recovering data quickly in the event of a failure.
Staying Informed and Flexible
  • Continuous Learning: The storage technology landscape is continually changing. Stay informed about new technologies, standards, and best practices through industry publications, forums, and professional networks.
  • Vendor and Technology Agnosticism: Whenever possible, avoid locking yourself into single-vendor solutions or proprietary technologies that may limit your ability to adapt and upgrade in the future. Opt for standards-based, interoperable solutions that offer flexibility.

By anticipating future trends and challenges in video production, you can design a storage strategy that will meet your needs. Embracing scalability, investing in high-speed connectivity, leveraging AI, ensuring robust data security, and maintaining a flexible, informed approach to technology selection will position your video production workflows for success in the years to come.

Conclusion

The landscape of video production is one of constant evolution. This is driven by advances in technology, shifts in consumer expectations, and the ever-growing demand for higher quality content. Within this dynamic environment, the role of effective data storage solutions cannot be overstated. These storage solutions form the backbone of video production workflows.

As we’ve explored, RAID setups offer a blend of performance, redundancy, and capacity. The choice between hardware and software RAID, and among the various RAID levels, should be informed by a clear understanding of your specific needs, balancing speed, data protection, and budget considerations. Meanwhile, cloud storage solutions present a flexible and scalable alternative or complement to RAID.

Direct-Attached Storage (DAS) and Network-Attached Storage (NAS) further expand the storage options. The decision to integrate DAS or NAS into your workflow will depend on your collaboration needs, project sizes, and performance requirements.

Looking ahead, the future of video production storage is set to be shaped by several key trends. This includes the increasing adoption of SSDs, advancements in network infrastructure, the integration of AI and automation in storage management, and the ongoing need for robust data security measures. Adapting to these trends will require a proactive and informed approach. One that embraces scalability, leverages the latest technologies, and prioritizes the protection of valuable digital assets.

In conclusion, crafting an effective storage strategy for video production is a complex but critical task. By carefully considering the options and strategies discussed in this guide, you can ensure that your storage solutions not only meet the demands of today’s video production landscape but are also poised to adapt to the challenges and opportunities of tomorrow.

If you are looking to learn more about how we use Raid’s in our video production company, reach out today!


Is AI Going to Replace Video Editors?

Here at Luma Creative, we’re excited about the possibilities AI video editing tools offer! As a San Francisco video production company working extensively within the corporate-tech sphere, we’re at the epicenter of innovation for artificial intelligence. We are constantly asking ourselves: “Is AI going to replace video editors?” The answer isn’t as black and white as you’d think.

As the tech giant Meta states in their launch of ‘Make-A-Video’ AI software:  “Generative AI research is pushing creative expression forward by giving people tools to quickly and easily create new content…”  Therefore, does this mean it’s going to be faster and easier to create content? The answer is clearly: Yes!

AI video editing tools: practical application

Modern editors juggle various tasks: repetitious technical, creative choice, narrative shaping, and concept honing tasks. These tasks, informed by foundational editorial skills, take time and connection to the client’s vision. With the emergence of AI supplemental tools in the past five years, a variety of use cases have emerged. As ProGrade Digital makes clear“AI-powered editing tools can automatically analyse raw footage, recognise key moments, and automatically generate edited versions of videos…”

At a higher level, many companies (e.g., Adobe) are creating generative AI tools to do everything from simplifying editor workflows to reimagining the way we create. Here at Luma Creative, we’ve adopted several AI systems into our workflow. Adobe Podcast refines source audio and cleans up background audio (An example of Luma’s work seen here in our interview with Professor Carl June on the 2023 Cellares production). Meanwhile, Scene Edit Detection from Adobe Pro guides A-to-B transitions during interviews. These programs significantly reduce time spent and offer our editors the ability to focus on the bigger picture. Of course, there are far more applications to be explored, and we’re excitedly experimenting.

So, what’s the verdict? 

At Luma Creative, we agree with Viostream’s article on the topic: “While AI has undoubtedly brought about many positive changes in the industry, it is important to recognise that it cannot fully replace human video editors.” This is due to the complexity of editing decisions made outside the sphere of digital manipulation. “AI is not yet able to replicate the creative decision-making process that a human editor has honed. It’s important to leverage these skills to produce the highest quality content possible.” Simply put, human content needs human oversight, and when you hire a human, you hire human perspectives and human sensibility. 

Why these skills matter

The largest misconception about most AI programs is that anyone can use them with little-to-no training. Thus creating a democratized space where anyone can be an editor. While many AI programs do simplify previously complex editing tasks, non-editors nonetheless often lack the experience to avoid making common video production mistakes. Understanding both the algorithm and the artistic problem space reveals desired results, as AI tasks must be specifically formatted. It can be challenging to find reliable AI tools. Even minor adjustments to algorithms can cause footage to fall flat.

Prompt engineers are those who understand how to speak with AI effectively. Here’s a few thoughts found in Sudhakar Manivannan’s (Senior Manager, Software Engineering at Walmart Global Tech India | GenAI) LinkedIn article on the matter:

“Crafting the right prompt can ensure that the AI system generates responses that are both accurate and pertinent to the user’s needs. This improves user satisfaction and increases the likelihood of positive outcomes…Users often have unique requirements, and prompt engineering allows for tailored interactions with AI systems, catering to individual preferences and goals.”

At Luma, it’s evident that prompt engineering is critical for editors to adopt. As Business Insider puts it

“Unlike traditional computer engineers, who code, prompt engineers write prose…” 

As our article on corporate video production reminds us, one should never: “…cut corners on production value…” Hiring practices should reflect the best use of these new tools. Using AI should not come at a cost for quality – even when it’s exciting how fast a project can come together. 

So, how does it all add up?

Here at Luma Creative, we find great potential in the AI space. We see a world where AI video editing tools benefit everyone, from editors to clients. With AI, video editors can learn to use AI tools so that they can focus on uniquely human skills. Hopefully you now learned a little more about if AI is going to replace video editors. As an editor, prompt engineering skills appear essential. When addressing production, AI is low-cost. It also reduces simple and tedious jobs. Human editors make your video accessible and meaningful to your viewers. With AI already a crucial part of our process, we are excited for future advancements.

Simply put, together is better.

Looking to learn more about our video editing techniques? Reach out to learn more!


Luma Creative produced San Francisco bio pharma video production for Cellares
San Francisco biopharma video production – Cellares

At Luma Creative, we had the privilege of producing keystone content for Cellares, a San Franscico Bay Area gene therapy startup valued at an impressive $3.2 billion. It was a highly technical video production project with multiple stand-alone outputs. We worked with them over several times on set as well as countless post production days to ensure the upmost success of their video content. This San Francisco biopharma video production was a wonderful opportunity for us to combine our cinematic prowess with a very informational subject matter.

We aimed to ensure the success of their public announcement via professional, cinema grade visual media, appreciating the trust Cellares placed in us given this substantial product release. Although Cellares had a limited timeframe, we were sure to hit their deadlines every time.

Project Overview

  • Project Type: Marketing video production
  • Location: South San Francisco, CA (2022-2023), New Jersey (Drone footage 2022)
  • Client: Cellares
  • Objectives:
    • Crafting a range of deliverables, including:
      • A compelling Leadership video.
      • An immersive End-to-End (E2E) run video for investors.
      • A dynamic and refined public E2E Software demo video to showcase the Cell Shuttle’s forefront design and technological prowess.
      • A montage Culture video to convey the company’s ethos.
      • Engaging ‘Mouse-over’ videos to enhance user experience.
      • Software video to demo the companies platform
      • Modeling for the company’s website.

Timeline

Pre-production meetings, several shoots, followed by post-production & editing. 

There were two separate production dates during the years 2022-2023. The first for producing investor content, and the second focused on video production and other modeling content for public web distribution.

We first met with the Cellares team to establish clarity on the best ways to portray the product, company, and the impact of both. Would we shoot this with a small and nimble crew with a quantity approach or a larger, more polished and cinematic crew. They chose the latter. Looking for the best production quality within their budget. 

As we dove into pre production. There were a few core questions. How was this story to unfold? How would visuals reveal it? How would the immense gravity of such a product be accurately expressed to viewers – instilling trust?

Deliverables and Portfolio

A Leadership video starring the notable immunologist Carl June (who pioneered gene therapy in the 70s and 80s), expressing his support and approval of Cellares’s cutting-edge services. A massive turning point for product adoption. This video lives on the front page of Cellares’ website.

This was followed by a dynamic Software demo E2E video outlining the straightforward and fundamental advantages of the Cell Shuttle with visuals of the workflow. The seamless transitions and complex product showcasing were executed with concise precision. Furthermore, one crucial visual includes a 360-degree production investigation, breaking down the core functions of the cell shuttle.

A short culture video (no audio) was produced to communicate the overall company persona, internal culture, and external impact. This would be used as a background video on the company’s careers page.

Among the noteworthy deliverables was a full-length E2E investors video we produced in 2022. This video offered an extensive journey into what Cellares could offer, which was pivotal in their product adoption and 2023 Series C funding success.

Software Demo which highlights the back end of how the cell shuttle processes can be customized for each application.

We also provided a few models based on their CAD files to precisely show in a 2d fashion the intricacies of their product.

Biopharma video production
Luma Creative produced San Francisco bio pharma video production for Cellares

Our portfolio showcases all of our publicly viewable Cellares projects. You can explore them in detail by clicking here.

Behind the scenes

Conclusion:

In our partnership with Cellares, our goal was simple: to create a straightforward, clean narrative and informative visual content. We are proud to have been part of their market success. These videos now reside on Cellares’s website, enhancing user engagement and product adoption and conveying valuable insights about the future of gene therapy.

Our journey with Cellares has been a privilege, and we look forward to more collaborations that bring innovative ideas to life!

If you are looking for San Francisco biopharma video production, contact us today!


How to prepare for an on-camera interview
Preparing For An On-camera Interview

The Big Picture – Determining The Purpose Of The Interview

If you want to know how to prepare for an on-camera interview as an interviewee, you came to the right place. Let’s face it – gearing up for an on-camera interview might feel like a daunting task. But if you have ever represented your company face-to-face or know how to conduct an interview you will be glad to know that the path to success isn’t much different. The most important thing you can do is prepare. 

Before you begin memorizing a grand speech, you will want to know the purpose of the interview and the audience. Consider the following questions: 

  • Who will be viewing the interview? 
  • Where will the interview be shared? [Will the interview be distributed internally at your company? Will the interview be shared on social media?]
  • Will the interview be broadcasted as a livestream or will you have the chance for multiple takes? 
  • What are the main points of the subject you will present? 

Prepare by answering these key questions. Do your research on the subject matter and know how the details connect to the bigger picture. In general, be ready to share about the subject matter as an outsider. Let the purpose of the interview and how it will be broadcasted guide the tone in which you will speak. Once you know the talking points and have a gameplan to address each possible question, run through your lines until you get it right. 

Filming Day – Deciding What To Wear On-Camera 

Now that you are ready to ace your response, don’t forget that presentation matters! The videography team will do everything they can to make sure you look good on camera. There are, however, a few things you can do to help out:

  • Avoid logos and clothing with small prints
  • Opt for darker fabrics but be sure to ask beforehand what is recommended for the setting and light set up 
  • Bring a back up outfit to set 

Aside from following these guidelines on how to dress for an on-camera interview consider again the purpose and audience of the interview and dress accordingly. 

Ready to record! – Making A Good Impression As Interviewee

You prepared your talking points and you are looking sharp. You know just what to say but now that you have arrived on set, keep in mind these useful tips for how to say it: 

  • Don’t respond with ‘yes’ or ‘no’. Respond to each question in a full sentence. [Ex: When asked what your favorite city is, don’t say “San Francisco”, but instead say, “my favorite city is San Francisco”. And if asked if you prefer San Francisco, don’t say “yes”, but instead say, “I prefer San Francisco.” 
  • Avoid wandering eyes. Maintain solid eye contact with your interviewer. If you are instructed to look into the camera, do the same, and consider imagining someone you know to shake off any nerves. 
  • Keep good posture. If you are sitting during the interview, be mindful of your legs and feet. 
  • Speak succinctly. Keep your sentences short and simple. Avoid all filler words. 
  • Avoid a monotone voice. Take your time and smile!
  • Don’t fidget. Keep your arms and hands relaxed but remember that body language is a tool. Use your hands to naturally aid your words. 
  • When applicable, tie in a summary of your key message

Finally, trust yourself and the preparation you have done.  Just because you have prepared your response does not mean you need to read from a script like a robot. You want to appear comfortable and confident. Approach the session like a conversation. This is now your chance to shine as a storyteller!

Looking for more advice about on how to prepare for an on-camera interview as an interviewee? Check out these golden tips from those who have nailed it before.

Are you looking for a San Francisco video production company? Reach out today!


Should you hire a videographer or a video production company
Hiring a Videographer vs a Video Production Company: Which Is Right For You?

In the realm of video creation, two primary options await those seeking to create content. You have the option to hire a videographer or contract a video production company. While both can produce quality results, their processes, scope, resources, and costs can differ significantly. In this article, we’ll break down the core differences to help you decide which choice aligns best with your needs. What is the primary difference between a videographer vs a video production company?

1. Scope of Work:

Videographer: A videographer, often a solo professional or part of a small team, typically handles everything from shooting to editing. They’re best suited for smaller projects like events, interviews, and simple promotional videos.

Video Production Company: This is a full-scale operation, involving a team of specialists for each phase of production. This may include scriptwriting, storyboarding, post-production, and distribution. They handle larger, more complex projects like commercials, corporate videos, and cinematic storytelling. Video production companies can bring in a specialized crew to get precision shots that require a lot of logistical planning or building sets that aren’t feasible for a solo videographer.

2. Equipment & Resources:

Videographer: Videographers usually own or rent their gear, which might be limited in variety but is professional-grade. They might not have access to the latest or most specialized equipment.

Video Production Company: These companies invest in state-of-the-art equipment and have a wider array of tools at their disposal – such as drones, specialized lighting, and top-tier editing software.

3. Cost:

Videographer: Given their smaller scale, hiring a videographer is generally more budget-friendly. This makes them a popular choice for startups and small businesses. Is your company is just getting started? Do you want to see how your customers will react to a video? A low investment videographer based project might be the best fit!

Video Production Company: Given their resources, expertise, and the scale of projects they handle, these companies come with a higher price tag. However, the investment often translates into higher production value.

4. Flexibility & Personal Touch:

Videographer: Videographers often offer more flexibility in terms of last-minute changes and can provide a personal touch to their projects. Changes are faster to implement for the team.

Video Production Company: While they operate within a structured process, many production companies value client input and collaboration. They may be less agile with last-minute changes due to the larger teams and predefined processes involved. However, they may offer more flexibility with scheduling or have multiple crews to finish your project sooner.

5. Specialization:

Videographer: Many videographers develop niche specialties based on interest or demand, such as wedding videos, documentary-style content, or corporate interviews.

Video Production Company: These companies often cover a broader range of styles and can pull from a team of specialists to best match the needs of a specific project.

6. Post-Production:

Videographer: While many videographers have editing skills and can offer basic post-production services, their offerings are limited compared to full-scale companies.

Video Production Company: With dedicated post-production teams, these companies can provide advanced editing, sound design, color grading, graphics, animation, and more.

7. Scale and Multiple Projects:

Videographer: Videographers might be more suited for one-off projects or a series of small-scale videos. They may be more effective for projects like monthly social media retainers which require frequent content creation at a lower production value.

Video Production Company: If you’re looking to produce a series of videos or need content on an ongoing basis, a video production company, can often handle multiple projects simultaneously. Agencies have more resources at their disposal to scale.

Take a look at this short video for more info.

Conclusion:

Your choice between a videographer and a video production company should depend on the scale, budget, complexity, and specific needs of your project. For budget-conscious projects, a videographer could be the perfect fit. For larger undertakings aiming for a grander scale and top-tier production value, investing in a video production company might be the best route.

Remember, the ultimate goal is to effectively convey your message and engage your audience, so choose the option that aligns best with your vision and objectives. Thanks for reading our article on a videographer vs video production company.

Luma Creative can provide an experienced videographer or full video production services. Our offerings are based on your needs and budget. Reach out today to learn more!


Luma Creative provides insights into why you should film your video production in San Francisco
Why you should film your marketing video in San Francisco

In today’s digital world, video marketing is of critical importance. To create captivating and impactful marketing videos, consider your location carefully. Shooting video production production in San Francisco is unparalelled with it’s unique blend of natural beauty, iconic landmarks, diverse culture. Lastly there is unwavering support from the San Francisco Film Commission. Shooting your marketing video in San Francisco offers a winning choice. In this article we’ll discuss why you should film your marketing video in San Francisco.

Iconic Landmarks and Stunning Scenery

San Francisco is home to some of the most recognizable landmarks in the world. The Golden Gate Bridge, Alcatraz Island, and the Painted Ladies to name a few. Including these landmarks in your marketing video instantly adds credibility and familiarity to your brand. There is a reason so many films have shot in this city. The breathtaking scenery provides a visually captivating backdrop that can make your video truly stand out. The varied locations can match your brand’s aesthetics.

Cultural Diversity and Vibrant Neighborhoods

San Francisco is renowned for its rich cultural diversity and vibrant neighborhoods. Each district in the city has its own distinct personality and charm. This offers endless possibilities for storytelling and capturing authentic experiences. From the bohemian atmosphere of Haight-Ashbury to the bustling streets of Chinatown, the city’s neighborhoods provide unique and visually appealing settings. These settings can add depth and interest to your marketing video. By incorporating the local culture and showcasing the city’s diversity, you can resonate with a wider audience.

Film-Friendly Infrastructure and Support from the SF Film Commission

San Francisco takes pride in its film-friendly infrastructure and the unwavering support provided by the San Francisco Film Commission. Therefore, if you are considering why you should film your marketing video in San Francisco, it’s imperative to permit with a city that understands what it takes. This dedicated organization understands the value of the film industry and actively promotes and supports filmmaking in the city. The SF Film Commission serves as a valuable resource, offering guidance, permits, and logistical assistance. Their expertise and knowledge help streamline the process, ensuring a seamless experience for production teams.

SF Film Commission tips

Working closely with the SF Film Commission allows you to tap into their extensive network of local contacts and connections. They can provide recommendations for experienced crews, production companies, and rental equipment services that are well-versed in working within the city. This local expertise not saves valuable time and effort. It also ensures that your shoot runs smoothly, allowing you create compelling content for your marketing video.

Conclusion

In conclusion, San Francisco is an exceptional location for shooting your marketing video. This city has iconic landmarks, stunning scenery, cultural diversity, and the unwavering support from the SF Film Commission. Therefore it offers a wealth of opportunities to create visually captivating and engaging content. Embrace the city’s energy to capture the essence of this vibrant destination. You will be able to elevate your brand and connect with your audience in a memorable way.

We have several other articles on San Francisco film production as well. Check out a few of our favorites or contact us to help shoot your next video production.


Are you looking for professional San Francisco video production? We are a San Francisco Bay Area corporate and commercial video production company that’s simplified the production process, resulting in extremely fast turnaround times. So whether you need a video to enhance your virtual event, a production team to live stream, a creative post-production team to level up your video or a comprehensive strategy that encompasses everything, we’re available worldwide -- even at the last minute. There are many talented San Francisco video production specialists. How to find a video production company specializes in professional SF videography with tight deadlines. How long does video production take offers the best video production in San Jose, San Francisco and surrounding areas. Marketing techniques is another talented video production company! Lastly check out video production Marketing tips. Their commercial video skills are unmatched! The best San Francisco Corporate video production! Creative SF video production companies can be challenging to find.