The Blog


Should you hire a professional colorist for your video production?

Picture this. You’ve just finished up editing your 30 second commercial masterpiece. Your pacing is spot on. The foley sounds great and your sound mix is finally locked. To your surprise the client only had a few minor changes and loves it. Your deadline is in two days but you are wondering if you should send the final video to a professional colorist? If you are looking for this video to have as much polish as possible, we couldn’t recommend it more. In this article we’ll discuss if you should hire a professional colorist for your video production.

What is a professional colorist?

You might be wondering, what is a professional colorist? The simple answer is that they are someone or a team of people who will make your video’s colors fit your desired look. Not only will they work with you to develop a look but they’ll make sure that all the images fit together. Is there was some underexposure in half of your shots? Did your DP tend to shoot warmer then you would have liked?. According to Adobe, “color correction will unify your footage.” The colorist will take care of matching all the shots together. They’ll start by doing simple color correction of the hues and tones. Once they have matched the footage, then they will usually move on to doing a more complex color grade.

The color grade is where things really come to life. At this stage they’ll likely start any motion tracking and creating track masks, fixing simple technical errors, and directing the viewers attention to the subject. This could mean darkening everything in the image except the product or lightly blurring out the background. In today’s world, the line is sometimes blurred between simple VFX and things a professional colorist can do. For the sake of this article, we’ll assume the colorist isn’t handling any green screen VFX or more complicated tracking, but it can be done!

How much time does it take to color a video?

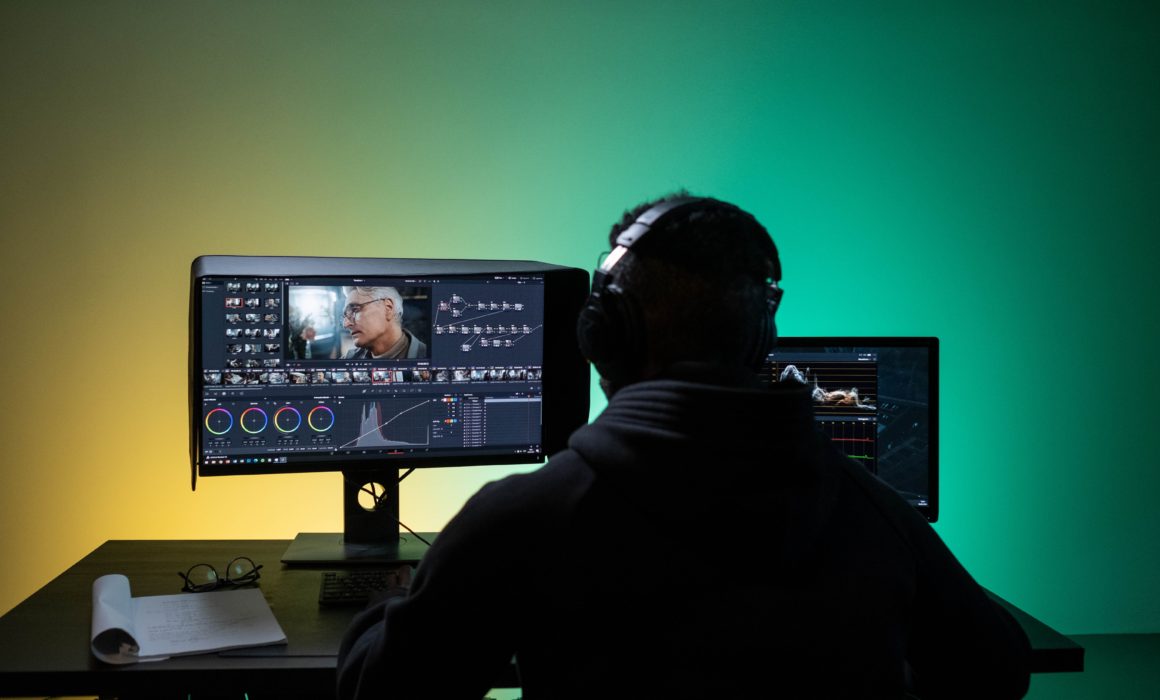
Color correction can take a drastically different amount of time depending on how complex the color correction is. Is there complicated tracking and a lot of re-lighting for a feature film? Or is the video a simple 30 second spot with more of a simple grade? Most commercial’s are graded in a single day. Often times even less. Depending on the level of the color correction artist or studio, you may even be able to video chat or go in for an in person color correction session. We find it’s very helpful to pull references for our colorist so they know what world we are looking to end up in. Typically we’ll color a few shots with them over a video chat and then let them get to work for a few hours finishing it up. A good colorist can take your film from bland to grand!

How much does a professional colorist cost?

Just like most things in the video production world. The costs can vary highly. If you are wondering should you hire a professional colorist for your video production this will definitely be the biggest concern. We’ve found that rates vary quite drastically. From several hundred dollars for a project to several hundred dollars per hour. The skill level of your color correction artist will likely dictate how much they charge. Is the colorist represented by a color correction or talent agency or are they a freelancer? Are they working out of a studio or their living room? At the end of the day, a strong portfolio and ease of collaboration will dictate much they are charging. Some of the more well known post production studio’s in the Bay Area are Roast N Post and MFD.

Conclusion

Thanks for checking out our article. Simply put, if you are shooting a professional video and spending the money on a fancy cinema camera and lenses, you should definitely consider having your video professionally colored. Let us know if you have any questions. We are a San Francisco based video production company who will elevate your brand!


how to create a directors treatment
How to create a director’s treatment

As a production company in San Francisco we make all types of videos. We shoot events, explainers, interviews, commercials and everything in between. Every job is different. We are often working direct to client or under an agency. The main difference is often times who takes care of the initial creative. Has the agency been working with the client for many months to hone their messaging or do they need our creative support? If we are writing the creative, then often times after pitching the initial idea, our director will create a director’s treatment.

When we first started, we found the idea of a director’s treatment quite intimidating. What are they and when should we make one? Surely we didn’t need to send it to every client! After much research and many times making them, we think we’ve finally got a handle on them. In this article, we’ll break down how to create a director’s treatment.

What is a director’s treatment?

A directors treatment is a visual document comprised of words, photos or GIF’s that describes a story. It is typically broken down into sections including, but not limited to: intro, story, characters, look, wardrobe, production design, editing, sound design, conclusion. According to Thefutur.com “The director’s treatment is an important tool in the pre-production process to give potential clients a clear roadmap of what to expect from the final video.”

When should you write a director’s treatment?

Let’s say your client comes to you wanting to shoot a commercial for a new coffee mug. They tell you their idea and ask you to pitch them yours. Sure you could just describe it to them, but would they really be able to see your story come to life? As creatives, we often have a very visual mind, but it’s important to visually convey that story for everyone on the clients team to see. It is much more cost effective for you to make a treatment before shooting, instead of shooting and editing only for the client not to like the visual direction. Maybe it was too light and bright for their taste or the locations just don’t fit their brand. Each section you write gives a conversation starter so you can express your ideas and having a jumping off point.

Are they top secret?

Many directors feel that their secret to winning jobs is in their treatments. This could be due to their ability to resonate with the clients vision or their ability to articulate themselves via text and images. It’s important as a director to find your own voice. It can take time, but through repetition, you’ll start to get a rhythm for what works for you and your clients. Sure looking at examples can give you some ideas, but it may actually end up stifling your creativity in the long run!

Key sections explained

Intro: This is where you should introduce yourself and relate o the project. In what way can you connect with the mission or product? How can you elevate this video?

Story: After taking a look at their story, how can you elevate it? Do you go bold and take it another direction? Or do you play it safe and just make a few small tweaks? We’ve had success with both approaches. It can be helpful to ask how bold they’d like you to be before writing something. Maybe they already have the idea and just want it polished? Other times they may just have a seed of an idea and really want it fleshed out. Either way, this is where you’ll write out the core storyline.

Characters: Who are the key characters in your story? How can you give them a personality that comes to life. It can be helpful to describe their ethnicity, age, hobbies, and background. It might also be helpful to note that a location or non-living thing can sometimes be a character.

Look: How is this piece going to feel. Is it dark and moody? Light and bright? What aspect ratio are you looking to use? Are you going to shoot anamorphic? Use this section to describe and show what they should expect with the images you will capture. This would also be a good place to mention your Director of photography and any relevant work.

Wardrobe: What do you imagine your characters wearing? Can you draw on references from any other movies, periods of history or styles?

Production design: How will the worlds you create look? Once again, try to use as much visual language as possible. If you were to read this to somebody else with their eyes closed could you put them in the world? What would they be seeing? What would be in the scenes?

Editing: Editing is critically important to have a story turns out. What kind of editing will you use to make this story flow. Will you use chronological editing? Will you use time-shifting? Should it be be paced fast or slow? Will you linger on certain moments more than others? Asking yourself these key questions can help you decide what the editing will add to the story.

Sound design: Not all videos have sound design, but from our perspective sound is one of the most overlooked elements to a good story. They can play up subtle moments or give the viewer extra motion. What kind of music will be playing? Will there be any music at all? Will there be sound effects or any sort of Foley to bring it to life?

Conclusion: Thank your readers for taking the time to read your treatment. Leave them feeling inspired and ready to get started! You’ve just learned the last step of how to create a director’s treatment.

Where to find reference images?

You might think that once you are done writing your treatment, you are done. However that is far from the case. You should be spending just as long looking for a reference images as you should writing your treatment. At first this section can seem overwhelming and daunting, but it truly is the most important part. Likely you are not re-creating the wheel and can find images that looks somewhat like you are trying to describe in your writing.

In the past five years there have been many websites released where you can find cinematic looking images, whether that is from previous commercials or from past feature films. A few of our favorite websites to look for images are: Shotdeck, Film Grab, and Film.AI. Another helpful place is to look at other directors or DP’s Vimeos. Try looking at what they like and seeing if you can find some thing you resonate with for your story. Lastly, try looking at other brands commercials in similar spaces to see if you can find what you are looking for.

Conclusion

Thanks for taking the time to read our article on how to create a director’s treatment. Hopefully it has been helpful and will take your treatments to the next level. If you are looking for a San Francisco video production company, reach out to us today!


how to get a carnet for an international video production
Do I need a carnet for international video production?

While most of our video productions occur within the San Francisco Bay Area, we get the opportunity to travel for work a few times a year. Recently, we were sent to Austin, New Orleans, Vancouver and Maui for a Bay area tech company. With any travel job, we ask ourselves if and how much equipment we should bring with us. Sure, we could source everything locally, but that often requires more costs and prep time. For this shoot, we decided we’d bring camera equipment with us and source grip and electric locally. The equipment would be comprised of our personal gear as well as rented equipment from a few rental houses. Given this was our first time shooting internationally, we found ourselves asking our if we need a carnet. In this article we’ll talk about if you need a carnet for international video production and the details it entails.

What is a carnet?

When we booked our last job, we knew it was time to get educated on what a carnet was. In simple terms, a carnet allows you to import and export equipment into another country without paying import duties. Think of it this way: a foreign country doesn’t want you bringing goods into their country and selling them and then taking that money back to your home country. Instead, without the carnet, they’ll collect an import tax to make up for this cost assuming you’ll sell the goods in their country. You might be asking yourself, can I get away with not bringing a carnet? Legally, you should have one, but if you are there with just a few pieces of small and inexpensive gear for a personal trip, you should be fine. There are around 80 countries that require them, so do your research before heading on your trip

How do I get a carnet?

If you’ve decided you need to get a carnet, it’s now time to make it happen! There are many companies that will help you get one including: Boomerang carnets, Filmlogic, Roanoke Group and more. The fees associated with each company vary widely so it’s important to inquire before selecting your processing company. The steps for each one should be relatively similar.

  1. Collect name/serial number/ value of each piece of equipment you’ll be temporarily importing.
  2. Provide travel information and fill out application
  3. Submit tax return or financial statements for surety bond.
  4. Receive your Carnet.

You might be thinking “why do I need to submit a tax return or financial statement?” According to Boomerang carnets, “The U.S. national guaranteeing association for carnets requires that all U.S. ATA Carnets be financially secured.” This means that they want to be sure you can pay the import or export duties should you bring extra equipment with you either direction. To complete this step you’d either need a surety bond or a certified check for a specific amount of the total important amount. Read more on that here.

How long does it take to get a carnet?

The process of getting a carnet is pretty quick if you have all the serial numbers and equipment compiled. From there its just about filling out a quick application and providing your proof of business income. Within 24hour you should hear from your chosen company and can have your carnet within 24hour of confirmation via overnight shipping!

What do you need to do with the carnet?

There are a few important steps with the carnet to ensure you don’t get billed anything afterwards.

  1. Get the stamp before leaving your home country that proves you are taking the equipment you say you are. This will likely require additional time at the airport as you’ll need to find customs inspection. For our recent trip this was on the complete other side of the airport.
  2. When going through customs in your destination country get another stamp where they verify you are not importing anything other than what is on your list.
  3. Once again, when leaving the destination country, you’ll need to arrive early to go and visit the customs inspection station. We might also recommend making an appointment. This will give you your final departure stamp.
  4. When you arrive back in your origination country, find the customs inspection, or have the info center bring an inspector to you. They will give the final signature and stamp to prove you are not importing anything other than what you left with!

Conclusion

All in all the idea of a carnet can be a bit frightening at first. If planned properly, it is not a big deal at all. My biggest tip would be to start your gear prep early to collect serials and plan plenty of time at the airports to get the required stamps! If you are looking for any information on a carnet for international video production, feel free to reach out!


How to unload equipment into buildings for video production in san Francisco
How to unload equipment into buildings for video production in San Francisco

Over the past several years, we have loaded valuable equipment into many shoots in buildings around San Francisco. Sometimes it has gone extremely smoothly and other times it has involved some very unsafe situations. Unfortunately, theft of camera equipment in San Francisco is very common. Whether you’re looking for time savings, security tips, or professionalism this post will cover everything. In this post we’ll discuss how to unload equipment into buildings for video production in San Francisco.

When we first began, it was often that we’d bring as much equipment as possible in the least efficient manner. We’d park in loading zones and lay all our gear out on the curb. Not only was this cumbersome and time consuming, but it set us up to be targeted in plain daylight. We’d then load in our equipment piece by piece, and without carts, into small elevators, and take it up to where we’d be shooting. This was incredibly inefficient and cost us many parking tickets and copious amounts of stress. Ever since that time, we still have cars slow down and look at what we are unloading out our our vehicles. We can’t stop that, but we can reduce the chances of them bothering us. We have developed systems to load in quickly while bringing as few eyes as possible on us. Read on to learn some tips and tricks about how we unload video production equipment into buildings in San Francisco.

Have a plan

Once we have determined that we’ll need to shoot on location, at a clients building or a rented space, in San Francisco, we immediately scope out the area. This usually involves looking at Google Maps as well as Google Street View of the buildings exterior as well as the normal traffic patterns around the building. We typically ask ourselves and the clients a few questions:

  • Is there a vendor entrance?
  • Is there a freight elevator?
  • If we’ll be loading in through the main entrance, is the building front door unlocked?
  • Do we have contact information handy for security or someone to open the doors?
  • Can we park and unload in a loading zone out front?
  • If we need to re-park after unloading, what is the closest parking lot that will accommodate our vehicle?
  • If we are bringing a grip truck, should we permit a spot for the truck or is there a secure lot nearby?

Let’s go over an example

Recently we had a shoot at 400 Montgomery Street in San Francisco. Our client told us that the best entrance would be through the front doors. As we looked at Google Maps we saw that the main door entrance did not have a loading zone.

This meant that we would need to double park and risk getting a ticket while unloading. After a little more street view exploration, our team saw that there was a commercial loading zone around the corner on California. We could push the equipment carts a little farther and have a legal loading area to park.

Based on this, we decided it would be best to park on California to avoid any hassles.

On the day of the shoot, knowing this ahead of time made the load in much easier!

Prioritize what you really need

When shooting on location it’s important to think about what you really need, bringing only the necessary equipment and no more. The more equipment that comes out of your headquarters, the more liability your team incurs, and the more heavy lifting is required! Pack light when possible. Sometimes we decide we don’t need the largest set of lenses for a basic corporate interview. On other projects, we know having more high quality equipment is going to make a noticeable difference, so we take the risk. It’s all about minimizing risk of damage and loss when shooting on location, so think twice before every shoot.

Keep equipment covered

When loading into buildings in San Francisco, thieves only know you have a camera or lens if it’s visible. A bunch of odd shaped black cases could really be anything. However, the moment that camera or lens comes out of the case, you have marked yourself as a target. Be smart about when and where you are pulling out equipment. We recommend getting camera equipment cases that are durable and don’t stand out much. Yes, that bright blue video production case looks super “cool”, but will it still be “cool” if it draws extra attention to the wrong eyes?

Be alert

Our next tip is to be alert and trust your gut. Trouble can happen in a split second anywhere in San Francisco. Constantly survey your surroundings and consider designating a crew member as a lookout. Have any cars pulled over near you or look suspicious? If so, it might be smart to drive around the block and into a parking garage in order to try and deter the potential trouble. We’ve only had to do this once, but luckily the car drove off once they saw us enter a garage. Then we left the garage and dropped off the last pieces of equipment at the locations as quickly as possible with all hands on deck! Luckily we didn’t have any issues.

Prioritize valuables

When we unload equipment into buildings in San Francisco for video production, we prioritize our most expensive pieces of equipment first. This means that if we become a target during that first load, the most expensive pieces are safely inside already.

Consider hiring security

In our article on how to hire security we discuss the different types of security as well as how to hire them. If your plan involves needing to load in very slowly or with many high value items you might consider hiring security. Although this won’t eliminate all chances of being approached or robbed, it will certainly deter attackers from a potential event.

Let it go

Although we have never been robbed, it’s important to keep in mind that no piece of equipment is worth your life. If someone tries to take your gear forcefully with a gun or weapon, just let it go. That is why we have insurance. This is also a reminder to make sure your insurance covers any and all owned and rented equipment.

Conclusion

Filming in San Francisco provides some of the best scenery and locations in the world. However, its mission critical that you are smart about how you unload equipment into buildings for video production in San Francisco. If you are looking for more safety tips, check out the SF Film commissions article on safety tips!


San Francisco creative commercial video production
San Francisco brand video production – Four day shoot for Cepton

We just finished our biggest project yet! Cepton makes LiDAR for several sectors but their primary focus is automotive. We have done several small video productions for them in the past, but now that they are officially listed on the NASDAQ they felt it was time to step it up a notch. They came to us looking to make a high end brand video on a tight timeline. Our concept was ambitious. Three storylines plus an arm car day shot over four days. The goal of this video was to not only educate users about their lidar technology but to inspire viewers to understand the larger goal of the company. To bring Lidar to the masses. In this article we’ll break down how we accomplished this San Francisco brand video production. Take a look at the video below and then read on to see our process.

Approach

Our approach for this San Francisco brand video production started with a treatment. In this treatment we presented two potential storylines to the company as well as the look and feel we would be creating. It turned out that the client actually wanted to blend the lines between both of our storylines. Not a problem. We tweaked and then started with our script creation. At this point, we brought in our script writer and got to work hashing out all the details of the story. We knew that because there would be such a large lift with the pre-production in order to capture the content necessary, we wanted to be 100% locked with the script before moving on!

Our script ended up being approximately six pages. It was our guide going into pre-production!

Once the script was ready, we presented it to the client for final story sign off. We tweaked and tweaked some more and then we locked the script. At this point, the base narrative was locked and we were able to start with the pre production. The first thing we did was break down the script into a shot list. Then our producer did a full script breakdown. At this point, we knew this was going to be tricky. Four days for this concept was very ambitious! Guess we just love a good challenge.

Pre Production

The first thing we did during pre-production was location scouting. This would be where we picked the houses and main locations for our shoot. The client loved that we were looking for distinctly different locations. They also loved the idea of shooting in San Francisco; however, this presents many logistical and security concerns. We’ve shot here many a time, but exteriors in San Francisco definitely pose a challenge. After scouting, we also decided that shooting on the highway between Muir beach and Stinson beach would be our best opportunity for some epic coastal footage. At this point, we brought on a locations manager. They helped us file appropriate permits with the city of San Francisco, state of California as well as the State Parks. This was a first for us working with so many jurisdictions.

During pre-production we also began casting for our actors and picking our picture vehicles. This posed another challenge as their self driving technology wasn’t actually in any of the cars we were shooting with! The vehicles also had to be newer than 2021. After finding our vehicles we began to lock our department heads. We chose to work with a Director of photography who had experience working with cars and had completed a successful project with in the past. We also knew that a limiting factor of the production would be the availability of our arm car team. At this point, we had the core team assembled and decided to lock shoot dates.

As pre-production continued, we began to storyboard. This part of the process is awesome! Everything starts to get visual and we now have a tangible communication tool with the client and all of our collaborators. Once those were locked we did our final tech scout with the crew and got ready to shoot.

Production

Once we completed the pre-production phase it was time for some fun! The four shoot days involved approximately twenty crew and each one of them was necessary to make sure we are able to not only get the cinematic shots that would represent their brand well, but would also keep us safe on the road. For day one, the russian arm day, where we were doing all of our shots on the road, we hired the local arm car company as well as San Francisco police and California highway patrol(CHP). This meant we would have full access to the road! It also helped that our locations manager was good friends with the SF film commission.

It was our first time being able to completely stop traffic and it was quite exhilarating. In the morning, we shot in downtown San Francisco by the Embarcadero as well as in the financial district. In the afternoon we went over the Marin and did our neighborhood driving shots as well as the coastal shots. This part of the day involved the CHP shutting down highway one between for a stretch of road between Muir beach and Stinson beach.

The image below shows the stretch of road on highway where the CHP shut down the road so we could film safely.

After we finished day one, we knew the shoot was going to be relatively smooth sailing. Day two involved our team shooting in the South Bay for the R&D scenes at their headquarters in San Jose. In the afternoon, we shot at a nearby house and school to get the daughter departure scene as well as the arrival. Because it was mandatory that we filmed at their headquarters in the South Bay, it only made sense that we shot the house and school in the South Bay as well.

On day three we were in Marin for the kids departure scene as well as the near accident scene and the coastal driving in car shots. These location moves were tricky, with trying to move so many crew but we got it done!

For day four we were in San Francisco for the couple departure scene as well as the in car city shots and the business woman arrival. We finished up the shots up at Mount Tamalpais for the kids arrival scene. We definitely scored on the weather!

Quick behind the scenes video from the shoot.

Post Production

Once we captured all the footage from the shoot, it was just a matter of assembling things to get post production started! Our editor put together an assembly cut within a week and we were loving what we were seeing. Because their technology is inherently visual with how it uses lasers to map out the world around it, we knew VFX was going to take some time. We began sharing the plates of the scenes that would need visual effects integration with our VFX team. With regards to the GIF below, we took the drone shot of the truck on the road and then sent this to our VFX artist who then recreated the real world in a virtual setting by using a model of the same truck and animating it to show the distance that their lidar technology could detect.

San Francisco vfx

The client was particular about how their technology was portrayed on screen so we spent extra time making sure their lidar technology was portrayed correctly on screen.

Once the client had signed off on the VFX, we were able to picture lock the video. At this stage, we moved on to color correction and sound design to put the finishing touches on the video.

BTS Photos

Conclusion

We had a ton of fun on this production. It was our largest San Francisco brand video production so far. And it was also the project that our team put the most amount of hours into. As we continue to evolve as a company, it’s this type of work that we’d like to continue getting the opportunity to create! If you or your company are looking for a cinematic professional brand video, contract us today!


San francisco video production in the post-covid era
San Francisco Video Production in the Post-Covid Era

Over the last several months, we have had the privilege of shooting several San Francisco video production projects. From fast-paced productions where we needed road closures and police escorts, to simple shoots where we provided video feeds for international clients to direct remotely. You may be wondering, how is San Francisco video production in the Post-Covid Era. We have seen how Covid has directly changed the SF Bay Area video scene and would love to share some of our thoughts. The four main effects we have seen are: 1. Big shoots require more time and resources to produce 2. Remote feeds are here to stay. 3. Having a backup crew is imperative 4. Video production is busier and more important to business success than ever.

Big video projects take longer to produce

In April we received a big request to shoot a brand story film over four days. This video would include on-the-road driving footage, three main storylines, and research and development footage at their headquarters. Previously, we would have proposed that production could be done in as little as a month. Knowing the permit office timelines and shortage of police officers in San Francisco, we decided to give ourselves a few extra weeks. Good thing we did, it was a close one!

Approach

We broke this production into four shoot days. Day one would capture all of the on-the-road footage. This was going to be the most intense day and it required a village to coordinate. We needed a basecamp to park all of our crew vehicles and our picture cars. Our Director, Producer, Director of Photography, and Russian Arm Car Crew did an incredible job of planning the routes and making sure we were in the optimal place at each part of the day. Securing the permitting with the city was where things got tricky. Our location manager spoke to the office many weeks ahead to detail the routes we planned to take, and which streets would require police assistance. We submitted the necessary documents several days early but at the last minute were still waiting to receive our permits. They assured us everything would work fine, it wasn’t until the Friday before the Sunday shoot that we finally heard back. They needed a change in one of our insurance documents. Nothing major… but it was 4:50pm on a Friday. We were luckily able to get ahold of our insurance agency and connect them with the San Francisco permit coordinator. They worked things out and we got our permit at 9pm that night. Phew!

Timelines

Their timeline of 14 days to receive the permit isn’t enough lead time for them to process the permits. Now, we are adamant that clients budget at least one additional week when dealing with the San Francisco Film Commission office. According to our location manager, the office staff was reduced during Covid and they have been chronically understaffed since. Extra time will ensure the permit is processed and your pre-production goes through smoothly.

Remote feeds are here to stay

Before Covid, we would shoot once or twice per week or two, on average. Roughly one out of ten clients would request for a remote feed. But during the peak of Covid, nearly every shoot was requesting a remote feed so either the client, agency, or director could view the stream from anywhere. Travel was restricted for some, and others did not want to take the risk to travel to the shoot. Yes, we are still finding that nearly one out of four shoots are looking for some sort of remote feed or streaming.

A remote feed adds extra complexity to the shoot, but Luma Creative has invested in the technology to livestream from anywhere there is a solid cell phone signal. Managing the remote feed takes extra time during the shoot. However, the remote feed ensures all key stakeholders can give their feedback, “live” instead of in post-production. Live feedback can reduce changes and mitigate costs for the post-production phase. San Francisco video production in the Post-Covid Era is definitely different, read on for more!

Having a backup crew is imperative 

When Covid was at it’s peak, it was mandatory to have Covid testing and a Covid compliance officer at every set. This was risky if someone tested positive on set;  we’d scramble to find a replacement crew and it would set back our projects by several hours. Now that we have had experience with this, we have backup crew for any shoot with a tight timeline. Better to be safe than sorry! San Francisco Covid numbers are significantly lower than the last few years, and hopefully going in the right direction, but it pays to be careful.

Video production is busier than ever

We have received significantly more inquiries and requests for proposals for video production since before the pandemic. This is a great thing for our business and the whole video production industry. Consumers are watching more content than ever before and the demand for video content is insatiable. Consumer demand is up in the video production sector. With many companies returning to the office full-time or with hybrid setup, clients are finding new ways to use video to bolster their business. From video productions requiring weeks of scouting and pre-production, to hybrid livestreams that have small in-person audiences, every kind of production seems to not only be back, but on the rise!

We’ve seen a few big changes in the San Francisco video production market. Each of them has made us more flexible, creative, and innovative than before. We have also learned where additional time and resources are needed. This ensures every production we take on goes off without a hitch. From small to large, we get it done the right way every time!

If you are looking for a creative and ambitious San Francisco Video Production Company, contact us today!


San Francisco event sizzle video
Allraise San Francisco event sizzle video and photography

As live events are coming back to San Francisco, it’s obvious people are excited to get back together. From concerts, to museums and beyond, people are ready to get out there! Recently, we were hired to film an event sizzle video for Allraise at the Midway in the Dogpatch. We also captured the keynotes and provided photography for their two day event in San Francisco. Our team delivered a 60 sec cutdown, a 30 sec sizzle video, 8 hours of session content and an edited photography gallery within one week of the event. We provide San Francisco event sizzle video and photography for companies looking to stand out!

Allraise sizzle video

Day 1 – How we captured the content

On day one of the event, the first thing we captured was content of the participants signing in to the event and networking. This gave the participants a chance to warm up to the event as well as get some food! We captured signage and a few establishing shots. These intro aerials provide us stunning shots of the skyline to set the scene in San Francisco. After the welcome meet and great, the high energy sessions began! They started with a marching band to bring everyone into the main auditorium. The anticipation was palpable! It was critical for our San Francisco event sizzle video that we get snippets of this! Our photographer also made sure to get into the action and capture as much as possible.

These keynotes were highly engaging and you could feel everyone’s excitement! From industry overviews to the current state of the economy, the presenters were flawless. The day wrapped up with us capturing a few breakout sessions which were a bit more intimate than the larger keynotes. During this time, we took the time to capture more networking for both our photography and videography. At the end of the day, the event organizer and countless staff flipped the main keynote room into a gorgeous dinner where the attendees got to sit back, network, and enjoy some tasty food and wine. Our video production wrapped up for the day at this point, but we had to get a few shots for the video!

Day 2 – Why we captured the content

On day two, we focused on getting more audience reactions during the keynotes for both photography and videography. This day was a similar flow to day one with just as much engaging content and information. We wrapped up shooting the event with some more formal photos of the participants as well as the Allraise team members. The excitement to get out there and seize the day was infectious. We left feeling hopeful and looking to the future for more great San Francisco event sizzle videos!

Why make a sizzle video?

  • They are bite sized and easy to share.
  • They build momentum after the event to generate more interest in future events.
  • Short and snappy sizzle videos have a high completion rate.
  • They illustrate the high quality of the event.

Check out the abridged gallery below to see some of our favorite shots.

Looking for a San Francisco event sizzle video? Perhaps you also need some photography? Contact us today!


How to conduct an interview for video production

There are many different types of Bay Area video production that we offer at Luma Creative. From commercials to explainer videos and everything in between, we shoot nearly everything. Some of our videos require interviews, so we feel we’ve gotten pretty good at capturing the content we need to make the video a success. One of the most common questions we get is regarding our professional tips on how to conduct an interview on video. There are many different styles of interviews such as documentary interviews, corporate, or video journalism.  Below are some universal tips that we wanted to share for your next interview:

  1. Know Your Purpose – Make sure that you are clear with the goals of your end deliverable or video piece. You should know the overall story you are looking to get out of the interview before it begins. Leave some room for discovery but ultimately, you are responsible for getting the soundbites that will make your video come to life.
  2. Choose the Right Interviewee. Pick someone who will represent your purpose, who is articulate, comfortable on camera, and has all the questions in advance so they can prepare. Often times it also helps to hop on a pre-interview call to connect with them and make sure they are setup for success. Most people are not used to be on camera, so making them feel comfortable before arriving can go a long way. With our crowdfunding videos, it’s often the first time someone is on camera so it can be easy for them to get nervous! Looking for some preparation tips for your talent? You can send them this article on preparing for an on-camera interview.
  3. Do Your Research – It’s important to be able to think on your feet. Have an understanding of the subject before you sit down with them. This means being informed on the subject and knowing the right questions to ask. Sure you could use a teleprompter for your subject, but often times this feels staged or too rehearsed.
  4. Have a proper crew – When learning how to conduct an interview for video production, it’s important to remember this is a team activity. It’s ideal to always have an interviewer next to the Videographer, so the videographer can focus on the shot/sound and the interviewer can focus on the content. You always want to make sure the lens is perfectly aligned so when the interviewer answers the questions, it looks like the eyes of the subject are aligned in the shot, vs looking shifty or all over the place. Another tip can be to use an eye direct, which allows your interviewer to be a bit further away and have the interviewee look directly into the lens to see them.
  5. Light Your Subject – We can’t stress this enough. Lighting is everything and will set up the mood. The interview won’t be useable if the light looks too dramatic or the subject hates how they look. We will often show the subject their shot, so they approve it verbally. You’ll need at least two lights, preferably three. A soft source is best for your subject, a second light for the background, and a third for either fill light, hair light, or a side light (variously called an “edge” light or “rim” light)
  6. Test Your Sound – Audio is everything. Not only should you be recording sound in multiple ways, but you should be monitoring it throughout. We often times will use both a lav mic, hidden under the subjects clothing as well as a boom mic. This will give you a few options in case one doesn’t sound ideal.
  7. Prepare, but be spontaneous. Go into the interview with a plan. What sound bytes are you looking to get out of the interview? Once you’ve got the soundbites you need, feel free to ask the subject if they have anything to add or if there is anything they think that they missed.
  8. Get the interviewee comfortable. I can not stress enough how building a rapport is essential to the success of the footage. Do they need any water? How has their day been so far?
  9. Have the subject  repeat your question when they answer. Avoid “yes” or “no” answers. This way when you cut yourself out of the interview, they’ll set up their answer for you!
  10. Keep your mouth shut when the subject talks. Or if the subject starts talking when the interview question is not  complete, you need to have them repeat so the editor has footage they can work with. Yes it is a conversation, but at the same time, keep the edit in mind?

Do you have any thoughts on how to conduct an interview for video production If so, let us know! We are a San Francisco video production company who will take your production to the next level! Contact us today!


How to Hire Security for San Francisco Video Production

Video Production in San Francisco presents many challenges. For starters, it’s a logistical nightmare. Busy streets. Extremely limited parking. Not to mention challenging weather. To make matters worse, security has been a big concern over the last several years. Too many stories of camera’s being stolen on film sets or people being followed home to get their camera gear. In this article we’ll discuss the different kinds of security as well as the few options, whether armed or unarmed? How many guards do you need? In this article we’ll show you how to hire security for San Francisco video production.

When do you Need to Hire Security in San Francisco?

This is the question we get asked most often. When clients from out of town see this line item on a budget, we often get asked about it. Do you really need security to film in San Francisco? The answer to this question is almost always “Yes!” Anytime you are permitting a location in San Francisco or shooting with any sort of a setup, it’s almost imperative that you consider security. Not only do you want your crew to feel safe, but you want to put up your best efforts to keep your camera equipment safe. After all, cameras and lenses we shoot on are anywhere from a few thousand dollars up into the 100’s of thousands of dollars.

Do you Need Armed/Unarmed Security or Off Duty Cop?

At first this question didn’t make make much sense to us. Would an armed security guard really be able to fire a weapon? The short answer is “yes”. After talking to a security company who provided services on one of our recent sets. They are legally allowed to fire anytime someone on set has their personal safety at risk. That means if a potential robber pulls out a weapon, it’s okay. However if they do not present a weapon, the security guard must use their non lethal option. Pepper Spray or similar. This isn’t to say that an unarmed guard doesn’t carry a non lethal weapon as well, but they don’t carry a gun. However they still provide a deterrent and let potential robbers know that this production is taking safety seriously. The last option is an off duty Cop. They can carry a weapon and fire it as well. Likely the provide the biggest deterrent. But of course is subjective.

How Much Does Security Cost?

The rates vary by company, but the last time we hired security we were quoted $75/hr for unarmed guards. $100/hr for armed guards and $150/hr for off duty cops. If you are wondering how to hire security for San Francisco video production you’ve probably already thought of the costs.

How Many Guards do you Need?

Most companies have a four hour minimum and the guards need a single break during that time. This means that likely it’s smart to have to in case of anything happening during one of their breaks. Depending on the size of your set you might consider additional. Are you blocking down a street with multiple entrances to your set? Perhaps you could have a guard at each entrance? Do you need your camera or lighting vehicles watched? Sure a production assistant could do this, but likely don’t provide the same deterrent that a guard does.

Summary

Thanks for reading our article on how to hire security for San Francisco Video Production. We hope you understand how easy it is! There are many companies that offer this service and are happy to make your shoot go smoothly!

Here’s a list of Security companies providing security to film sets in SF.

Aegis, Bannerman, Gaurds to Go,

Looking for a professional San Francisco Video Production Company? We take on set safety very seriously. Contact us today to learn more.


How camera to cloud can speed up your workflow

As video production technology has advanced time and time again, the bar has been raised on how fast and at what quality videos can be delivered! There was film that turned into tapes and then eventually turned into digital and now there is instantaneous offload. We were part of a shoot recently where only minutes after thirty-minute interviews were captured, the editor had proxies show up in their Premiere timeline. This was thanks to the new Frame.io Camera to Cloud or C2C. How did this work? What additional hardware and software is required? In this article, we’ll show you how a camera to cloud can speed up your workflow!

With this new technology, you’ll be able to speed up your workflow like never before. Long gone are the days of waiting to get home to offload to a drive. Then mail it to your editor with expensive overnight shipping or stressful mishaps. Now, literally within moments, your editor will be able to start cutting the footage, so you’ll have a rough cut before the day is even over. Yes, there are products such as Gnarbox which allow you to edit in the field, but this Frame.io C2C is much more powerful! We’ll break up the sections into Frame.io subscription, hardware, software, workflow, and final thoughts.

Frame.io subscription

The first thing to consider when you want to do C2C is that you’ve got to have a subscription to Frame.io’s paid plans. Their plan pricing is broken down on their website. Essentially you’ve got to decide how much storage space you want. Even with their Pro $15/month plan, you’d be off to the races with C2C. And quite frankly, with how expensive overnight shipping can be, this price is an absolute bargain. You will not have to stress about a hard drive getting lost and missing a deadline. No after-hours fees for your editors, just a solid platform that will make a difference in your workflow.

This isn’t even getting into the plethora of other features that frame.io has, such as notes dropping right into a Premiere timeline! Maybe you were like us, and were using Vimeo review pages for client feedback. While this works well, you’ve still got to toggle back and forth between the web browser and your editing software. When considering how a camera to cloud can speed up your workflow, this is definitely the first start. Not only will you have your footage immediately drop into your timeline, but you’ll several other features that will add value as well! Check out the Frame.io website for more information

Hardware

Now that you have a subscription to Frame.Io’s pro plan, let’s explore what hardware you need to make C2C work. The most important piece of hardware would be a video encoder like the Teradek Cube 655. This device encodes h.264 files and uploads them to the internet. It also has onboard SD card recording for onsite proxies. You no longer need to bog down your camera creating proxies as well as recording the high-resolution media. On a recent shoot, we used a Canon C300ii, to create local recordings as well as proxies. One of the proxy SD cards had an issue so we were happy to have the Cube’s backup copies!

The next thing to consider with your workflow is how mobile you’ll need to be and in what locations. If you are in an office environment, you’ll likely have access to power and solid internet access. But what if you were out in the field and running everything off of batteries and with somewhat unreliable service? The great thing about this workflow is that it is flexible! If you are wanting to keep your camera build small, and not have the cube directly on the camera, you can either hardwire to the device or use a Teradek Bolt XT or 4k compatible wireless set.

Internet Access

Additionally, because the files are saved locally to your cube on the SD card, if you hotpot your phone and then lose service, the files will automatically resume uploading after you regain service. It’s important to note that these files will only upload up to 24 hours after the shoot.

Another benefit of using the Cube is that it is encoding for the Vuer app. This means that clients can remotely watch on set with minimal latency. You won’t need to have expensive monitors for all clients and even with distance protocols in plce. This app will also pass along audio for remote clients in other parts of the building on the same network!

The next piece of hardware that the Frame.io C2C workflow is compatible with is the Sound Devices 888 and the Scorpion. If you are recording audio separately from your camera, you’d be able to transfer either original audio files or proxy files to the cloud and into Premiere pro as well! This means that your sound tech can have a remote team as well! The possibilities are truly limitless.

Software

In order to make the C2C workflow happen, you’ll need to have the subscription, hardware as well as compatible video editing software. Adobe Premiere Pro is our editing software of choice, but this C2C is also compatible with other software as well such as Final Cut Pro X or Davinci Resolve. At the end of the day, switching to one of these platforms even to just ingest your clips would probably be worth it to save time! You can always take those proxy files and auto import them into other NLE’s as well. The editor can follow along as the shoot progresses or they can import the clips at the end of the day!

All in all, we firmly believe that C2C is going to change the game forever! You’ll be able to deliver higher quality video’s in shorter periods of time! For more information check out the Frame.io C2C FAQ’s. Remember, this software is still in the early stages and we expect to see updates to the compatibility and workflow suggestions as well!

Thanks for reading our article about how the camera to cloud workflow can speed up your workflow! If you are looking for extremely fast and high-quality San Francisco video production, contact us today!


Are you looking for professional San Francisco video production? We are a San Francisco Bay Area corporate and commercial video production company that’s simplified the production process, resulting in extremely fast turnaround times. So whether you need a video to enhance your virtual event, a production team to live stream, a creative post-production team to level up your video or a comprehensive strategy that encompasses everything, we’re available worldwide -- even at the last minute. There are many talented San Francisco video production specialists. How to find a video production company specializes in professional SF videography with tight deadlines. How long does video production take offers the best video production in San Jose, San Francisco and surrounding areas. Marketing techniques is another talented video production company! Lastly check out video production Marketing tips. Their commercial video skills are unmatched! The best San Francisco Corporate video production! Creative SF video production companies can be challenging to find.