The Blog


Two week video production
How we produced a commercial in two weeks

Video production can vary widely in quality, cost, and speed. When considering video production companies, it’s important to set expectations well upfront such that all parties are aware of the deliverables and when they should expect them. Check out the iron triangle to learn more about balancing the three! When Eyeque came to us looking for two-week commercial video production, we had to look in the mirror and see if it would be possible. Would we really be able to concept, pre-produce, shoot as well as edit, and revise within their two-week deadline. After coming up with an initial concept, we decided it would be possible and we’d love the challenge. In this article, we’ll break down how we made this commercial video production happen in such a short timeframe.

Timeline

To make this shoot happen we knew we’d need a rigid timeline. We broke down the 14 days as follows:

1: Finalize idea and write a treatment
2: Adjust and finalize treatment and start scripting
3: Lock shoot date, Casting for actors, start locking crew, start looking for locations
4: Lock crew and continue looking for locations. Finalize script
5: Visit potential locations, and lock crew
6: Audition actors and finalize crew
7: Lock actors and location scout final location
8: Shoot video
9: Begin editing
10: V1 delivered by 10am-client feedback by 6 pm
11: 10 am deliver v2 and wait for feedback and revisions
12: Lock final and export for color. Start sound design
13: Color v1 back and tweak, continue sound design
14: Lock and deliver the final video.

Story

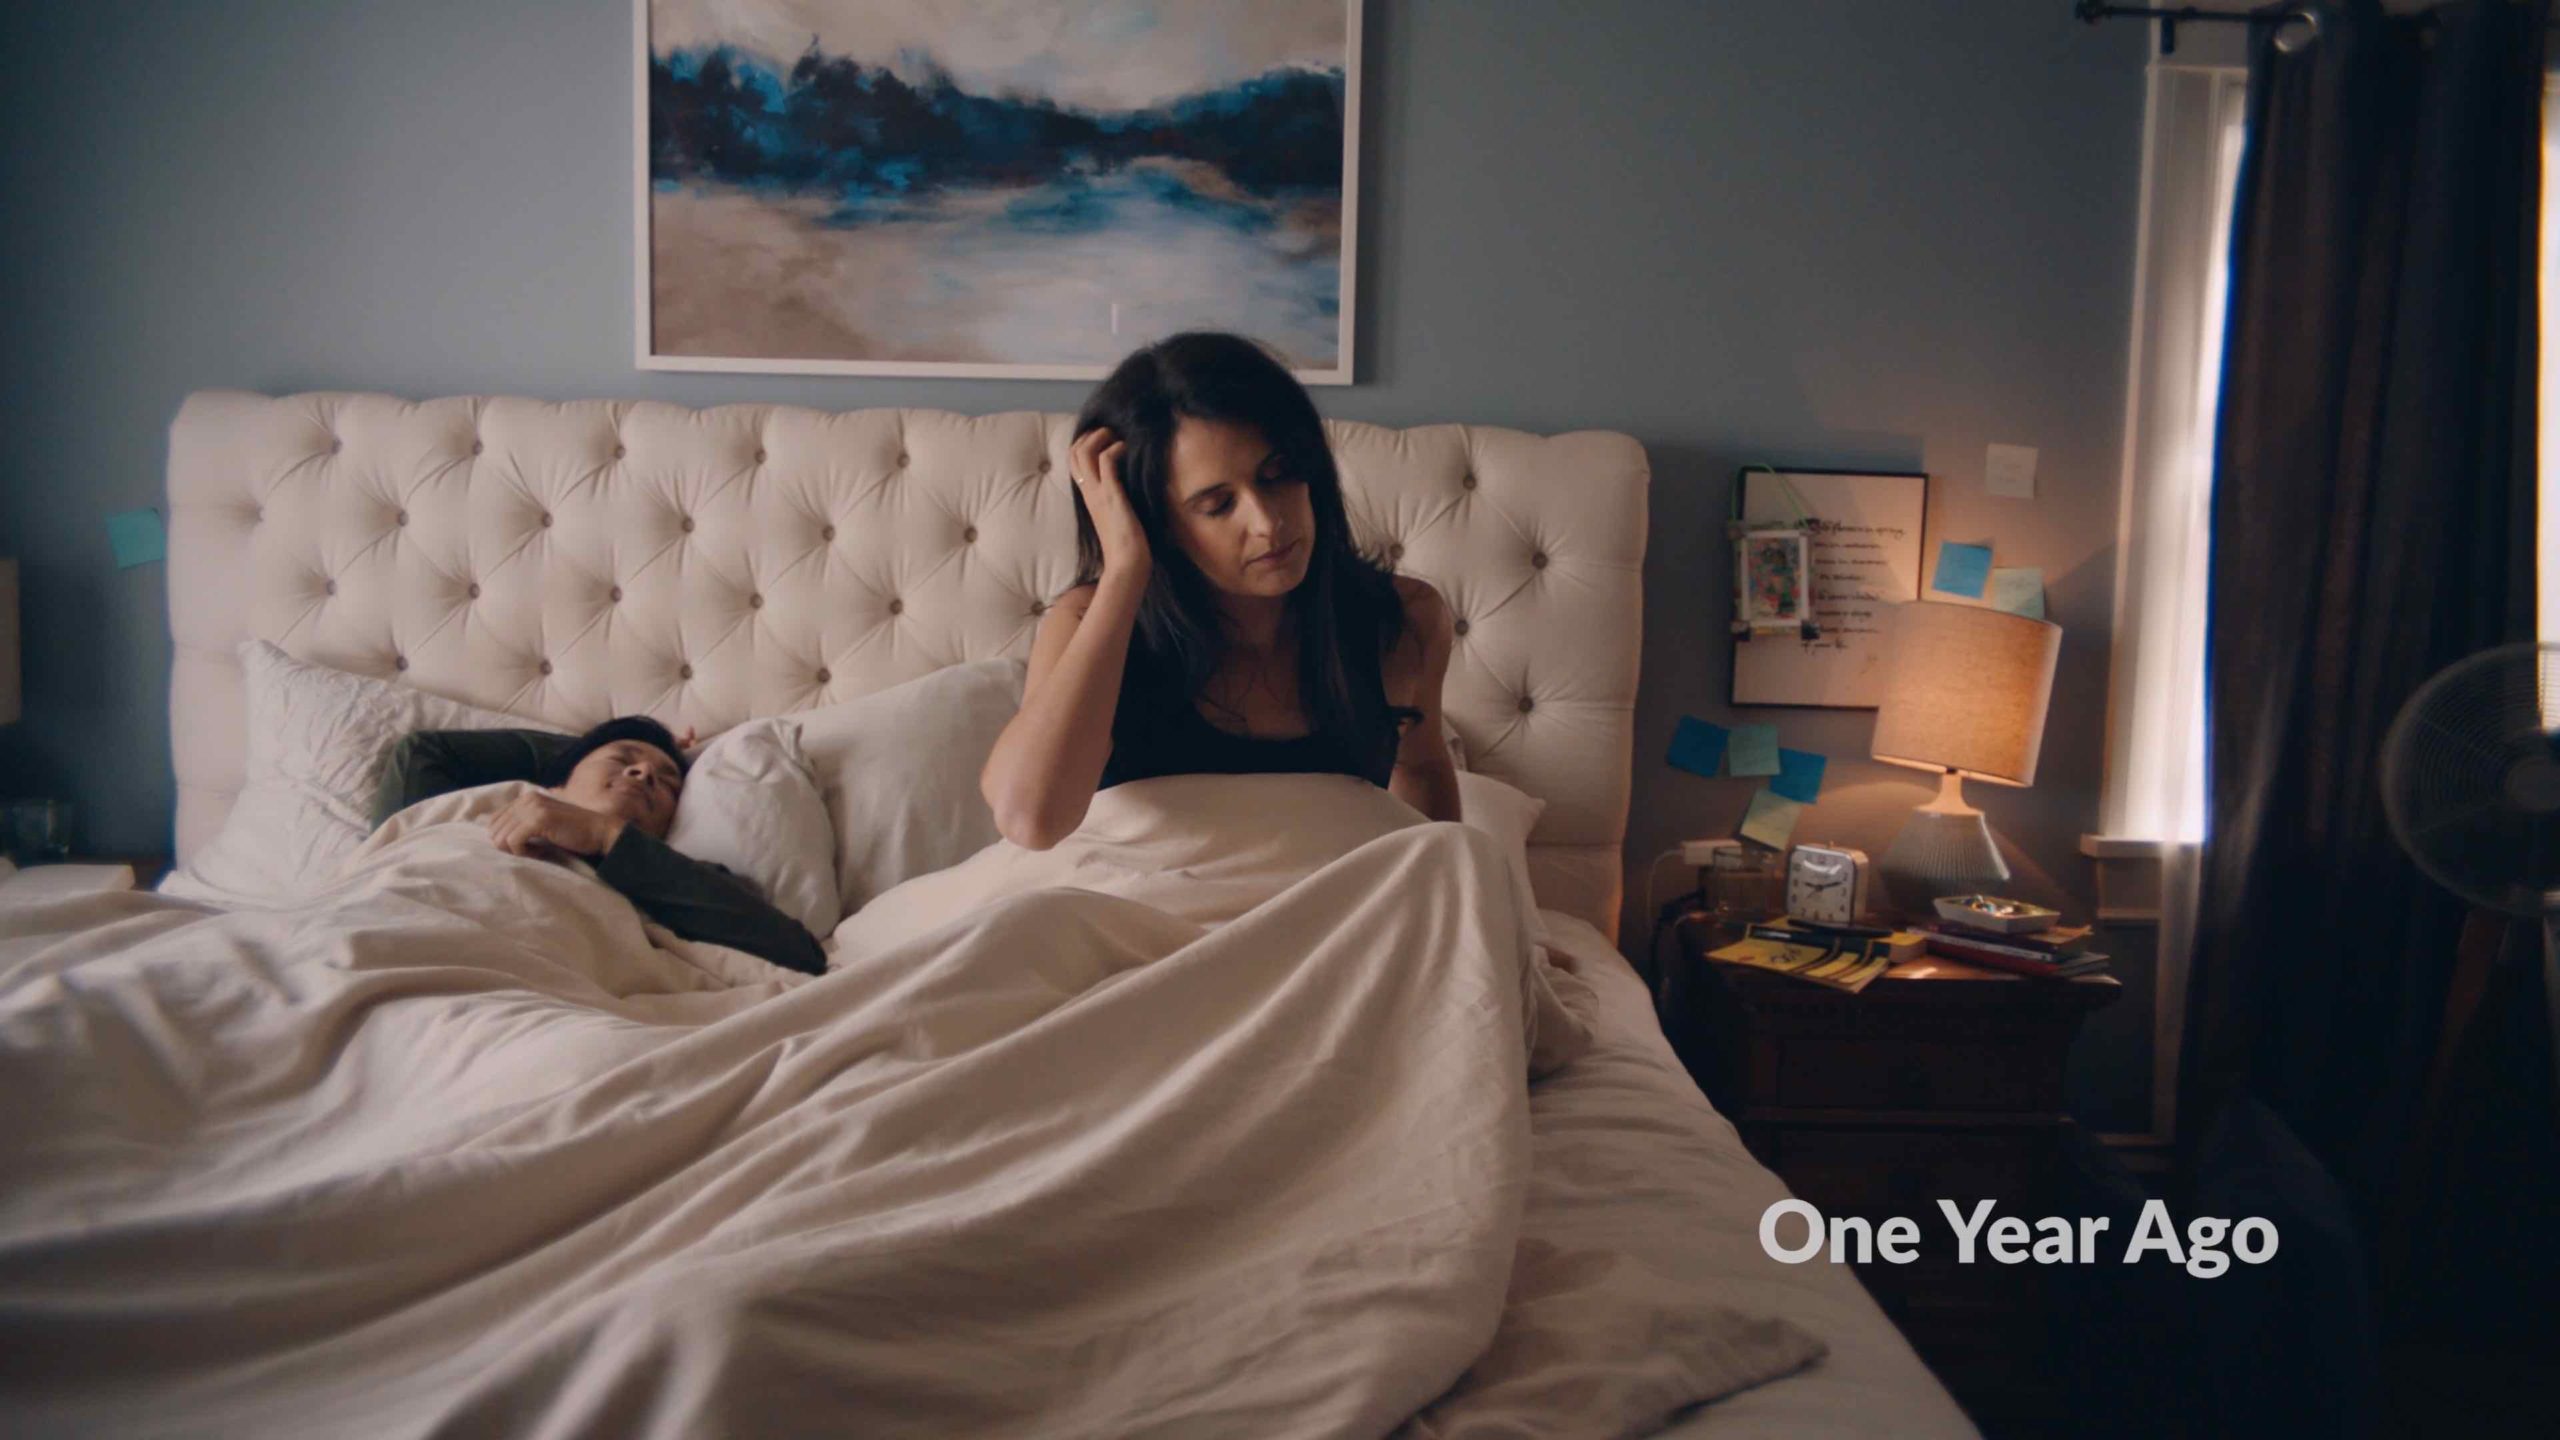
As we worked on the story, we knew we had a few constraining factors. #1 was budget. This would allow us one packed day with a full crew We could have shot over two days. However, to get the look that we were going for, we decided we’d pack one 11 hour day. We decided we’d need to work with one location and settled on the idea of contrasting two worlds of the same person. A person without Eyeque who was rushing to get to an appointment and someone who had Eyeque and could simply sit at home for their vision check. Our character would be able to maximize her day and be able to enjoy the simple things in life. Two-week commercial video production would be tough given we only had one day!

Casting

For this project we knew we didn’t have much time to run an in-person audition, so we used Zoom to interview any potential talent. Our team thought about using past talent out of quick decisions sake but decided we were looking for someone who would be new to our portfolio and fit the story. We used SFcasting for this project, although we also considered backstage. We were looking to cast four actors. The main character to be our mid-aged mom. a husband to play a supporting role, as well as two kids.

Crew

Having a solid crew on any video production can make a huge difference in the final outcome. We always want to be sure to hire the most talented possible crew to maximize our tight shoot schedule. On this specific job, given the single-day limitation, we knew we’d need a prep day for camera building as well as a 1st AD. We also had a DP, production designer, set dresser, gaffer, key grip, photographer Assistant camera, production assistant, and a hair and makeup artist. This barebones but essential crew, would ensure we could still get a commercial polish but without a massive budget.

Shotlist

As soon as we lock our treatment, we usually start writing a script. This will help us time the piece to ensure it fits within the final deliverable range. Typically we’ll present it to the client to make sure that it resonates with their team and then lock the creative. Although we’d love to do the final shot list as early as possible, it’s often that we can’t lock this until we’ve seen the final locations as they tend to influence our shots. However, after our initial creative is locked we’ll typically break down the video by scene and start to rough-shot list the key shots in order to figure out what is essential and what is fluff.
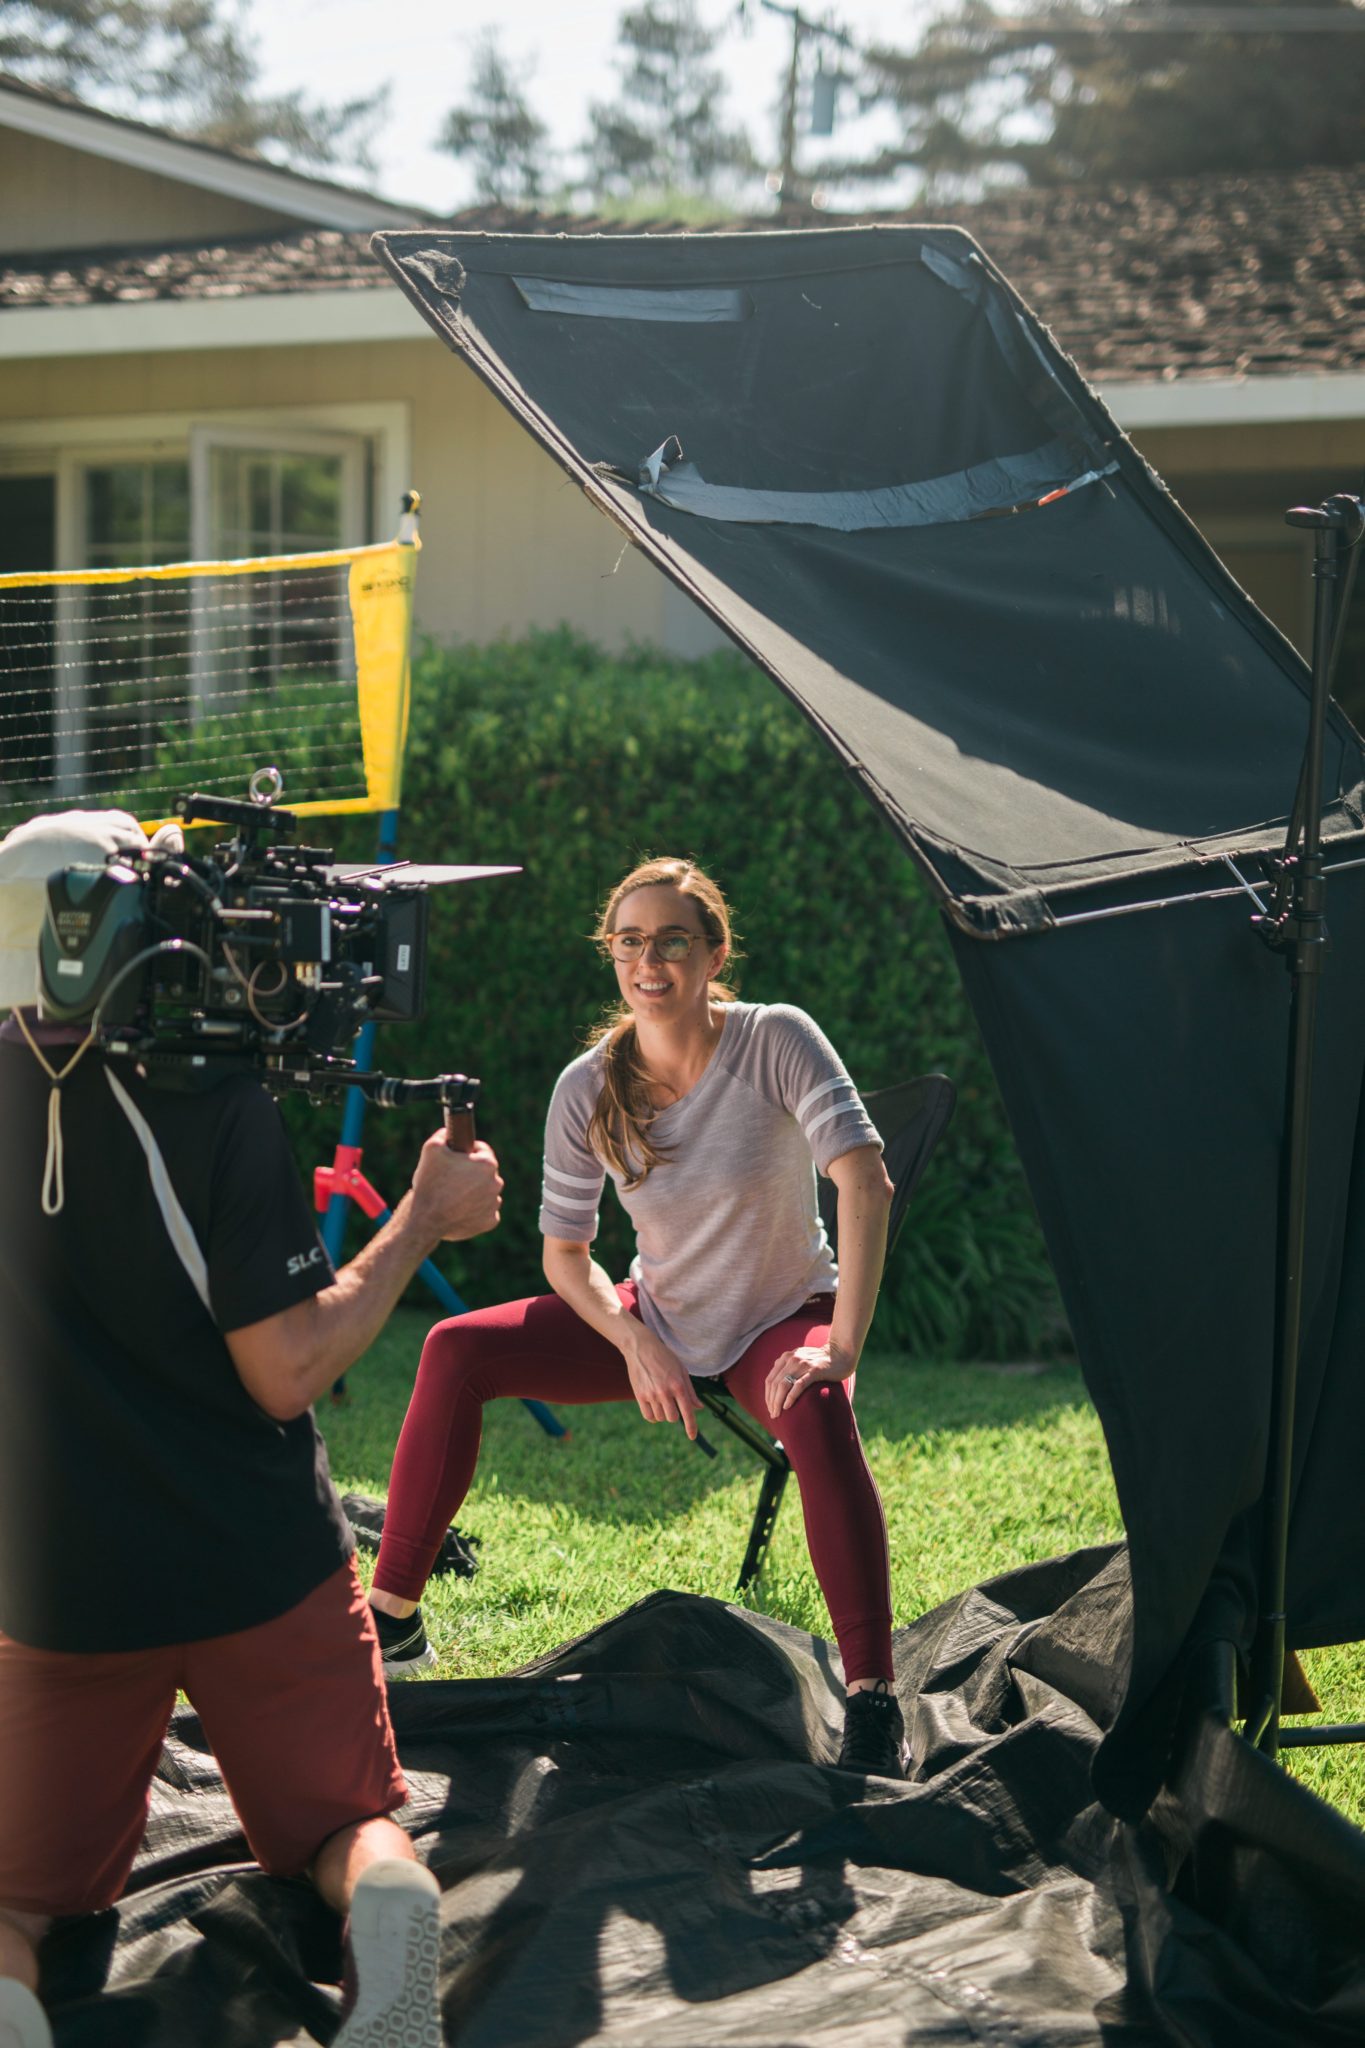
Shooting

On this particular shoot, we knew we had 11 hours to get our visuals captured. Therefore we arrived early to make sure everything was on standby outside the location and then once the clock started we were off to the races! That day prior we worked with our 1st AD to finalize the shooting schedule. We had two distinct worlds we were going to create as well as two distinct looks for all our cast. This meant, we could stagger our grip and electric department with our production design team between what was being set up and shot amongst the bedroom, living room and kitchen to try and maximize our time.

By lunchtime, we were on schedule but knew we still had a lot of content to capture. We had about 50 shots to capture throughout the day, and although we would have loved to get more insert shots, there just wasn’t time. Video production is a lot of giving and taking. Should we spend more time, getting the blocking perfect on one-shot or should we move on in the hopes of getting more shots and finishing on time! Our kids did awesomely and it was a smooth finish into the end of the day!

Editing

There is a critical difference between corporate and commercial work. In commercial, where we have the whole piece storyboarded out, it’s just a matter of using the best takes. In this case, since we had a thorough shot list and script, we just took the best takes and sequenced them in order. The final editing required minimal tweaking and was part of the reason why we were able to complete the project on such a short timeline!

Color

During our treatment phase, we collect frames from other films we are trying to emulate. No we aren’t going to copy the look exactly, but we do like to use these references to guide both our set design, lighting as well as our color. Are we going to bright and airy or dark and subdued? In this video, to create contrast between our two worlds, we knew color needed to play a huge difference amongst all the shots. Our colorist got to work right away creating looks after the shoot and was ready to copy the looks over as soon as the picture was locked.

Wrapup

Hopefully, this article broke down how we were able to make two-week commercial video production happen. Are you looking to make a video with a tight turnaround? Perhaps you have more time, but just want to put our skills to the test! Check out our other work and contact us today!

Here’s the final video


footlocker event video production
Footlocker Event Video Production

Before the pandemic, we typically captured a handful of events each year. Now that society is returning to normalcy, it’s looking like things are starting to pick back up! Event video production is back in action! Footlocker and Eastbay reached out to us to have us shoot an event with NFL star Davante Adams, where they were partnering up to give back to the Palo Alto high school football team with some Jerseys and Cleats. We shot photos and created a 1-minute sizzle video for their social media and PR teams.

Event Video Production is something entirely different than your standard commercial video production. With events, you’ve gotta be extremely quick, but also capture what you need to deliver a polished look. It’s necessary to be one step ahead to ensure you get enough shots since you can’t realistically recreate an event. In this case, working with a celebrity pro-NFL star we knew we’d only have a minute or two for a quick interview as well as that we couldn’t ask him to redo anything. When we arrived we set up our video and photo gear and put together a mobile interview kit: Lights, diffusion, tripods, etc.

Setup

We worked with the EastBay team to place their main product reveal table to optimize the sun’s natural lighting. Our team would not be able to use any lighting modifiers. Capturing these setup shots was important for the video production and photography in order to show the viewers who sponsored the event. We mixed up coverage angles between our two videographers in order to add variety to the edit quickly. We also used our Mavic 2 drone to capture a few establishing shots. These aerial angles quickly and easily add depth and variety to any video production.

Event

When Davante Adams arrived, the team was ecstatic. The excitement was almost palpable as they saw him step onto the field. They circled up around him on the center of the field as he discussed the role that sports played in his life and how this was just the beginning for many of them! When he opened the first box to show the team what they were getting, they were pumped! He finished up telling them to keep pushing it in school as well because, at the end of the day, that was equally important to help him get a scholarship placement.

Reactions

After the team picked up their shoeboxes, many of them asked for autographs or words of wisdom. Capturing these moments was gold as they helped wrap up the event. After we grabbed our quick interview with Davante, we asked a few members of the team to work with us to capture some product shots. This was about as commercial as this shoot got. We figured a few beauty shots would help bring a little polish to the event. The team started practice almost immediately after the event, so we also had the chance to film a few shots of them practicing. We then asked the coach for a quick interview and then packed up.

Looking for event video production? Contact us today!


Top Live Streaming Video Production Tips 2021

When the pandemic hit in 2020, it was obvious that things were going to change! Would video production ever be the same again? Would every production be directed remotely over zoom? We found that our client’s demand for live streaming skyrocketed as everyone was remote and couldn’t interact in person as usual. In this guide, we’ve compiled our top live streaming video production tips for 2021.

For most of us during the pandemic, video calls became the norm. Whether it was a call with a potential client or a call with our family. Our societal norms of getting together in person were put on hold. That said, given our current technological state, we were in a great place to pivot. Technology had never been cheaper and more widely accessible! These are definitely our top Live Streaming Video Production Tips for 2021. If you are looking for a professional San Francisco live streaming video production company, we’d be happy to chat more!

Although our business is video production, we’ve found that many times, a simple live stream can be done by the average person. Sure, for bigger jobs or productions that can’t afford to go wrong, we are here to help, but we wanted to pass along some tips to make sure that the self-produced live streams many of our companies are putting on were successful. We’ll break it down into a couple of key segments for a basic one-camera live stream of your CEO talking to your company: Camera, Audio, Lighting, Network, Location, software.

Camera

While most computers have webcams and they are reasonably good, there is something that most of these cameras don’t offer. Shallow depth of field. Such as portrait mode on your phone and how it helps blur the background, well with a camera that has a lens that has a shallow depth of field(DOF), you can create an image that is more aesthetically pleasing. It used to be that most cameras didn’t offer shallow DOF and autofocus in one, but those days are long gone. Look for a camera and lens combo that offers an aperture of f2.8 or less. Typically a cheap fixed focal length prime lens would be your best bargain! Also look for a camera that has a USB port so you can plug it into your computer as a webcam. A simple Google can help figure out if it can be used as a webcam. Having a great camera is going to take your 2021 live streaming to the next level!

Audio

While it’s great to be able to see your subject with a nice shallow DOF, the sound is the other half of the picture! It’s common that people overlook sound, but for video live streaming it couldn’t be more important! For this, there are a couple of options for a basic stream. One: an on-camera microphone such as a Rode Video Mic or Two: a wireless Lav setup such as a Sennheiser G4 kit. Most likely the wireless option is going to sound more desirable because of the placement of the mic being closer to the subject. With either of these options, you would plug the microphone into the camera to avoid any audio sync issues.

Lighting

There are a couple of factors that can make a big difference in your desired lighting. The first being how much ambient light is in your space already. If it’s right next to a window, we might recommend going to a different location, whereas if it’s in a dark cave, it might be best to find a different location as well. For live streaming, it’s important to realize that these events are often more than just a few minutes and therefore the ambient light can change quickly depending on the time of day. Ideally, find a space that had some natural ambient light but also wasn’t in direct sunlight! Think soft and warm. Typically this is going to look the most flattering on the skin! We might also recommend purchasing or renting a bi-color light source that can help match the ambient light color temperature(think blue or orange). This will help spotlight your subject in a pleasing manner and keep your viewers focused.

Network

It might seem fairly obvious that having a fairly solid network internet connection is key, it’s often one of the most overlooked pieces. Does your network not have at least 10Mbps of network upload speed? Will there be other people on the network? If the answer is yes, you might think about adding some software to help boost your internet speed. Our preferred one is called Speedify. It works for both Mac and PC. It essentially bonds multiple connections together for the fastest speed. Think hardwired connection from your router as well as a mobile hotspot from your phone. You no longer are restricted to just one. This will help increase quality as well as reduce stream emergencies where your network goes down during your live stream!

In this section, it is also important to talk about your internet speed. Sure, you might have great download speeds, but for streaming upload speed is equally if not more important. Depending on your streaming platform, your stream can either be shut down or be low quality. We recommend having at least 10Mbps(megabits per second) on the upload. This will ensure that your entire stream will be played at the maximum resolution and without any glitches! We can stress this enough for our top live streaming video production tips for 2021

Location

When picking a location, we recommend picking something that is comfortable, has a bit of ambient light as well as a quiet ventilation system! These will help create a great lighting environment, good sound and keep you and your support staff comfortable! You will also need to consider what is the topic of your live stream. Is this a casual live stream about your companies update or your sales kickoff event? We would think a more casual setting for the first example and a more corporate setting for the latter.

Live-Streaming-video-produciton-tips-2021

Software

For live streaming, there are many pieces of software that will help you live stream. There are a few factors to consider such as if you’ll be using graphics, need remote participation or want to record the stream. For most of us doing video calls, we’ve been using Zoom, Gotomeeting, Google Hangouts, or other video conferencing tools, but for streaming, it’s possible to take this up a notch. Perhaps you want to capture emails upon arrival? Or you want to charge a fee? This is all possible with a little research! We’d recommend checking out this article for more in-depth live streaming platform information.

Thanks for taking a moment to read about our top live streaming video tips for 2021! We know it can be quite intimidating when trying to learn about life streaming! By taking a step by step approach, you can be sure that your stream is a smashing success!

Let us know if you have any questions or contact us today!


How to select the perfect camera for your video production

There are many cameras on the market today and all offer different advantages over each other. Some cameras are small, offering easy rigging. Other’s are large offering professional codecs and functionality. Whatever your budget is, there is surely a camera that can maximize your video production value! From the Sony A7siii or an iPhone to the Arri Alexa LT and everything in between, we’ll help you select the perfect camera for your video production.

We’ll do this by walking you through the major considerations to evaluate when picking a camera. Those core considerations are budget, the number of cameras needed, data workflow, desired placement, and post workflow. Each camera has trade-offs but we can maximize the value based on your specific needs!

Budget

Obviously, the biggest consideration of any video production shoot is the budget. Cameras, although critical to the project, are just one piece of the puzzle to make a shoot happen. In the camera department, there are other potential costs including media, batteries, lenses, signal transmission, and distribution as well as support. We found that when we first starting shooting many years ago, we’d try to maximize our budget on the camera, thinking it would get us the best look. But after many years of shooting, we realized that lenses were really what put the icing on the cake. Sure a camera is important, but glass plays an equally big piece in the equation in how the image turns out. On many shoots, we’ve spent anywhere from a few hundred renting cameras into around $1500 for the Alexa mini LT.

When you also put into the equation, that you need lighting as well, which can potentially cost thousands in rentals, it’s obvious that it’s usually best to evaluate everything first before deciding on what camera to shoot your production on. At the beginning of every project, we recommend writing out a small budget with the basic categories. Camera/lenses, lights, crew, insurance, props, misc. Even making a ballpark estimate can give you flexibility to decide what camera make sense on a budget level.

Number of cameras

The next consideration after you’ve made your initial budget would be to evaluate how many cameras you need. Is this a packed day with both a handheld rig and gimbal setup? Are you looking to get multiple distinct interviews in an interview, without punching in? Do you need multiple units filming at once. If the answer to any of these is yes, then it’s obvious that you should consider multiple cameras and budget for them accordingly. We find this is usually the biggest factor when scheduling and budgeting a day. It can take upwards of an hour to switch a full rig from handheld to Movi or vice versa. This valuable time could be used to shoot more shots.

When considering how to select a camera for your video production this speed versus budget is always a big consideration. Maybe you’ve got a very relaxed schedule and you have the necessary time to switch over your camera. Or perhaps you have a big budget and this extra camera doesn’t really eat into the budget. We’ve worked on projects where instead of renting one $1500/day Alexa LT, we instead elected to rent 2 Red Gemini‘s. Sometimes speed is really necessary and to have to complete builds available all day, can make a huge difference in finishing the day on time(and on budget)!

Data

After you evaluate how many cameras would work best for your shoot, you should consider how much data each camera will need. Maybe that’s just another SD card, or perhaps it’s another red mag? But it could also be a ton of data for high-speed shooting on a camera such as a Phantom Flex. These cards will also need offload time, and perhaps even a Digital imaging technician(DIT). These people will manage all the media throughout the day and make sure it’s backed up simultaneously as the shoot continues on.

We can’t stress this enough. Be sure to have enough media to shoot! Once we were helping with another shoot and half way through the day, they realized they weren’t going to have enough space for the shoot to finish. The scrambled, found a local rental house and make a pickup. Imagine if they had been out in the field!

Placement

Perhaps you are trying to rig your cameras overhead, or you are trying to rig them to a car. The bigger the camera, the more time and budget you’d need to consider for rigging. We’ve done shoots where we needed quick underwater shots. This could have been extremely costly if we wanted to rig the Red in underwater housing as that is not cheap. So instead we just used a Sony a7iii with a small lens and a cheap underwater housing.

Although we’ve not done any direct rigging to cars, we have rigged a Ronin 2 with a Red Gemini before. Luckily we owned the Ronin 2 at the time!

Post workflow

One of the final considerations when trying to select the perfect camera for your video production is your post-production workflow. Will you have plenty of time to offload the media, create proxies, edit a rough cut and get revision rounds. Or maybe you need to deliver the final video 4 hours after the shoot ends? In this case, you’d want to use a camera that’s built for speed. Use a camera that offers a video codec that will make your life easy. No need to stress shooting raw.

Color Correction

Our last section involves thinking about color correction. For many of our shoots, we’ve got a tight turnaround without a time to send the final picture lock to a colorist. In these cases, we still apply basic color adjustments and tweaks but they don’t have time to get the full professional colorist tuning. You’ll need to decide how much energy you’ll want to spend coloring or if you can afford to hire a colorist. This is one thing you shouldn’t skimp on if you have left over budget as it will really make a big difference in the final piece.

Thanks for taking some time to learn about our recommendations about how to select the perfect camera for your video production! If you’d like to explore more check out these links! Video School, Shutterstock, Film Daft.

If you are looking for a solid San Francisco video production company. Contact us today!


How to budget for video production
How to budget video production?

As work gets back to pre-pandemic levels, digital content is more important than ever before. Events need sizzle videos, brand-name products need commercials, and non-profits need informational content. Video production is critically important to a brand’s success. In this article, we’ll breakdown a few ways to budget for video production to ensure maximum budget utilization and efficiency for the best outcome.

We often get asked, how much will our video cost?. It would be great if we could just throw out a number, but it’s rarely as simple as a few-second decision. Due to the number of variables that go into production, costs can vary. In the article linked above, we discuss the many factors that can impact your video production budget. For this article, let’s discuss a few methods we’ve used to help maximize the on-screen value for the most impact. We’ll outline a few tips according to each stage of the production process: Pre-Production, Production, and Post Production.

Pre-Production

While it might seem obvious that a big chunk of the video production budget comes from production, it’s actually in the pre-production phase that can help save costs down the road. Having a solid game plan can help set up the team for success and prevent unnecessary and costly delays.


First: Finalize your creative concept before moving on to pre-production. This will prevent wasted resources trying to make the production happen before the creative aspect is even finalized. Once you start locking down crew, locations, actors, and insurance, a change of the underlying story can significantly complicate the project quickly.

Second: Lock your budget before you finalize creative. For example, a creative brief that relies on a high-speed chase sequence through a downtown area will cost more than an actor walking in a public park. Just on the insurance cost alone, the video production budget can be dramatically different. Depending on the level of production, you may get a brief from an agency and be working with repped directors providing production support or you’ll just be a hybrid agency/production company working on both the creative and production side of things. The sooner this budget gets locked, the quicker you can get the pre-production underway.

Third: Decide which crew members are absolutely necessary and which are nice to have. It would be awesome to have a 2nd AC or an extra grip on every production. But many jobs’ budgets don’t justify the cost. You may be able to adjust your budget allocations to different production aspects later in the process. Every job is different and you should talk with your department heads to discuss the best choice crew and the minimum to get it done well. A happy crew will work much better than a grumpy crew!

Production

Now that your pre-production is complete and you are ready to shoot your video production, let’s break down a few ways to help allocate a budget wisely.

First: Avoid overtime by eliminating numerous takes. Does the director need coverage from three angles? Do you really need all those insert shots? When overtime is on the line, you’ve got to decide which elements are absolutely necessary to tell the story. Before the shoot day, we highlight the “critical shots” and what are “nice to haves” if we have extra time. You want to make the best video possible, but is it worth going into overtime for a few additional options?

Second: Stagger your shoot day to give different departments a lunch break when they are not actively needed. This primarily applies to Grip and Electric (G&E). If you are rolling the same set for a few hours but have a change after lunch, have your G&E team take lunch an hour before general crew lunch. This would allow them to start setting up for the next shot while the other crew is eating. Be 100% sure you won’t need anything from them during lunch or things could get complicated quickly!

Third: Ensure solid communication. We aren’t just hiring workers, we are hiring humans. As video production sets get bigger and chains of command get longer, it’s often easy to lose sight that a person is doing a task. From actors to the crew, everyone plays a role! If someone misses something, it can get costly quickly. If one task is delayed, other aspects are delayed and you risk going overtime. Yes, it’s work, but film production should be fun when it’s appropriate!

Post Production

You’ve almost finished your video production, but now you’ve got to do post! Let’s see what we can do to save some cash.

First: Ensure you have a strong treatment and final outline for the video before starting editing. This can help minimize the number of revision rounds and editing day rates.

Second: Create a stages of post-production document for your client and have them sign off each stage of the way. It might seem great to go back and change the order of shots after the picture is locked, but it’ll create additional costs with your editor and colorist to sync things up again.

Third: Consider alternative sources of music licensing, depending on your project and delivery platform. Music licensing fees can add significant costs to your budget. Instead of paying a pricey corporate license for a song, you might consider hiring a musician who is familiar with music scoring to help create a custom piece. This can also be costly, but less so than a generic song with extreme licensing costs. The cost and creative outcome of a custom piece can elevate your creative vision.

Thanks for taking a moment to read our tips on how to budget for video production! Looking for a professional San Francisco video production company? Contact Us Today!


Top Digital Marketing Trends 2021

Digital Marketing Trends 2021

As the global pandemic has continued into 2021, it’s obvious that business won’t be back to usual any time soon. And because of that, there are several changes in the digital marketing world that will continue to evolve. Or in some cases, even stay the same. Below are the top digital marketing trends for 2021.

According to Forbes, they have several trends that they expect to continue into 2021.

A continuation of Digital Events

As we saw quickly life could be turned upside down it was also obvious that the basic infrastructure was in place pre-pandemic to be able to go live with ease. Thees virtual events have saved businesses a lot of money with event production which has been able to be swiftly converted into creating polished live productions. Not only do these virtual events mean they can likely have more attendees, but for global events, you don’t have to deal with visa issues, travel delays or other potential problems with having global attendees! 

Social Media will become a top channel for consumer purchases

Let’s face it, when we all saw that Instagram moved their explore page to bring in a shopping page, we knew things were changing. Not only that, but due to the pandemic, people weren’t able to see products as easily in person. As a result of that, social media has become paramount in helping consumers make purchasing decisions. This channel has become a priority for 2021 not only for discovery as it was previously, but now its the final part of the consumers journey towards getting that new product they’ve been eyeing all day! Brands will need to continue to adapt to be sure they are putting sufficient resources into short social videos or photography

Virtual events are here to stay

As much as networking and free food are a beneficial part of in person events, it’s obvious that for many sectors, virtual events are here to stay. It may be a awhile before things get back to normal!

Interaction with virtual events

Although we often are asked to prerecord videos for live events, it’s been shown that having live engagement with your audience can significantly boost your audiences satisfaction. Just being heard and respected can go a long ways when trying to woo the consumer! “This is what attendees are looking for, something that can substitute, even in part, for a live event.”


Those are your Top Digital Marketing Trends for 2021

Take a look at a few of our films while your here! Looking for San Francisco Video Production? Contact us today!

More digital Marketing Trends


Pajaro Valley Shelter Services Non profit video production
How to make profitable videos for nonprofit organizations

When people think of nonprofit video production, they usually think of low budgets. They wouldn’t be wrong in that thinking, as most don’t have big budgets. But that said, there is still money to be made. Over the past 10 years, we’ve had the privilege to work with several nonprofits including the Boys and Girls Club and Pajaro Valley Shelter Services. Not only were these shoots profitable, but they gave us a chance to give back to the community and make a big difference for these organizations. In this article, we’ll show you how to make profitable videos for nonprofit organizations.

Before we dive in, let’s define what a non-profit is! These organizations are operating “not primarily to make a profit”. Meaning their primary purpose is something for the better good of society. Think charities, shelters, churches or other organizations making a social difference in the community. The most common type of non-profit is a 501(c)3. Think YMCA, American Cancer Society, Society of Leukemia and Lymphoma, Red Cross etc. All of these are potential clients when it comes to nonprofit video production. We’ll walk you through how to budget, potential tax incentives, goodwill as well as potential referrals.

Budgetting

Camera

Our best suggestion when trying to determining how to make profitable videos for nonprofit organizations is to be smart about your budgeting for a project. This means that even if their budget is low, you may have to approach these projects differently than others. Maybe you shouldn’t rent that super expensive camera, or hire a 2nd AC. Could you DP also listen to audio? While there are obvious trade-offs to crew wearing multiple, hats, on these projects it’s obvious that you can’t have all the luxuries usually afforded with larger productions. Set your budget early on and stick to it. Remember story is king! If you can tell an emotional story with a Sony A7siii or a dry story with a Alexa Mini, it’s probably a tough choice.

Crew

Perhaps the client has told you that they have 7k max for the project. How much profit margin are you trying to keep for your video production, including pre-production, production, or post-production. Perhaps you are looking for 30% margin plus a day rate for yourself with a slight discount since it is nonprofit work. Maybe that leaves you with $4000 to put back into the production. How can you maximize this number? First, let’s assume we are shooting a testimonial and not a commercial. This means, likely it’s a genuine story from real people, and not hiring actors. This will significantly cut down on acting costs. Likely locations will also be free since you’ll be highlighting the organization’s real location!

Therefore this 4k can go to cover crew, rental, and post-production costs. Maybe you can wear two hats and just get away with a DP and a PA/grip. This combo can likely cost you less or equal to $2000 so you’ve got another $1000 for a BASIC camera package and a light or two and $1000 for post-production. While definitely a slim budget, there is still quality to be had. Perhaps the DP already has a camera you can rent for a reasonable, or they have some lights they can throw in? While we like to pay crew full rates, sometimes they can be a little flexible with their rate or rentals if they know it’s for a nonprofit. Just be sure to give them their full rate on future projects, as it can go a long way in the industry!

Post Production

So now you’ve got $1000 for post-production. Likely this will go to an editor or a colorist to put the final polish on the production. Depending on the number of revisions this could take anywhere from a few days to over a week! Definitely not the budget we’d like to post-production, but maybe you can upsell some additional cut downs, down the line.

Tax Incentives

This section can get a little tricky, depends on your tax situation. Given their budget is likely less than you would typically quote for the project, you might be able to get a form donating part of your services as a charitable donation. This portion of the project is tricky because it involves extra steps at tax time. We’ve also heard stories of companies getting challenged about the amounts they put for these donation values. Be diligent to put real numbers here based on actual costs but be realistic about all the unpaid time you put into the preproduction. This is one of our biggest tips on how to profitable videos for nonprofit organizations!

Goodwill

The next section talks about goodwill. As citizens of the planet, we have an obligation to do better for the community and our planet. That means, making films that will make a difference really help make this happen. Yes, it is your job, but every once and again these videos can really make you smile and help those in need. If this was a corporation and they were haggling you, that’s a tough pill to swallow, but frankly, if this is a legitimate non-profit, likely their budget truly is very small!

Referrals

The last section has to do with referrals. You never know where one job could take you. Do a good job and you’ll likely be back for another video. Do a great job, and you’ll likely be doing video production for other companies as well. Likely viewers will see it and be curious who made it. Or perhaps the person you are working with, has a spouse in a for profit organization! You never know who you might meet through someone else. Over the years, we’ve found networking in the industry can go a long way! Whether its with other crew we might be able to hire in the future, or other potential clients who we know through new friends!

Hopefully this article gave you a good idea of how to produce videos for nonprofit organizations! It really doesn’t have to be that hard. Just scale down the production and you’ll be off to the races. Last but not least, don’t forget to have fun while making these videos. Likely you choose to do this project instead of the sheer profit margin calling your name!

Looking for San Francisco Video Production? Contact us today!


when to hire a colorist for your video production
When to hire a colorist for your video production?

One of the many factors that go into the final quality of a video is Its color. Maybe you are shooting your video production on a Sony Venice or an Alexa Mini LF. High-end cameras that produce high-end looks. That’s awesome! But if you are just going to put a standard LUT and not tweak the image much, you will not be maximizing the value these cameras provide. The out of the box looks will get you to a great starting point, but without fine-tuning the image, the quality will likely not be as good as a cheaper camera with a solid color grade. In this article, we’ll discuss when to hire a colorist for your video production.

But what exactly does a colorist do? Sure, maybe you are familiar with basic color grading or use tools such as Lumetri in Adobe Premiere Pro to get your video dialed in. A colorist’s whole job is to adjust the image in order to suit the look the video. This can involve, balancing different cameras. Motion tracking parts of the image. Isolating or changing colors. Etc. It’s definitely one of the most overlooked parts of video production as far as small video production operations go.

Yes, you can get yourself pretty close by yourself! But likely, by the time you get to the color correction part of the project, you’ll be burnt out and ready to move on. It’s takes a video editor some serious focus and a plethora of time to be able to accomplish both a thoughtful edit as well as a killer color grade. In this article, we’ll break down the few questions to ask yourself when trying to evaluate if you want to hire a colorist.

Do you need it to look as good as possible?

The first question to ask yourself when evaluating when to hire a colorist for your video production, is who will be watching this video? If it’s an internal video for a company that won’t get too many views, then likely this additional cost won’t make a big difference in you getting more work. Likely for these jobs, you’ll just use Lumetri or a similar grading program to get the image looking good but not the best it could. But if you feel it’s got a great story and the potential to push your portfolio further. You might consider it. At the end of the day, certain projects need to have that polished look, while others can get by with something a bit simpler. It’s really up to you to decide.

For example, when we shot our Sitpack project, we knew this was going to get a lot of external views. It was going to be displayed prominently on a big crowdfunding campaign. We also knew it had a cool story. To us, this meant it had the potential to bring more work and would help generate revenue for the crowdfunding campaign. We decided to hire a colorist and we feel it was one of the best decisions we made on the project! Obviously, we needed money to make this decision, and because we had a little bit left over at the end of the project, it wasn’t a hard choice.

Do you have time to send your project to a colorist?

The next question to ask yourself is if you and your team have time to send it to a colorist. Although the process isn’t exactly super tough, it definitely takes time. You need to send the original project files either over the internet or on a hard drive. You’d also need to export the data from your timeline. Likely in an EDL format. If you used effects such as warp stabilizer or other titles or graphics, you need to remove those and then add them back in once the colorist sends the project back to you. Here’s a cool guide on how to prep your project for color correction. This can be frustrating if you forget something!

Color prepping

The next step of the process once you have prepped it for color is to wait for them to color the project. Some colorists are pretty fast for a relatively simple project. Others take a lot of time and are extremely meticulous. You can also attend virtual color sessions to dial in the look even more. Be sure you are using a calibrated monitor for this. Once they start to create the base look for the project, they will likely ask you for feedback before continuing on to make more granular choices. After this, they will send the video to you to review. Hopefully, it’s looking great, but if not, you may have to spend another day or two to get the image precisely how you want!

Once the colorist has finished the project, they’ll then export all the clips back to you(usually with handles for adjustment if needed). At this point, you’ll need to relink all the files and then add back in all your effects and graphics. When evaluating when to hire a colorist for your video production, definitely don’t forget to budget for at least three days to round trip the whole project.

Bonus time saving tip!

While we are on the topic of speeding up your workflow, one of the newest trends in video production is camera to cloud. This will allow your editor to get the project that much faster! You’ll be able to save at least a day at the beginning of your project, as your editor can literally start editing the project as your shooting day progresses. The cost for something like this is the Teradek Cube 655 plus the Frame.io plan! So perhaps around $2200 to get set up for a year. Then you are off to the races. This can allow you to have more time for your color colorection.

Are you matching different cameras?

Let’s say you got the time and the money, but aren’t exactly sure if it’s going to be portfolio-worthy. This is a tricky spot to be in. Do you just finish the project quickly and move on? Do you have at least a basic understanding of matching cameras? Did you shoot with a color chart? One of the big questions to consider when deciding to hire a colorist for your video production is if you’ll be matching different cameras. All cameras handle color, contrast, and highlight roll-off slightly differently.

If you shot with different brands of cameras, didn’t use a color chart and you have a high-end brand to maintain, we’d highly recommend hiring a colorist. We typically say that if you can get 95% of the image there, then it’s okay to do it yourself. But if you really want to push your brand forward. Hire a colorist!

If you do want to consider doing it yourself and you have a color checker, check out this Youtube video by Tom Antos!

Remember, shooting with different cameras, is just one of the factors to consider when evaluating if you want to hire a colorist.

Do you have the budget?

The last question to ask yourself, is if you have the budget? First, you might check out our article on budgeting for film production. We break down a few different ways to maximize your budget. As there are many factors that go into a budget, color is just one of them. We’ve spent everywhere from $500 for a colorist, up to $1500 for a more complicated commercial. Many colorists, charge much more than this. Sometimes in the range of $500/hr! They are incredibly fast at making tweaks to get the best image possible! It’s about finding someone who’s in your price range, who will still deliver incredible looks at a rate that is sustainable.

Remember, if you are going to rent a top-tier camera and use cinema glass, hiring a colorist is pretty much a non-negotiable! Don’t skimp on getting that image to look its absolute best!

Wrap up

Thanks for taking the time to read our article on when to hire a colorist for your video production. We know there are many factors to consider when you are putting together a video. Don’t let the final polish stop your project from being the best it can. That said, also be sure that your colorist does your project justice! If they are really cheap, there is likely a reason!

Luma Creative is a San Francisco Bay area video production company focused on getting the best looks for our client. If you’d like to learn more, reach out!


how to choose a location for video production
How to choose a location for video production

As things slowly go back to normal, many video production companies are returning to the pre-pandemic workflow. A huge part of producing top-quality video content is choosing the best location for your story. Location scouting can be both fun and hectic at times. There’s a lot of elements to be checked before you can start filming. We’ll show you how to choose a location for video production.

Being a video production company in San Francisco has presented several opportunities to work in locations in and out of the city. From beaches to gyms to parks, and a lot more, we must say that finding each location was a unique experience for us. Let’s get into it!

Know How You’ll Get There

Logistical factors are as essential as the other creative aspects in video production. This is a no-brainer! It’s important to know how you’ll reach a location, how many hours it will take to get there, travel expenses, availability, etc.

Before arriving at your location, check if you can view the area using Google Earth. This will give you an idea of what to expect, especially if it’s your first time visiting the place. Once you’re there, survey the nearest buildings, the community, the roads, and so on to strategize how your crew should set up in your chosen spot. Sometimes providing a detailed map for the crew with logistical information can be very helpful for your video production.

Choose a Location that Suits Your Plot

Pick a venue that matches what you envision in your script. This is one of the ways on how you’ll find the perfect setting for your video content. Focus on the fact that you’re trying to share a story or a message through your video, so selecting the right spot that fits your plot plays a big factor!

Are you looking for an abandoned building for a scary video? A nice beach in San Francisco for your surf-themed content? Or a park with many flowers for a romantic scene? Understand what the script requires and create a checklist of qualities and elements you’re looking for. This will narrow down your options which will eventually lead you to the right location.

Lights Please!

Okay, so now you found a venue that looks nice and has a good feel into it. The next thing you need to know is if the location has good lighting levels.

Knowing the lighting available in the location gives your video production crew an idea of how many lights and what tools you should bring to achieve the right mood for your scene. Make the most out of the light the space has. It’s important to create a vibe that looks natural on video. Knowing the amount of both natural light and artificial light in the location is important before you start shooting. This is one of the key’s to how to choose a location for video production.

Sound Check, One, Two

All good with the lights? Great! The next step is checking the sound in and around your location. You would definitely want less noise to achieve high-quality audio

Echoes, the buzzing traffic, barking of dogs in the house nearby, etc. are some of the things you have to watch out for when doing location scouting. Record the sound in the surroundings using your camera’s microphone and listen to what it picks up using a headset. Take note of any interference that can cause interruptions when filming. Is there any construction scheduled nearby? You may be able to check with the city for upcoming noise disruptions due to traffic.

I’ve Got the Power!

Surveying power sources in the location is important during pre-production. This goes for both indoor and outdoor spaces. You may have brought all the equipment you need but what are you going to do with them if the venue doesn’t have the power needed to turn them on?

Having enough power options to work with makes the video production team’s job easier. Another aspect you have to check is the safety of the power system. Make sure that it can handle the load from your tools to avoid any accidents.

Take Notes and Pictures

Creating a detailed report for the locations you’ve checked is very important in video production. This helps your crew make the right decision on where to shoot. Take as many images and notes as you can and review them carefully when choosing the best spot for your script.

Make sure that all the gathered information can easily be absorbed by the whole team. Some of the details you can include in the report are population, landmarks, fire exits, number of rooms, windows, and any element which you feel should be taken note of.

You might also consider using the Sunsurveyor app to see where the sun will be. Will this cause any issues?

Ask for Permission

Lights? Check! Sound? Check! Power Source? Check! So what else should you need to know about your location? Availability! You have to know if you can legally shoot in the spot or not.

It’s important to secure permits before you film at a specific location. Check if the venue is privately-owned or if it’s a public place to know who you should talk to before you proceed.

If the location is private property, reach out to the owners so you can come up with an agreement. But if it’s on a street or a park, make sure to get in touch with officials to get the legal documents you need. Remember, it’s a lot better to get permission before video production starts to avoid any interruption from property owners or local authorities. 

San Francisco film commission office has a streamlined area to apply for permits. Oakland film permits can be found here. San Jose film permits are relatively easy to get as well. Lastly, check out the Santa Cruz film permit office.

And if you’re not allowed to film at your chosen venue, don’t waste your time trying to push it. Look for other locations where you can get permission to film. 

Wrap Up

One small issue with the location can make a big impact on your project. This is why investing time doing the required research is essential to avoid any interruptions or additional costs. Looking for more info on scouting for film production? Check out this videomaker article.

Remember, you might need more than one location for your content. This is why you have to put in the preparation needed to make sure your crew found the right spot and has everything ready before the camera starts to roll.

If you are opting for a sound stage, a few of our favorites are: Bernhardt studio(San Carlos), Ciel(Berkeley), and Intrepid(San Raphael).

Thanks for taking the time to read our top seven tips for how to choose a location for video production. Looking for a San Francisco video production team for your content? Contact us now!


How to cast actors for video production

If you are looking for actors for your video production process, it’s important to follow the right steps involved so you can get the right talent and skill. The process of finding actors for a film pre-production process is called casting. The person in charge of the casting is referred to as the casting director. So what exactly does a casting director do to source for the best team out there? And how do you cast actors for video production? Let’s get you started.

There are two options you could go for when casting actors for your video production. First, you could hire a casting director if you want to make things more professional and streamlined.  Second, the director or the producer handling the production could own the casting process. It all boils down to your budget and what you are looking for.

Another additional option for a cost-effective budget production would be the showreels. It’s quick and cheap. What you need to do is to ask for a showreel of their highlighted work. Most union actors will have a reel. But the more inexpensive or newer actors most likely will not. If wondering where to get them, you can find the showreels on specialized websites such as SF Casting or backstage casting. Watching a showreel helps you get an impression of potential actors’ talents, physical presence, and versatility.

It’s also important to note that you can further break the casting director role to the principal casting director and the background casting director. The principal casting director typically handles all speaking roles, while the background casting director will be in charge of all non-speaking roles. Check more insights on background casting directors.

Why casting actors can make or break your production

Even with all the filming equipment in the world and a gorgeous location, having a miscast for your video production will directly affect performance and a disconnect with your target audience.

You want actors who will suit and bring out well the performance of a particular role. Can the audience believe in your actors’ performance? Because, believe me, if they won’t believe, they won’t be invested. While the script might be good enough, you have to keep the audience interested; otherwise, anything to the contrary will work against your TV show or video.

The casting process is extremely systematic, and it calls for ample time that is hard to rush. The timing also has to be good coupled with instinct and critical analysis.

Casting Actors for Video Production

There are vital steps you should take when casting. You’ll want to check out the tips below.

#1. Do a Script Breakdown

First, casting directors will need to read and reread the script to familiarize themselves with the plot, characters, and major themes. After that, they will need to create a speaking role for each character description. Ideally, the casting director should come up with a character breakdown sheet containing detailed information on age, character, personality, interests, dislikes, etc. This exercise gives the casting director ideas on the best talent to source. It also helps a potential candidate more easily fit the role, if the description is poignant instead of vague.

#2. Open Casting Call

Getting the right talent follows that you send out calls to interested actors. Your options are wide. There are actors with experience, while others are ripe graduates from college seeking to build a portfolio. Post your call on online platforms and also in places you know actors like to hang out regularly. Your other option would be film schools; it’s easy finding great actors there. Casting sites and forums can also be your go-to points for actors.

You want your post to include some basic information that lists who you are, your business or company’s name, and your list of requirements. You should also let people know how they can reach out to you. Are you able to get more detailed? For example, you will need to tell them what the role is about and their age and gender preferences.

You have to set clear expectations. Have a balance between mystery and openness to not come off as too open or quite selfish with information. This is one of the key steps to how to cast actors for video production. In essence, you’ll want the actors to be able to find themselves at the audition and bring life to the role. Maybe it’s a sad role and they really go for it with the emotion! Or perhaps they hold it back and then let it loose at a particular line on the script.

#3. Schedule Auditions

Once you start getting enough responses to your casting call, schedule auditions. Auditions are a key and fun stage that involves putting your potential actors into action to bring your characters into life. There are two ways of conducting auditions: The self-tape and the in-person. With self-tape, the potential talent will record their audition and send it to the casting director. The in-person option involves the director meeting with a multitude of actors and putting them in character with their roles. In-person auditions are more optimum since they allow you to communicate with your actors more effectively.

#4. Have Callbacks

Scheduling and holding auditions is never a one-time process. You want to interact with many actors as much as possible. This helps you to understand their talent and abilities for given roles before narrowing them down. An actor may have exhibited a dismal performance in one role yet fit very well in another. Callbacks allow you to analyze that; you compare performance and pick the best.  The other thing you should look for during callbacks is the chemistry between the actors. How do they relate and do performances with fellow actors? It is something your audience will love and cherish if you do it right. You should give your actors the chance to perform vital scenes with their colleagues, record the sessions and see how it plays out. At the end of the process, ensure you get the best talents for your roles.

#5. Do a Screen Test

A film audition is what we call a screen test. It involves an actor performing sides on camera. The casting crew uses the screen tests to analyze performance, costumes, counterparts’ chemistry, and make-up. Your role as a casting director is to ensure that actors are falling in line regarding the parameters. Apart from the in-person auditions, doing a screen test will help you know how good your actor can perform for the camera and whether they fit the role. When trying to cast the best actors for video production, you’ve got to keep the end of your project in sight. Will this actor really resonate with your final video?

#6. Select the Right Actors

The decision to choose the cast for a video production squarely lies on the casting director and the producers. Depending on your budget, only select the best talents in the market to give you the results you desire.

Wrap Up

You now know how to cast actors for video production. The tips provided should guide you in the auditions and the decision-making process. Never rush through the process; this is something you want to invest as much time as possible. Putting down a good script is good, but you have to get the right talent in place for playing out the roles. Your job is to get the right talent and not make friends, so don’t be afraid to send out rejections. We hope you choose the best actors.

Looking for San Francisco Video Production? Contact us today!


Are you looking for professional San Francisco video production? We are a San Francisco Bay Area corporate and commercial video production company that’s simplified the production process, resulting in extremely fast turnaround times. So whether you need a video to enhance your virtual event, a production team to live stream, a creative post-production team to level up your video or a comprehensive strategy that encompasses everything, we’re available worldwide -- even at the last minute. There are many talented San Francisco video production specialists. How to find a video production company specializes in professional SF videography with tight deadlines. How long does video production take offers the best video production in San Jose, San Francisco and surrounding areas. Marketing techniques is another talented video production company! Lastly check out video production Marketing tips. Their commercial video skills are unmatched! The best San Francisco Corporate video production! Creative SF video production companies can be challenging to find.