Luma Creative a San Francisco production company highlights important steps in livestream videograph
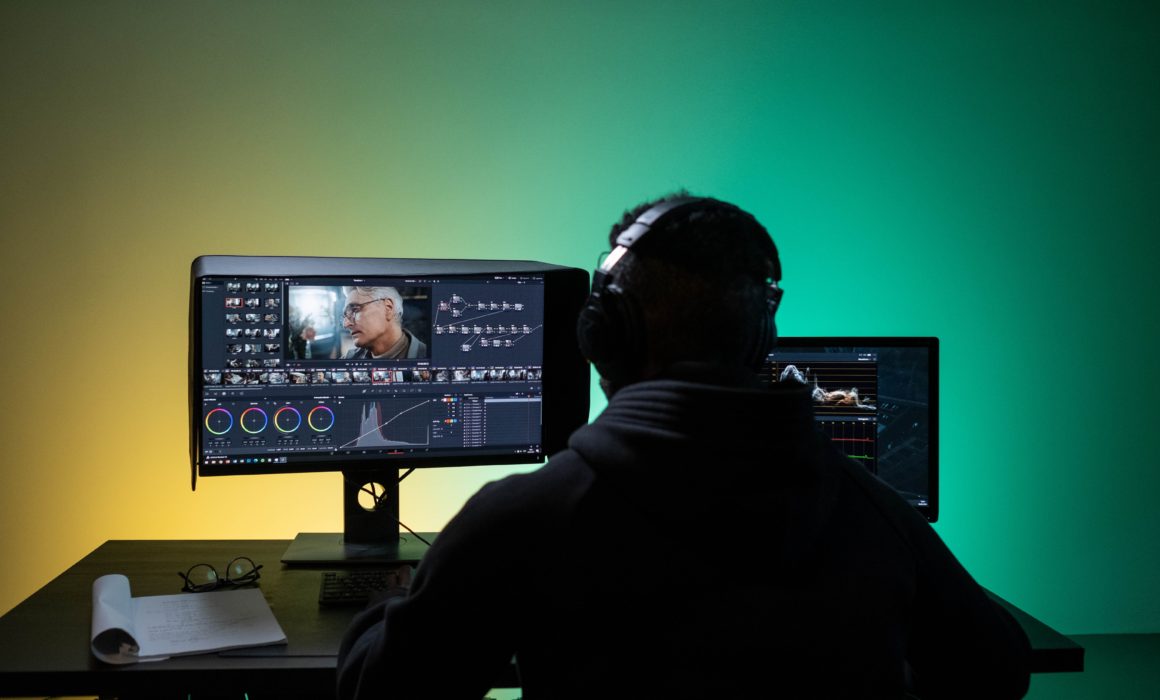
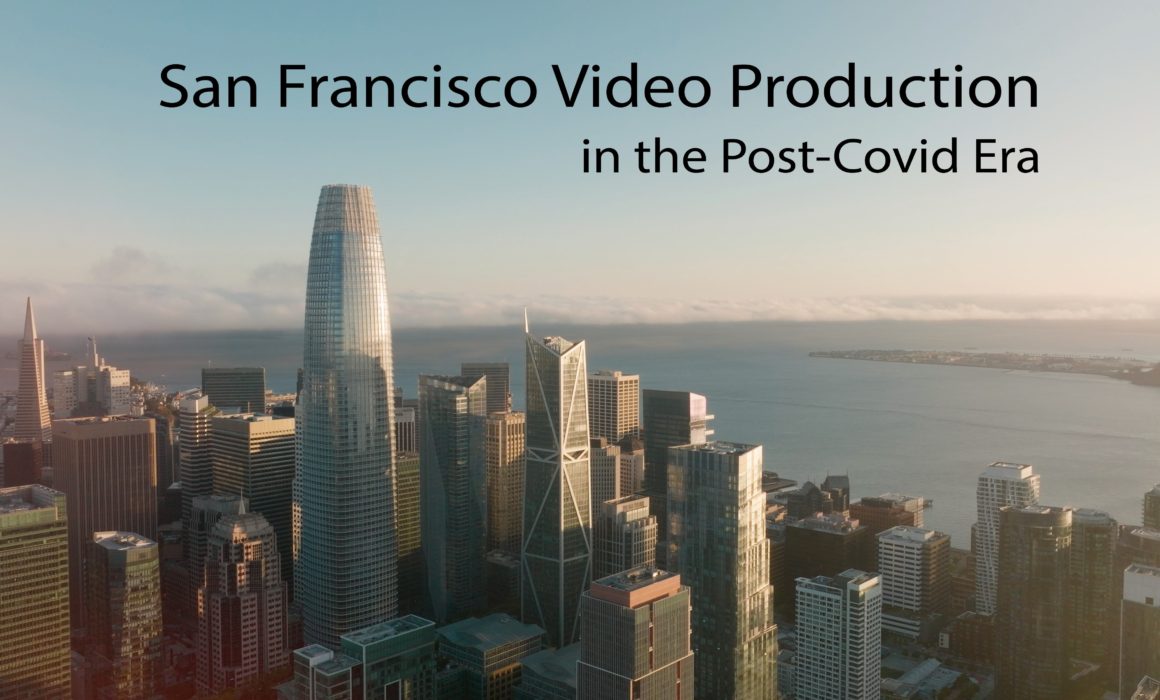
How to setup a professional livestream in San Francisco

In our digital era, live-streaming has emerged as a powerful medium for connecting with audiences in real-time. Whether broadcasting a pitch session, webinar, corporate event, or company gathering, the success of a livestream relies on the coordination of a dedicated videography crew. In this comprehensive guide, we explore the core crew roles within live-streaming videography, the equipment needed to execute the stream, and all the necessary planning and precautions to make your live stream a success. In this article, we’ll show you how to setup a professional livestream in San Francisco.

Creating a plan for live-streaming success

Since Live streams are inherently live, there is little room for error once the show gets started. As we continue learning how to setup a professional livestream in San Francisco there are a few things to consider. That is why it is important to have detailed plans, schedules, backups in case something goes wrong, and a prepared crew. There are many things to consider when preparing your live stream but this checklist is a useful starting point before the event gets rolling. 

Step 1: Technical Rehearsal

A rehearsal is a good place to start to make sure everyone is on the same page and there is nothing missing before the event. It allows the crew to iron out any wrinkles and check that all equipment is working properly. Here are some important things to go through during the technical rehearsal:

Equipment Testing: Test all cameras, microphones, lighting equipment, and streaming hardware/software to ensure they function properly.

Connection Checks: Verify the stability and speed of the internet connection at the venue. Test the streaming platform to ensure compatibility and reliability.

Run-throughs: Practice the entire live stream from start to finish, including transitions, graphics integration, and audience engagement elements.

Step 2: Create Backup Plans:

An extremely important step in pre-production for live streaming is understanding where problems may arise and having a plan in place. These are important backup plans to consider:

Backup Equipment: Have spare cameras, microphones, cables, and other essential equipment on standby in case of malfunctions or failures. Ensure that backup equipment is tested and ready to use if needed.

Luma Creative a San Francisco production company highlights important steps in livestream videograph
Redundant Internet Connections: Set up redundant Internet connections, such as multiple ISPs or mobile hotspots, to ensure uninterrupted streaming in case of internet outages or slowdowns.

Alternative Streaming Platforms: Have backup streaming platforms or services ready to switch to in case the primary platform experiences technical issues or downtime.

Step 3: Determine whether you are providing or being provided an audio feed

Situation # 1 – You may need to provide an audio feed:

Remote or Outdoor Events: In situations where the event takes place in a remote location or outdoor venue, you may need to provide your own audio setup. This typically involves using wireless, shotgun, or lavalier microphones to capture clear and high-quality audio from presenters, performers, or participants.

SInterviews or Panel Discussions: For events featuring interviews or panel discussions, it’s essential to have dedicated microphones for each participant to ensure clear audio capture.

Situation #2 – You may be provided with audio feed:

Professional Venues or Studios: In professional venues or studios equipped for live productions, audio feeds may be provided by the venue’s audio team or production crew. This could include a mix of ambient sound, microphone feeds, and instrument feeds, depending on the event requirements.

Conferences or Corporate Events: In corporate events or conferences held in well-equipped venues, audio feeds may be available from the venue’s sound system or audio setup. This can include microphone feeds from podiums, wireless microphones for presenters, and audio feeds from multimedia presentations.

Professional Broadcasting Setups: In professional setups, audio feeds may be integrated into the production workflow, with audio engineers responsible for managing audio mixing.

The decision to provide audio for livestream event videography or to be provided with an audio feed depends on the event’s specific requirements, the available resources, and the desired production quality. Additionally, ensuring clear, high-quality audio is essential for delivering a professional and engaging livestream experience. It is important to discuss with your client what will be available before the technical rehearsal.

Step 4: Create a detailed run-of-show

A run-of-show guides the crew through the sequence of events, camera shots, and technical cues. These are some things to consider in your run-of-show:

Sequence of Events: Outline the order of segments, presentations, performances, or discussions planned for the live stream.

Camera Shots: Specify the camera angles, framing, and movements for each shot to ensure dynamic and engaging visuals.

Layouts: Design or acquire a layout of the venue space so you can plan your camera angles and coordinate your equipment setup. 

Technical Cues: Include cues for graphics integration, transitions, audio cues, and any other technical elements.

Step 5: Have a plan for backup power:

While not likely, power outages can completely upend a live stream production, so it’s crucial to have backup power sources available. Here’s how to ensure access to backup power:

Generators: Have generators on standby to provide backup power in case of electrical outages or failures.

Uninterruptible Power Supplies (UPS): Install UPS units for critical equipment to provide temporary power during brief outages.

Step 6: Understand signal flow for livestream videography

Signal flow refers to the path that audio and video signals take from their source (such as a camera, microphone, or computer) to their destination (such as a streaming platform or recording device).

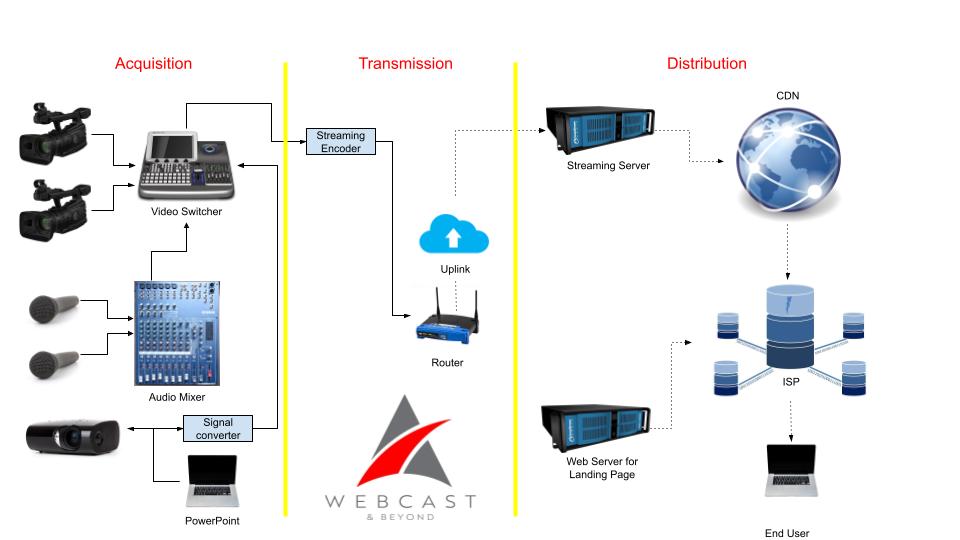
Here’s a basic overview of signal flow in livestream videography:

  1. Source Devices: These are the devices where the audio and video signals originate. Common sources include cameras, microphones, computers, and video playback devices.
  2. Input Connections: The signals from the source devices are typically fed into a central hub or switcher. This could be a physical hardware switcher or a software-based solution on a computer.
  3. Switcher/Mixer: The switcher or mixer allows the operator to select which audio and video sources are being used for the livestream. It may also include features for mixing audio levels, applying effects, and transitioning between different camera angles.
  4. Output Connections: Once the audio and video signals have been mixed and processed, they are sent to the streaming device. This could be a dedicated hardware encoder, a computer running streaming software, or a cloud-based streaming service.
  5. Streaming Device: The streaming device encodes the audio and video signals into a format suitable for online streaming. It also handles tasks such as compression, bitrate management, and network connectivity.
  6. Streaming Platform/CDN: The streaming platform or CDN distributes the livestream to viewers around the world. This could be a platform like YouTube, Twitch, Facebook Live, or a custom CDN configured for a specific event or organization.

Crew for Livestream Videography 

Live streams come in all shapes and sizes. However, it is important to be aware of all the possible crew needed to execute a dynamic livestream. Here is a breakdown of crew members to consider for your livestream and what their responsibilities are: 

Crew Roles

Producer: The producer serves as the project manager, overseeing all aspects of the live stream from conception to execution. They coordinate with clients, manage budgets, and ensure that the production stays on schedule and within scope.

Show Caller: The show caller and producer roles often get confused or combined. However, while a producer is primarily concerned with pre-production and organizing the event, the show caller is the on-the-day specialist who provides direction and oversees the live event. 

Technical Director: The technical director oversees the technical aspects of the live stream, including video switching, graphics integration, and live encoding. They work closely with the director and camera operators to execute smooth transitions and integrate graphics or pre-recorded content seamlessly.

Camera Operators: Camera operators are tasked with capturing the visuals during the live stream. They operate cameras, adjust framing and focus, and anticipate the action to ensure smooth transitions between shots.

Audio Engineer: The audio engineer is responsible for capturing high-quality sound during the live stream. They set up microphones, monitor audio levels, and troubleshoot any issues that may arise to ensure clear and consistent audio throughout the broadcast.

Graphics Operator: The graphics operator is responsible for creating and integrating on-screen graphics, lower thirds, and other visual elements during the live stream. They work in coordination with the technical director.

Stream Engineer: Manages the live streaming platform and encoding settings. Monitors streaming quality and bandwidth usage. Troubleshoots streaming issues and adjusts settings as needed. Coordinates with the technical director and IT support for network infrastructure. 

Production Assistant: Production assistants perform tasks such as equipment setup, cable management, and running errands. They assist with logistics and troubleshooting, ensuring that the production runs smoothly behind the scenes.

Not every live stream event will require the attendance of each crew position. However, it is important to understand the crew roles and where they fit in depending on what is needed to execute the livestream.

Equipment needed for livestream videography:

Live streaming videography differs from all other videography pre-production. One of the most important pieces of how to setup a professional livestream in San Francisco is to make a list of the various equipment needed to execute, budget, and plan for the event. While different crews may differ on the exact equipment they bring, this checklist is a good starting point for what may be needed for a technical rehearsal, and shoot day. 

Cameras:

Professional video cameras

DSLR or mirrorless cameras with clean HDMI output

Tripods or camera stabilizers for steady shots

Audio Equipment:

Lavalier microphones

Shotgun microphones

Audio mixers

Headphones

Lighting Equipment:

LED panel lights

Softbox lights

Light stands and modifiers

Streaming Hardware/Software:

Live streaming encoders/software

Capture cards/interfaces

Internet connection: High-speed wired internet connection or mobile hotspot with sufficient bandwidth for streaming.

Video Switcher: A video switcher enables the director or technical director to switch between different video sources in real time, such as multiple cameras, pre-recorded content, computer screens, or graphics overlays.

Computer Setup:

High-performance computer

External monitors

Power Management:

Uninterruptible Power Supplies (UPS)

Power strips and surge protectors

Cabling and Accessories:

HDMI, SDI, and XLR cables

Cable organizers

Adapters, converters, and splitters

Graphics and Overlays:

Software: Adobe Photoshop, Adobe Illustrator, and Canva for creating custom graphics and overlays.

Integration hardware/software: Hardware solutions like Blackmagic Design ATEM Mini Pro or software solutions like NewBlueFX Titler Live.

Monitoring and Recording:

Video monitors

Video playback devices

Importance of prepared livestream videography

Understanding all the necessary steps to have a fully prepared livestream event is important. Hopefully, this article taught you how to set up a professional livestream in San Francisco. Additionally, once the event gets underway, you do not have the ability to yell “cut,” therefore making it crucial nothing goes wrong once the cameras are rolling. However, if you understand the necessary crew, equipment, and precautions needed for a livestream event then it is more than possible to execute! Not all two livestream events are the same. However, having knowledge of all the moving parts of livestream videography and all the questions to ask any potential client will ensure the event goes live without a hiccup.

If you are looking for a professional live-streaming company in San Francisco, contact us today!


Should you hire a professional colorist for your video production?

Picture this. You’ve just finished up editing your 30 second commercial masterpiece. Your pacing is spot on. The foley sounds great and your sound mix is finally locked. To your surprise the client only had a few minor changes and loves it. Your deadline is in two days but you are wondering if you should send the final video to a professional colorist? If you are looking for this video to have as much polish as possible, we couldn’t recommend it more. In this article we’ll discuss if you should hire a professional colorist for your video production.

What is a professional colorist?

You might be wondering, what is a professional colorist? The simple answer is that they are someone or a team of people who will make your video’s colors fit your desired look. Not only will they work with you to develop a look but they’ll make sure that all the images fit together. Is there was some underexposure in half of your shots? Did your DP tend to shoot warmer then you would have liked?. According to Adobe, “color correction will unify your footage.” The colorist will take care of matching all the shots together. They’ll start by doing simple color correction of the hues and tones. Once they have matched the footage, then they will usually move on to doing a more complex color grade.

The color grade is where things really come to life. At this stage they’ll likely start any motion tracking and creating track masks, fixing simple technical errors, and directing the viewers attention to the subject. This could mean darkening everything in the image except the product or lightly blurring out the background. In today’s world, the line is sometimes blurred between simple VFX and things a professional colorist can do. For the sake of this article, we’ll assume the colorist isn’t handling any green screen VFX or more complicated tracking, but it can be done!

How much time does it take to color a video?

Color correction can take a drastically different amount of time depending on how complex the color correction is. Is there complicated tracking and a lot of re-lighting for a feature film? Or is the video a simple 30 second spot with more of a simple grade? Most commercial’s are graded in a single day. Often times even less. Depending on the level of the color correction artist or studio, you may even be able to video chat or go in for an in person color correction session. We find it’s very helpful to pull references for our colorist so they know what world we are looking to end up in. Typically we’ll color a few shots with them over a video chat and then let them get to work for a few hours finishing it up. A good colorist can take your film from bland to grand!

How much does a professional colorist cost?

Just like most things in the video production world. The costs can vary highly. If you are wondering should you hire a professional colorist for your video production this will definitely be the biggest concern. We’ve found that rates vary quite drastically. From several hundred dollars for a project to several hundred dollars per hour. The skill level of your color correction artist will likely dictate how much they charge. Is the colorist represented by a color correction or talent agency or are they a freelancer? Are they working out of a studio or their living room? At the end of the day, a strong portfolio and ease of collaboration will dictate much they are charging. Some of the more well known post production studio’s in the Bay Area are Roast N Post and MFD.

Conclusion

Thanks for checking out our article. Simply put, if you are shooting a professional video and spending the money on a fancy cinema camera and lenses, you should definitely consider having your video professionally colored. Let us know if you have any questions. We are a San Francisco based video production company who will elevate your brand!


San Francisco creative commercial video production
San Francisco brand video production – Four day shoot for Cepton

We just finished our biggest project yet! Cepton makes LiDAR for several sectors but their primary focus is automotive. We have done several small video productions for them in the past, but now that they are officially listed on the NASDAQ they felt it was time to step it up a notch. They came to us looking to make a high end brand video on a tight timeline. Our concept was ambitious. Three storylines plus an arm car day shot over four days. The goal of this video was to not only educate users about their lidar technology but to inspire viewers to understand the larger goal of the company. To bring Lidar to the masses. In this article we’ll break down how we accomplished this San Francisco brand video production. Take a look at the video below and then read on to see our process.

Approach

Our approach for this San Francisco brand video production started with a treatment. In this treatment we presented two potential storylines to the company as well as the look and feel we would be creating. It turned out that the client actually wanted to blend the lines between both of our storylines. Not a problem. We tweaked and then started with our script creation. At this point, we brought in our script writer and got to work hashing out all the details of the story. We knew that because there would be such a large lift with the pre-production in order to capture the content necessary, we wanted to be 100% locked with the script before moving on!

Our script ended up being approximately six pages. It was our guide going into pre-production!

Once the script was ready, we presented it to the client for final story sign off. We tweaked and tweaked some more and then we locked the script. At this point, the base narrative was locked and we were able to start with the pre production. The first thing we did was break down the script into a shot list. Then our producer did a full script breakdown. At this point, we knew this was going to be tricky. Four days for this concept was very ambitious! Guess we just love a good challenge.

Pre Production

The first thing we did during pre-production was location scouting. This would be where we picked the houses and main locations for our shoot. The client loved that we were looking for distinctly different locations. They also loved the idea of shooting in San Francisco; however, this presents many logistical and security concerns. We’ve shot here many a time, but exteriors in San Francisco definitely pose a challenge. After scouting, we also decided that shooting on the highway between Muir beach and Stinson beach would be our best opportunity for some epic coastal footage. At this point, we brought on a locations manager. They helped us file appropriate permits with the city of San Francisco, state of California as well as the State Parks. This was a first for us working with so many jurisdictions.

During pre-production we also began casting for our actors and picking our picture vehicles. This posed another challenge as their self driving technology wasn’t actually in any of the cars we were shooting with! The vehicles also had to be newer than 2021. After finding our vehicles we began to lock our department heads. We chose to work with a Director of photography who had experience working with cars and had completed a successful project with in the past. We also knew that a limiting factor of the production would be the availability of our arm car team. At this point, we had the core team assembled and decided to lock shoot dates.

As pre-production continued, we began to storyboard. This part of the process is awesome! Everything starts to get visual and we now have a tangible communication tool with the client and all of our collaborators. Once those were locked we did our final tech scout with the crew and got ready to shoot.

Production

Once we completed the pre-production phase it was time for some fun! The four shoot days involved approximately twenty crew and each one of them was necessary to make sure we are able to not only get the cinematic shots that would represent their brand well, but would also keep us safe on the road. For day one, the russian arm day, where we were doing all of our shots on the road, we hired the local arm car company as well as San Francisco police and California highway patrol(CHP). This meant we would have full access to the road! It also helped that our locations manager was good friends with the SF film commission.

It was our first time being able to completely stop traffic and it was quite exhilarating. In the morning, we shot in downtown San Francisco by the Embarcadero as well as in the financial district. In the afternoon we went over the Marin and did our neighborhood driving shots as well as the coastal shots. This part of the day involved the CHP shutting down highway one between for a stretch of road between Muir beach and Stinson beach.

The image below shows the stretch of road on highway where the CHP shut down the road so we could film safely.

After we finished day one, we knew the shoot was going to be relatively smooth sailing. Day two involved our team shooting in the South Bay for the R&D scenes at their headquarters in San Jose. In the afternoon, we shot at a nearby house and school to get the daughter departure scene as well as the arrival. Because it was mandatory that we filmed at their headquarters in the South Bay, it only made sense that we shot the house and school in the South Bay as well.

On day three we were in Marin for the kids departure scene as well as the near accident scene and the coastal driving in car shots. These location moves were tricky, with trying to move so many crew but we got it done!

For day four we were in San Francisco for the couple departure scene as well as the in car city shots and the business woman arrival. We finished up the shots up at Mount Tamalpais for the kids arrival scene. We definitely scored on the weather!

Quick behind the scenes video from the shoot.

Post Production

Once we captured all the footage from the shoot, it was just a matter of assembling things to get post production started! Our editor put together an assembly cut within a week and we were loving what we were seeing. Because their technology is inherently visual with how it uses lasers to map out the world around it, we knew VFX was going to take some time. We began sharing the plates of the scenes that would need visual effects integration with our VFX team. With regards to the GIF below, we took the drone shot of the truck on the road and then sent this to our VFX artist who then recreated the real world in a virtual setting by using a model of the same truck and animating it to show the distance that their lidar technology could detect.

San Francisco vfx

The client was particular about how their technology was portrayed on screen so we spent extra time making sure their lidar technology was portrayed correctly on screen.

Once the client had signed off on the VFX, we were able to picture lock the video. At this stage, we moved on to color correction and sound design to put the finishing touches on the video.

BTS Photos

Conclusion

We had a ton of fun on this production. It was our largest San Francisco brand video production so far. And it was also the project that our team put the most amount of hours into. As we continue to evolve as a company, it’s this type of work that we’d like to continue getting the opportunity to create! If you or your company are looking for a cinematic professional brand video, contract us today!


San francisco video production in the post-covid era
San Francisco Video Production in the Post-Covid Era

Over the last several months, we have had the privilege of shooting several San Francisco video production projects. From fast-paced productions where we needed road closures and police escorts, to simple shoots where we provided video feeds for international clients to direct remotely. You may be wondering, how is San Francisco video production in the Post-Covid Era. We have seen how Covid has directly changed the SF Bay Area video scene and would love to share some of our thoughts. The four main effects we have seen are: 1. Big shoots require more time and resources to produce 2. Remote feeds are here to stay. 3. Having a backup crew is imperative 4. Video production is busier and more important to business success than ever.

Big video projects take longer to produce

In April we received a big request to shoot a brand story film over four days. This video would include on-the-road driving footage, three main storylines, and research and development footage at their headquarters. Previously, we would have proposed that production could be done in as little as a month. Knowing the permit office timelines and shortage of police officers in San Francisco, we decided to give ourselves a few extra weeks. Good thing we did, it was a close one!

Approach

We broke this production into four shoot days. Day one would capture all of the on-the-road footage. This was going to be the most intense day and it required a village to coordinate. We needed a basecamp to park all of our crew vehicles and our picture cars. Our Director, Producer, Director of Photography, and Russian Arm Car Crew did an incredible job of planning the routes and making sure we were in the optimal place at each part of the day. Securing the permitting with the city was where things got tricky. Our location manager spoke to the office many weeks ahead to detail the routes we planned to take, and which streets would require police assistance. We submitted the necessary documents several days early but at the last minute were still waiting to receive our permits. They assured us everything would work fine, it wasn’t until the Friday before the Sunday shoot that we finally heard back. They needed a change in one of our insurance documents. Nothing major… but it was 4:50pm on a Friday. We were luckily able to get ahold of our insurance agency and connect them with the San Francisco permit coordinator. They worked things out and we got our permit at 9pm that night. Phew!

Timelines

Their timeline of 14 days to receive the permit isn’t enough lead time for them to process the permits. Now, we are adamant that clients budget at least one additional week when dealing with the San Francisco Film Commission office. According to our location manager, the office staff was reduced during Covid and they have been chronically understaffed since. Extra time will ensure the permit is processed and your pre-production goes through smoothly.

Remote feeds are here to stay

Before Covid, we would shoot once or twice per week or two, on average. Roughly one out of ten clients would request for a remote feed. But during the peak of Covid, nearly every shoot was requesting a remote feed so either the client, agency, or director could view the stream from anywhere. Travel was restricted for some, and others did not want to take the risk to travel to the shoot. Yes, we are still finding that nearly one out of four shoots are looking for some sort of remote feed or streaming.

A remote feed adds extra complexity to the shoot, but Luma Creative has invested in the technology to livestream from anywhere there is a solid cell phone signal. Managing the remote feed takes extra time during the shoot. However, the remote feed ensures all key stakeholders can give their feedback, “live” instead of in post-production. Live feedback can reduce changes and mitigate costs for the post-production phase. San Francisco video production in the Post-Covid Era is definitely different, read on for more!

Having a backup crew is imperative 

When Covid was at it’s peak, it was mandatory to have Covid testing and a Covid compliance officer at every set. This was risky if someone tested positive on set;  we’d scramble to find a replacement crew and it would set back our projects by several hours. Now that we have had experience with this, we have backup crew for any shoot with a tight timeline. Better to be safe than sorry! San Francisco Covid numbers are significantly lower than the last few years, and hopefully going in the right direction, but it pays to be careful.

Video production is busier than ever

We have received significantly more inquiries and requests for proposals for video production since before the pandemic. This is a great thing for our business and the whole video production industry. Consumers are watching more content than ever before and the demand for video content is insatiable. Consumer demand is up in the video production sector. With many companies returning to the office full-time or with hybrid setup, clients are finding new ways to use video to bolster their business. From video productions requiring weeks of scouting and pre-production, to hybrid livestreams that have small in-person audiences, every kind of production seems to not only be back, but on the rise!

We’ve seen a few big changes in the San Francisco video production market. Each of them has made us more flexible, creative, and innovative than before. We have also learned where additional time and resources are needed. This ensures every production we take on goes off without a hitch. From small to large, we get it done the right way every time!

If you are looking for a creative and ambitious San Francisco Video Production Company, contact us today!


How to Hire Security for San Francisco Video Production

Video Production in San Francisco presents many challenges. For starters, it’s a logistical nightmare. Busy streets. Extremely limited parking. Not to mention challenging weather. To make matters worse, security has been a big concern over the last several years. Too many stories of camera’s being stolen on film sets or people being followed home to get their camera gear. In this article we’ll discuss the different kinds of security as well as the few options, whether armed or unarmed? How many guards do you need? In this article we’ll show you how to hire security for San Francisco video production.

When do you Need to Hire Security in San Francisco?

This is the question we get asked most often. When clients from out of town see this line item on a budget, we often get asked about it. Do you really need security to film in San Francisco? The answer to this question is almost always “Yes!” Anytime you are permitting a location in San Francisco or shooting with any sort of a setup, it’s almost imperative that you consider security. Not only do you want your crew to feel safe, but you want to put up your best efforts to keep your camera equipment safe. After all, cameras and lenses we shoot on are anywhere from a few thousand dollars up into the 100’s of thousands of dollars.

Do you Need Armed/Unarmed Security or Off Duty Cop?

At first this question didn’t make make much sense to us. Would an armed security guard really be able to fire a weapon? The short answer is “yes”. After talking to a security company who provided services on one of our recent sets. They are legally allowed to fire anytime someone on set has their personal safety at risk. That means if a potential robber pulls out a weapon, it’s okay. However if they do not present a weapon, the security guard must use their non lethal option. Pepper Spray or similar. This isn’t to say that an unarmed guard doesn’t carry a non lethal weapon as well, but they don’t carry a gun. However they still provide a deterrent and let potential robbers know that this production is taking safety seriously. The last option is an off duty Cop. They can carry a weapon and fire it as well. Likely the provide the biggest deterrent. But of course is subjective.

How Much Does Security Cost?

The rates vary by company, but the last time we hired security we were quoted $75/hr for unarmed guards. $100/hr for armed guards and $150/hr for off duty cops. If you are wondering how to hire security for San Francisco video production you’ve probably already thought of the costs.

How Many Guards do you Need?

Most companies have a four hour minimum and the guards need a single break during that time. This means that likely it’s smart to have to in case of anything happening during one of their breaks. Depending on the size of your set you might consider additional. Are you blocking down a street with multiple entrances to your set? Perhaps you could have a guard at each entrance? Do you need your camera or lighting vehicles watched? Sure a production assistant could do this, but likely don’t provide the same deterrent that a guard does.

Summary

Thanks for reading our article on how to hire security for San Francisco Video Production. We hope you understand how easy it is! There are many companies that offer this service and are happy to make your shoot go smoothly!

Here’s a list of Security companies providing security to film sets in SF.

Aegis, Bannerman, Gaurds to Go,

Looking for a professional San Francisco Video Production Company? We take on set safety very seriously. Contact us today to learn more.


Two week video production
How we produced a commercial in two weeks

Video production can vary widely in quality, cost, and speed. When considering video production companies, it’s important to set expectations well upfront such that all parties are aware of the deliverables and when they should expect them. Check out the iron triangle to learn more about balancing the three! When Eyeque came to us looking for two-week commercial video production, we had to look in the mirror and see if it would be possible. Would we really be able to concept, pre-produce, shoot as well as edit, and revise within their two-week deadline. After coming up with an initial concept, we decided it would be possible and we’d love the challenge. In this article, we’ll break down how we made this commercial video production happen in such a short timeframe.

Timeline

To make this shoot happen we knew we’d need a rigid timeline. We broke down the 14 days as follows:

1: Finalize idea and write a treatment
2: Adjust and finalize treatment and start scripting
3: Lock shoot date, Casting for actors, start locking crew, start looking for locations
4: Lock crew and continue looking for locations. Finalize script
5: Visit potential locations, and lock crew
6: Audition actors and finalize crew
7: Lock actors and location scout final location
8: Shoot video
9: Begin editing
10: V1 delivered by 10am-client feedback by 6 pm
11: 10 am deliver v2 and wait for feedback and revisions
12: Lock final and export for color. Start sound design
13: Color v1 back and tweak, continue sound design
14: Lock and deliver the final video.

Story

As we worked on the story, we knew we had a few constraining factors. #1 was budget. This would allow us one packed day with a full crew We could have shot over two days. However, to get the look that we were going for, we decided we’d pack one 11 hour day. We decided we’d need to work with one location and settled on the idea of contrasting two worlds of the same person. A person without Eyeque who was rushing to get to an appointment and someone who had Eyeque and could simply sit at home for their vision check. Our character would be able to maximize her day and be able to enjoy the simple things in life. Two-week commercial video production would be tough given we only had one day!

Casting

For this project we knew we didn’t have much time to run an in-person audition, so we used Zoom to interview any potential talent. Our team thought about using past talent out of quick decisions sake but decided we were looking for someone who would be new to our portfolio and fit the story. We used SFcasting for this project, although we also considered backstage. We were looking to cast four actors. The main character to be our mid-aged mom. a husband to play a supporting role, as well as two kids.

Crew

Having a solid crew on any video production can make a huge difference in the final outcome. We always want to be sure to hire the most talented possible crew to maximize our tight shoot schedule. On this specific job, given the single-day limitation, we knew we’d need a prep day for camera building as well as a 1st AD. We also had a DP, production designer, set dresser, gaffer, key grip, photographer Assistant camera, production assistant, and a hair and makeup artist. This barebones but essential crew, would ensure we could still get a commercial polish but without a massive budget.

Shotlist

As soon as we lock our treatment, we usually start writing a script. This will help us time the piece to ensure it fits within the final deliverable range. Typically we’ll present it to the client to make sure that it resonates with their team and then lock the creative. Although we’d love to do the final shot list as early as possible, it’s often that we can’t lock this until we’ve seen the final locations as they tend to influence our shots. However, after our initial creative is locked we’ll typically break down the video by scene and start to rough-shot list the key shots in order to figure out what is essential and what is fluff.

Shooting

On this particular shoot, we knew we had 11 hours to get our visuals captured. Therefore we arrived early to make sure everything was on standby outside the location and then once the clock started we were off to the races! That day prior we worked with our 1st AD to finalize the shooting schedule. We had two distinct worlds we were going to create as well as two distinct looks for all our cast. This meant, we could stagger our grip and electric department with our production design team between what was being set up and shot amongst the bedroom, living room and kitchen to try and maximize our time.

By lunchtime, we were on schedule but knew we still had a lot of content to capture. We had about 50 shots to capture throughout the day, and although we would have loved to get more insert shots, there just wasn’t time. Video production is a lot of giving and taking. Should we spend more time, getting the blocking perfect on one-shot or should we move on in the hopes of getting more shots and finishing on time! Our kids did awesomely and it was a smooth finish into the end of the day!

Editing

There is a critical difference between corporate and commercial work. In commercial, where we have the whole piece storyboarded out, it’s just a matter of using the best takes. In this case, since we had a thorough shot list and script, we just took the best takes and sequenced them in order. The final editing required minimal tweaking and was part of the reason why we were able to complete the project on such a short timeline!

Color

During our treatment phase, we collect frames from other films we are trying to emulate. No we aren’t going to copy the look exactly, but we do like to use these references to guide both our set design, lighting as well as our color. Are we going to bright and airy or dark and subdued? In this video, to create contrast between our two worlds, we knew color needed to play a huge difference amongst all the shots. Our colorist got to work right away creating looks after the shoot and was ready to copy the looks over as soon as the picture was locked.

Wrapup

Hopefully, this article broke down how we were able to make two-week commercial video production happen. Are you looking to make a video with a tight turnaround? Perhaps you have more time, but just want to put our skills to the test! Check out our other work and contact us today!

Here’s the final video


footlocker event video production
Footlocker Event Video Production

Before the pandemic, we typically captured a handful of events each year. Now that society is returning to normalcy, it’s looking like things are starting to pick back up! Event video production is back in action! Footlocker and Eastbay reached out to us to have us shoot an event with NFL star Davante Adams, where they were partnering up to give back to the Palo Alto high school football team with some Jerseys and Cleats. We shot photos and created a 1-minute sizzle video for their social media and PR teams.

Event Video Production is something entirely different than your standard commercial video production. With events, you’ve gotta be extremely quick, but also capture what you need to deliver a polished look. It’s necessary to be one step ahead to ensure you get enough shots since you can’t realistically recreate an event. In this case, working with a celebrity pro-NFL star we knew we’d only have a minute or two for a quick interview as well as that we couldn’t ask him to redo anything. When we arrived we set up our video and photo gear and put together a mobile interview kit: Lights, diffusion, tripods, etc.

Setup

We worked with the EastBay team to place their main product reveal table to optimize the sun’s natural lighting. Our team would not be able to use any lighting modifiers. Capturing these setup shots was important for the video production and photography in order to show the viewers who sponsored the event. We mixed up coverage angles between our two videographers in order to add variety to the edit quickly. We also used our Mavic 2 drone to capture a few establishing shots. These aerial angles quickly and easily add depth and variety to any video production.

Event

When Davante Adams arrived, the team was ecstatic. The excitement was almost palpable as they saw him step onto the field. They circled up around him on the center of the field as he discussed the role that sports played in his life and how this was just the beginning for many of them! When he opened the first box to show the team what they were getting, they were pumped! He finished up telling them to keep pushing it in school as well because, at the end of the day, that was equally important to help him get a scholarship placement.

Reactions

After the team picked up their shoeboxes, many of them asked for autographs or words of wisdom. Capturing these moments was gold as they helped wrap up the event. After we grabbed our quick interview with Davante, we asked a few members of the team to work with us to capture some product shots. This was about as commercial as this shoot got. We figured a few beauty shots would help bring a little polish to the event. The team started practice almost immediately after the event, so we also had the chance to film a few shots of them practicing. We then asked the coach for a quick interview and then packed up.

Looking for event video production? Contact us today!


how to choose a location for video production
How to choose a location for video production

As things slowly go back to normal, many video production companies are returning to the pre-pandemic workflow. A huge part of producing top-quality video content is choosing the best location for your story. Location scouting can be both fun and hectic at times. There’s a lot of elements to be checked before you can start filming. We’ll show you how to choose a location for video production.

Being a video production company in San Francisco has presented several opportunities to work in locations in and out of the city. From beaches to gyms to parks, and a lot more, we must say that finding each location was a unique experience for us. Let’s get into it!

Know How You’ll Get There

Logistical factors are as essential as the other creative aspects in video production. This is a no-brainer! It’s important to know how you’ll reach a location, how many hours it will take to get there, travel expenses, availability, etc.

Before arriving at your location, check if you can view the area using Google Earth. This will give you an idea of what to expect, especially if it’s your first time visiting the place. Once you’re there, survey the nearest buildings, the community, the roads, and so on to strategize how your crew should set up in your chosen spot. Sometimes providing a detailed map for the crew with logistical information can be very helpful for your video production.

Choose a Location that Suits Your Plot

Pick a venue that matches what you envision in your script. This is one of the ways on how you’ll find the perfect setting for your video content. Focus on the fact that you’re trying to share a story or a message through your video, so selecting the right spot that fits your plot plays a big factor!

Are you looking for an abandoned building for a scary video? A nice beach in San Francisco for your surf-themed content? Or a park with many flowers for a romantic scene? Understand what the script requires and create a checklist of qualities and elements you’re looking for. This will narrow down your options which will eventually lead you to the right location.

Lights Please!

Okay, so now you found a venue that looks nice and has a good feel into it. The next thing you need to know is if the location has good lighting levels.

Knowing the lighting available in the location gives your video production crew an idea of how many lights and what tools you should bring to achieve the right mood for your scene. Make the most out of the light the space has. It’s important to create a vibe that looks natural on video. Knowing the amount of both natural light and artificial light in the location is important before you start shooting. This is one of the key’s to how to choose a location for video production.

Sound Check, One, Two

All good with the lights? Great! The next step is checking the sound in and around your location. You would definitely want less noise to achieve high-quality audio

Echoes, the buzzing traffic, barking of dogs in the house nearby, etc. are some of the things you have to watch out for when doing location scouting. Record the sound in the surroundings using your camera’s microphone and listen to what it picks up using a headset. Take note of any interference that can cause interruptions when filming. Is there any construction scheduled nearby? You may be able to check with the city for upcoming noise disruptions due to traffic.

I’ve Got the Power!

Surveying power sources in the location is important during pre-production. This goes for both indoor and outdoor spaces. You may have brought all the equipment you need but what are you going to do with them if the venue doesn’t have the power needed to turn them on?

Having enough power options to work with makes the video production team’s job easier. Another aspect you have to check is the safety of the power system. Make sure that it can handle the load from your tools to avoid any accidents.

Take Notes and Pictures

Creating a detailed report for the locations you’ve checked is very important in video production. This helps your crew make the right decision on where to shoot. Take as many images and notes as you can and review them carefully when choosing the best spot for your script.

Make sure that all the gathered information can easily be absorbed by the whole team. Some of the details you can include in the report are population, landmarks, fire exits, number of rooms, windows, and any element which you feel should be taken note of.

You might also consider using the Sunsurveyor app to see where the sun will be. Will this cause any issues?

Ask for Permission

Lights? Check! Sound? Check! Power Source? Check! So what else should you need to know about your location? Availability! You have to know if you can legally shoot in the spot or not.

It’s important to secure permits before you film at a specific location. Check if the venue is privately-owned or if it’s a public place to know who you should talk to before you proceed.

If the location is private property, reach out to the owners so you can come up with an agreement. But if it’s on a street or a park, make sure to get in touch with officials to get the legal documents you need. Remember, it’s a lot better to get permission before video production starts to avoid any interruption from property owners or local authorities. 

San Francisco film commission office has a streamlined area to apply for permits. Oakland film permits can be found here. San Jose film permits are relatively easy to get as well. Lastly, check out the Santa Cruz film permit office.

And if you’re not allowed to film at your chosen venue, don’t waste your time trying to push it. Look for other locations where you can get permission to film. 

Wrap Up

One small issue with the location can make a big impact on your project. This is why investing time doing the required research is essential to avoid any interruptions or additional costs. Looking for more info on scouting for film production? Check out this videomaker article.

Remember, you might need more than one location for your content. This is why you have to put in the preparation needed to make sure your crew found the right spot and has everything ready before the camera starts to roll.

If you are opting for a sound stage, a few of our favorites are: Bernhardt studio(San Carlos), Ciel(Berkeley), and Intrepid(San Raphael).

Thanks for taking the time to read our top seven tips for how to choose a location for video production. Looking for a San Francisco video production team for your content? Contact us now!


San Francisco Crowdfunding Video Production
How to make a crowdfunding video

As crowdfunding campaigns continue to gain popularity amongst new product creators, it’s never been more important to make your campaign stand out. Sure you could shoot a successful campaign video with your iPhone, and quite frankly, it might be the best route for some people, but for those looking to raise a significant amount of capital and take the campaign seriously, a polished video is a key ingredient for success. Over the past few years, we’ve had the opportunity to produce videos for several campaigns including Sitpack, Mymug as well as several others! Let’s break down the key considerations of how we breakdown to companies on how to make a crowdfunding video. These key sectors might be broken down into: Target audience, Product Sector, Fundraising Goal, Production Timeline, and Competition. Let’s dive in!

Target Audience

As you finish up your product and have a final prototype, have you considered who your ideal target audience would be? Maybe it’s a watch that projects movies onto a wall targeted at teens, or a handbag with a built-in charger and GPS targeted at professional millennials. Whatever the case may be, it’s critical to determine this early in the pre-production phase to best determine how to market it. Whenever someone comes to us for professional video production, this is usually the first question we ask. Just because your husband or wife loves the product, doesn’t mean that the target audience would be as receptive to it. It’s important to test samples with your target audience and get feedback from them. “What’s your favorite feature?” or “How could you see yourself using this?” would be good starting places.

After you’ve determined who your target audience is, you might consider not only marketing to them, but also to the other special people in their lives such as parents, spouses, etc. Only using one avatar to show your product can significantly hurt the product’s selling potential. We usually strive to have multiple avatars from different ages and races to be sure it resonates with as many people as possible. As we are thinking about how to make a crowdfunding video, this is a very important element to consider. If you’d like to learn more, considering checking out these articles on how to find your target audience. Crowdfund Buzz, Thrinacia, Artofkickstart.

Product Sector

Are you creating a product in tech? Healthcare? Skincare? Depending on what sector you are trying to target, you should consider how best to position your product. Perhaps it’s going to save time over the other alternatives, or it’s going to make a daily struggle of life a little easier. Running user testing can help determine what these key advantages might be, and therefore would be important things to highlight in your video production for your crowdfunding campaign. We want to make your product stand out from the rest, so considering what sector your product exists in, and how to differentiate it will go a long way. Check out some current crowdfunding trends for more!

Fundraising Goal

Sure, in an ideal world, the sky would be the limit. But there are a few considerations to make before setting your crowdfunding goal. What are your expenses? This includes marketing, administrative, product, research testing etc. How far along in the production process are you? What are your competitors raising? Seedrs reports that once a campaign reaches 30% of their goal their odds of success jump to 90% compared to just 50% across all campaigns. To some, setting a goal that’s below their target would seem counterintuitive. But to others, they know that a campaign that’s got over 100% of its goal could inspire others to help out. For our Sitpack crowdfunding video, they set a medium goal but then smashed it over 5x!

Production Timeline

Most people we talk to are in the final stages of user testing and protyping. For Mymug, they had a finished the Mug, but the lid color wasn’t finalized. Not to worry, we were able to rotoscope the lid and change the color. For most supporters, they want to see these final versions so that they have confidence the project is in the final stage and will actually arrive at their doorstep. While we have created crowdfunding video campaigns for products that weren’t quite ready, those campaigns didn’t do nearly as well as those with final prototypes!

Competition

Perhaps your product is something completely new, or perhaps it’s a variation of a similar product, whatever the case, there are surely other competitors’ videos to check out. What did you like about them? What didn’t you like? Were the videos cinematic? Or did they look amateur? Did you laugh? Or did the jokes fall flat? Before we finalize the creative concept, we want to make sure that we are going to really succeed at reaching our target audience.

As we think about the key steps in how to make a crowdfunding video, answering these core questions will give a good starting place to consider the best approach to both the video production as well as how to help position the marketing of the campaign. Check out a few of our crowdfunding videos to see more.

Whenever you are looking to start making an awesome crowdfunding campaign, contact us for more information about our video production!


Are you looking for professional San Francisco video production? We are a San Francisco Bay Area corporate and commercial video production company that’s simplified the production process, resulting in extremely fast turnaround times. So whether you need a video to enhance your virtual event, a production team to live stream, a creative post-production team to level up your video or a comprehensive strategy that encompasses everything, we’re available worldwide -- even at the last minute. There are many talented San Francisco video production specialists. How to find a video production company specializes in professional SF videography with tight deadlines. How long does video production take offers the best video production in San Jose, San Francisco and surrounding areas. Marketing techniques is another talented video production company! Lastly check out video production Marketing tips. Their commercial video skills are unmatched! The best San Francisco Corporate video production! Creative SF video production companies can be challenging to find.